You can configure how your query will be sorted. In the Multi-level Sorting menu you can set one or muliple levels of sorting.
Following the steps from How to Create a Query. Here are the steps to configure sort in a query.
-
Click Sort Data.
-
In the Sort Data section:
-
Click Add Level.
-
Select the Column from the drop-down menu.
-
Select the Order type:
-
Ascending
-
Descending
-
-
-
Click Save.
-
In the Save Query menu:
-
Enter a Label.
Info Title used for display and translations.
-
Enter a Name.
-
In the Save to Folder section, select the folder where the query will be saved.
-
Click Save.
-
This action will sort your data by a single column. By adding another column you can set a multi-level sorting.
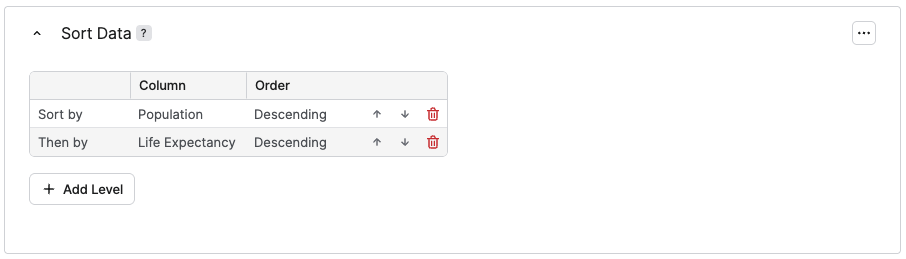
Example
The following example shows table sorted by the following two levels:
-
Population(Descending) -
Life Expectancy(Descending)
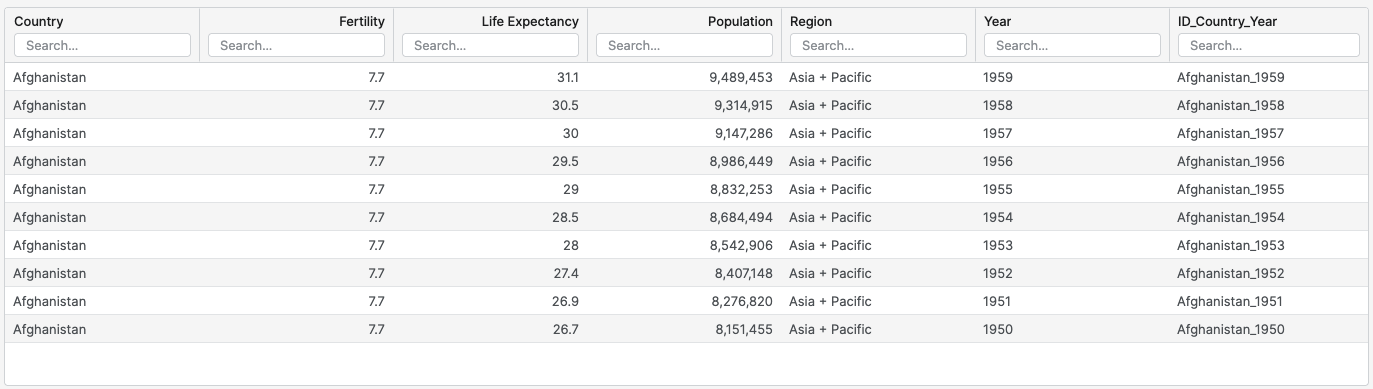
Not Sorted Table
Shows an example of the initial, not-sorted dataset.

Multi-level Sorted Table
Shows an example of what the sorted data would look like after applying the steps.
Sort Data is an independent block. You can insert it anywhere after Source. The data passed to later blocks is already sorted at that point.