|
Aim of this article |
This section shows how to set up notifications which inform you if and when jobs/tasks at a partition or a route in integration reach a certain status. |
|---|---|
|
Related sections |
|
|
Required permissions |
Alerts - edit |
In this section:
Options differ depending on whether it is a Job/Task Notification = PARTITION_JOB, Integration Notification = ROUTE_CHECK, or Event Orchestration Notification = WORKFLOW (for more details on EO Notifications, refer to How to Create Event Orchestration Notification).
Creating Notification Rule
New notifications are created either for a specific object of a given type (job/task or route) or using a blank form:
-
Navigate to Account > Notifications > Notification Rules.
-
Click the New Rule button.
-
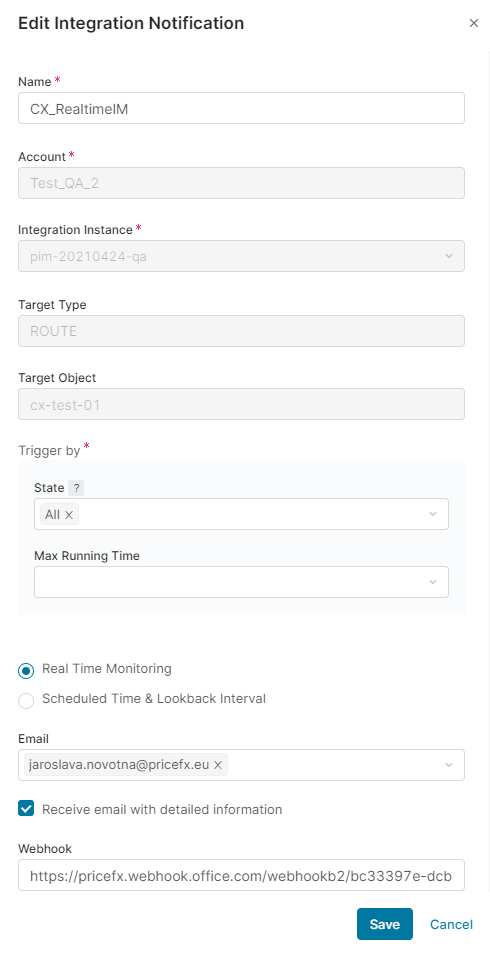
Update the notification settings according to your requirements:
-
Type: Select
-
PARTITION_JOB (Job/Task Notification)
-
ROUTE_CHECK (Integration Notification)
-
WORKFLOW (Event Orchestration Notification).
-
-
Name – Unique name of your choice. Will also be used as the email subject if email notifications are sent.
-
Account – Name of your account.
-
Partition – The field is visible for the PARTITION_JOB type only. Name of your partition (or all of the partitions for the account).
-
Integration Instance – The field is visible for the ROUTE_CHECK type only. Select the IntegrationManager instance (one or all IMs linked to your account).
-
Target Type: Displays the type of entity to monitor. Options include:
-
All
-
Analytics Data Load
-
CFS
-
Datamart
-
For integrations, the type is set to a specific route and cannot be changed after creation.
-
-
Target Name – Based on the name from partition Job/Task.
Here you can select the option Target all which enables you to monitor all objects which meet the specified conditions.
-
Target Object – Shows for which object the notification is defined. This value cannot be edited; all you can do is to create a new notification.
-
Trigger by: Define the condition/state that triggers notifications:
-
Partition jobs/tasks states:
All,Pending,Scheduled,Processing,Error,Ready,Cancelled,Interrupted,Did not run.
(Note: TheDid not runoption is not available when Real-Time Monitoring is selected.) -
Integration route states:
All,Success,Error,Warning,Did not run. -
Event orchestration notification states:
All,Success,Error. -
Selecting
Alltriggers notifications for every state listed above, including future states. -
Max running time: Allows you to set the maximum time for a route to be running. If it is longer, the notification is triggered. This feature is supported since IntegrationManager 1.8.
-
-
-
As for frequency of the monitoring, you can choose between:
-
Real time monitoring – Checks every 5 minutes if the specified object reached the trigger state and notifies you immediately.
-
Scheduled time & Lookback interval – Allows you to define a custom interval at which PlatformManager checks if the specified object reached the trigger state. You can define a specific date and time and have this repeated daily, weekly, monthly or yearly. The Lookback option defines what portion of the log should be scanned. For example, if your job is scheduled to run every Monday at 9 am and typically runs for 5 minutes, it makes sense to set up the monitoring frequency to Mondays at 9:30 and set the Look back option to 30 minutes.
-
-
Email – Enter emails of people who should get the notification.
-
Receive email with detailed information – If selected, the email will contain an attachment with various technical details, such as the account name, instance, partition, Pricefx version, IM name, TypedId, UUID, processing node, number of alert occurrences and in the attachment the message that the Pricefx application issued for the job.
-
Webhook – Enter MS Teams or Slack webhook URL, so that you receive the notification in one of these channels. For details see How to Get Webhook URL.
-
Trigger logic – Set the partition and logic to which you want to send the alert data. For more details refer to How to Send Notification Data to Partition.
-
Click Create to create the notification rule.
Creating New Rule From Prefilled Form for Specific Object
The starting point differs depending on whether you are creating a notification for a job/task or route.
-
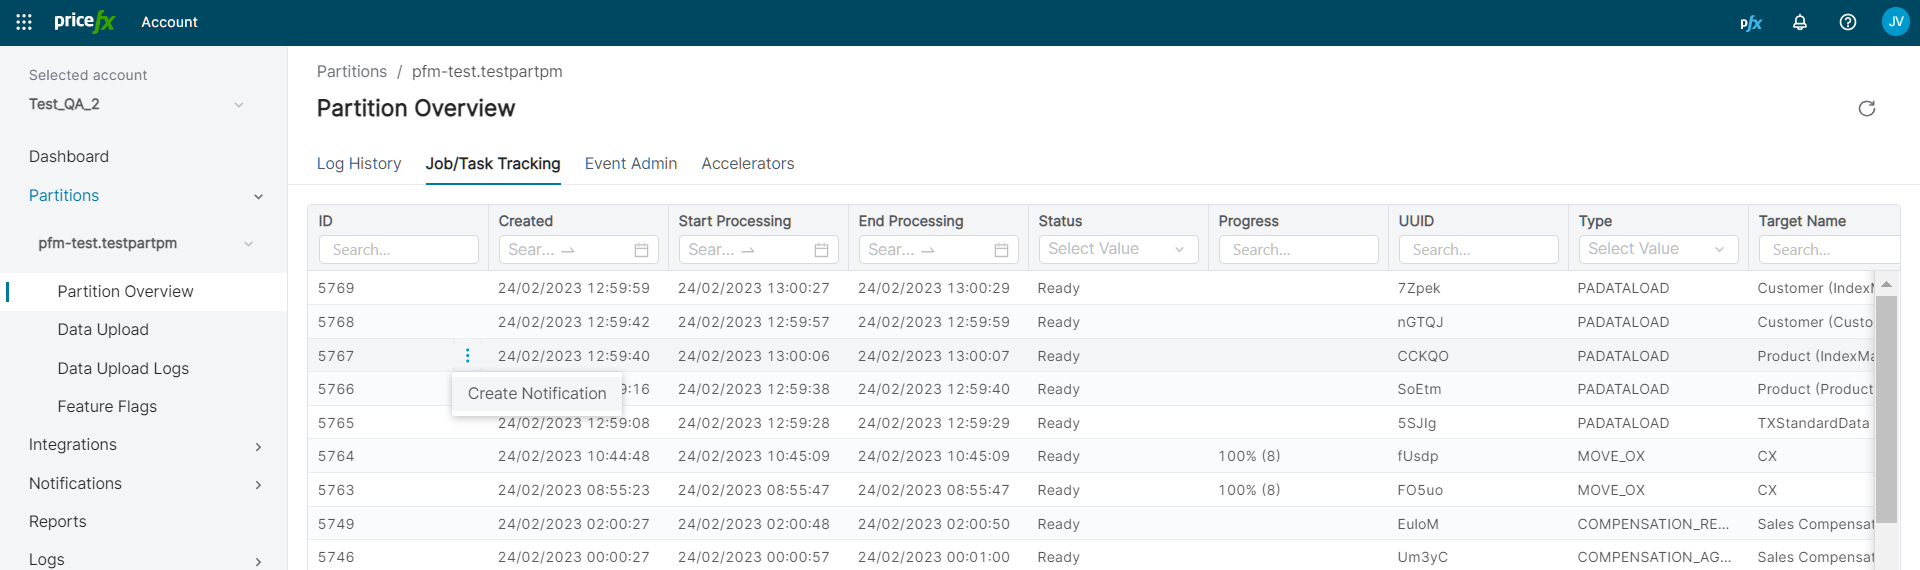
Go to Account > Partitions > Partition Overview > Job/Task Tracking.
or
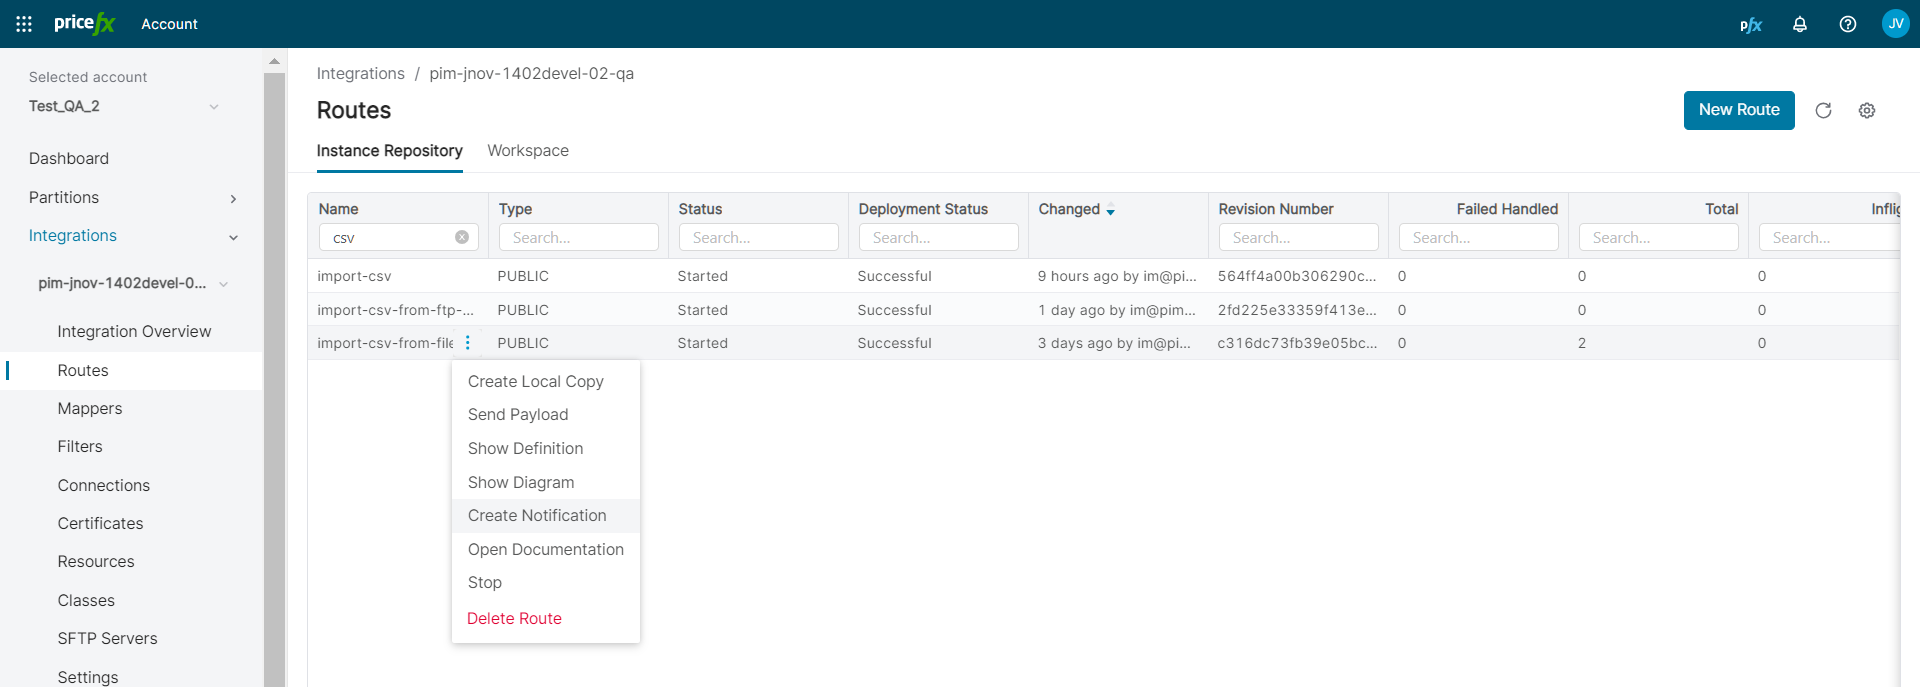
Go to Account > Integrations > Routes. -
Among the existing jobs/tasks/routes select the one whose status you want to monitor.
-
Select Create Notification from the row menu.
-
Fill in the definition (the options are described above in the Edit Notification Rule section).
Job/Task Notification creation:
Integration Notification creation:
Editing Notification Rule
You can modify an existing notification rule, although only certain fields are editable. Follow the steps below to make changes.
Steps to Edit a Notification Rule:
-
Navigate to Account > Notifications > Notification Rules.
-
Identify the notification rule you want to update.
-
Click on the 3-dot menu in the row corresponding to the rule you want to edit.
-
Select the Edit option.
-
Update Rule Details: Modify the fields as needed in the notification rule definition – refer to the Creating Notification Rule section above for detailed descriptions of available options.
When editing a notification rule, only certain fields can be modified, unlike the full customization available when creating a new rule.