
|
Aim of this article |
Shows how to use Update Assistant whose purpose is to make the process of IM update smoother and quicker. |
|---|---|
|
Related sections |
Settings (Reference Manual) |
|
Required permissions |
Integration Instance - Edit |
IM Update Assistant is currently available only to selected users as a pilot version.
Update Assistant first clones the instance (and the corresponding Git branch) into a new staging environment. All tests, analysis and changes performed by the assistant are done in the staging environment. Only in the last step of the process, when the update is approved, the changes are applied to the environment you intend to update.
For the breaking changes and migration steps of each IM version, see Upgrade Guides in the IntegrationManager documentation.
The process consists of the following steps:
-
Update Check – Here you select to which IM version you want to update and the system will perform a comparison of your current version and the target one. As a result, you will get a list of potentially breaking changes. When you expand a particular change, you can read the details and also learn how to fix it.
To continue, click Code Analysis.
There is the
IN_CONFLICTstate in the Update Assistant, which is returned when the analysis conflicts with Git changes. The “Current Update is in Conflict” message is displayed. Click Start new update to restart the Update Assistant.
-
Code Analysis – In this step the Update Assistant analyzes the code of your current IM instance and lists all places affected by the breaking changes from the previous step. This step is read-only. For every change you can expand the details to compare the current state and the target state. Changes that PlatformManager applies automatically are distinguished from changes that require a manual action; changes flagged as requiring a manual rewrite are highlighted. Use the View in Git link to inspect the affected code directly in Git.
⚠️ This does not include thorough validation of custom code.
Click Next to continue to the Code Modification step. Clicking Next does not trigger any modification.
-
Code Modification – This step is divided into two sections:
-
Automatically applied changes – Shows the number of changes that PlatformManager can apply for you. Click Apply Changes to trigger the automatic code modification. After the modification finishes, the result is displayed.
-
Manual action required – Displayed only when at least one change requires a manual action. Each listed change provides a detail view and a direct link to Git. Make these changes yourself in the highlighted temporary branch. After you apply a required change in Git, click Re-Analyze; changes that are resolved are removed from the list.
Before you continue, select the confirmation checkbox. It reads I confirm that all required manual changes have been applied to the branch, followed by the branch name. PlatformManager stores this acknowledgement (user name, date and time, target IM version). After the acknowledgement, click Start Update to start the update.
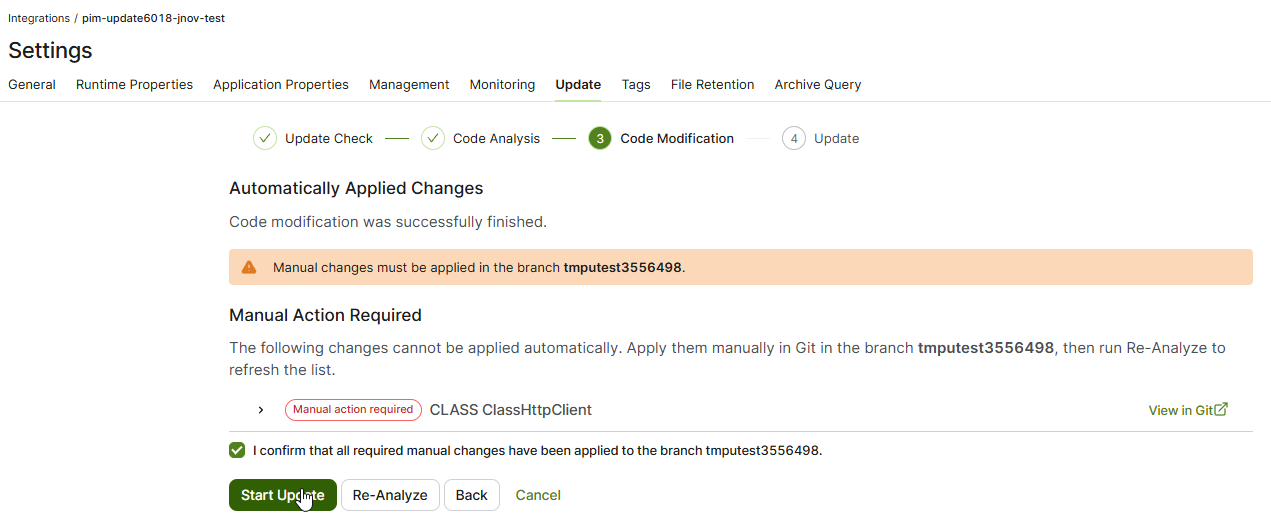
Start Update stays available while changes are still listed. The checkbox is therefore an override, not a gate. Run Re-Analyze until the list is empty before you use it.
-
-
Update – In this step, the actual update is performed. (Until now, all changes were done in a separate branch in Git and now they are merged with your IM instance.) When it is successfully completed, you get a confirmation.
When a manual action is required, the manual-edit window stays open for 7 days (by default) before the upgrade is cleaned up. One day before the timeout expires, PlatformManager sends an email notification to the user who started the update. The email contains a link which opens the instance Update tab and renews the timeout for another 7 days.