This guide describes how to configure a Connected App in Salesforce with Lightning Component, integrate it with Pricefx, and set up authentication and the application layout.
Create an External Client App
Step-by-Step Instructions
-
Log in to Salesforce as an Administrator.
-
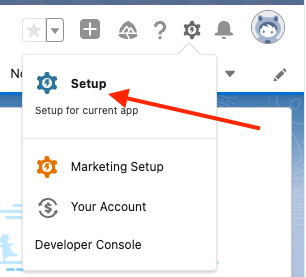
Click the Gear icon (⚙️) and select Setup.
-
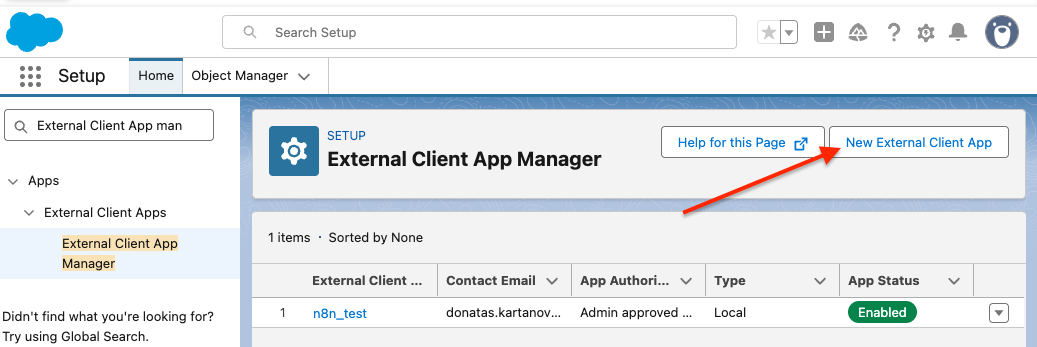
In the Quick Find box, search for "External Client App Manager".
-
Click the New External Client App button.
-
Fill in Basic Information
-
External Client App Name:
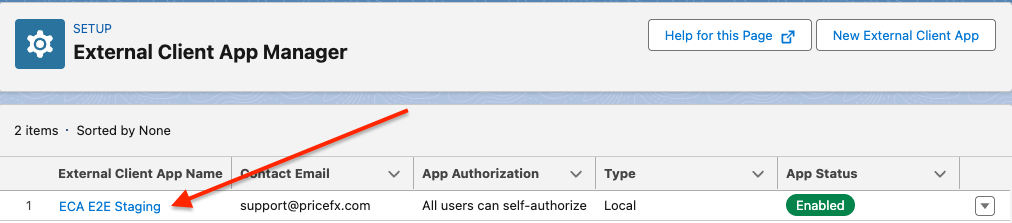
Enter a unique name, e.g.,ECA E2E Staging. -
API Name:
Automatically generated from the App Name (no spaces or special characters), e.g.,ECA_E2E_Staging. -
Contact Email:
support@pricefx.com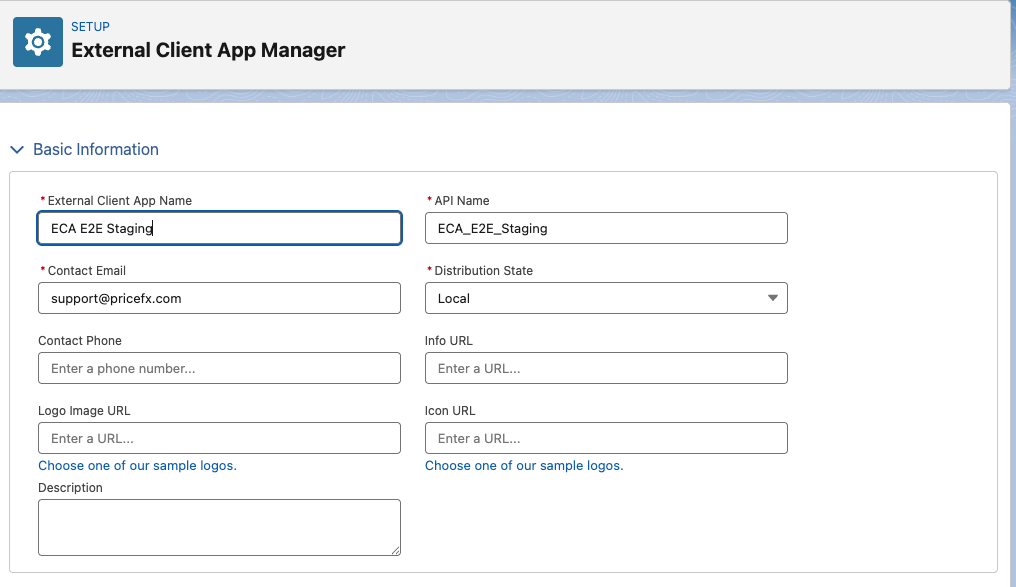
-
-
Enable OAuth Settings
-
Set the Callback URL:
https://<cluster name>.pricefx.com/
(This URL may vary; contact Pricefx support for the correct one.) -
In Selected OAuth Scopes, add:
Full access (full)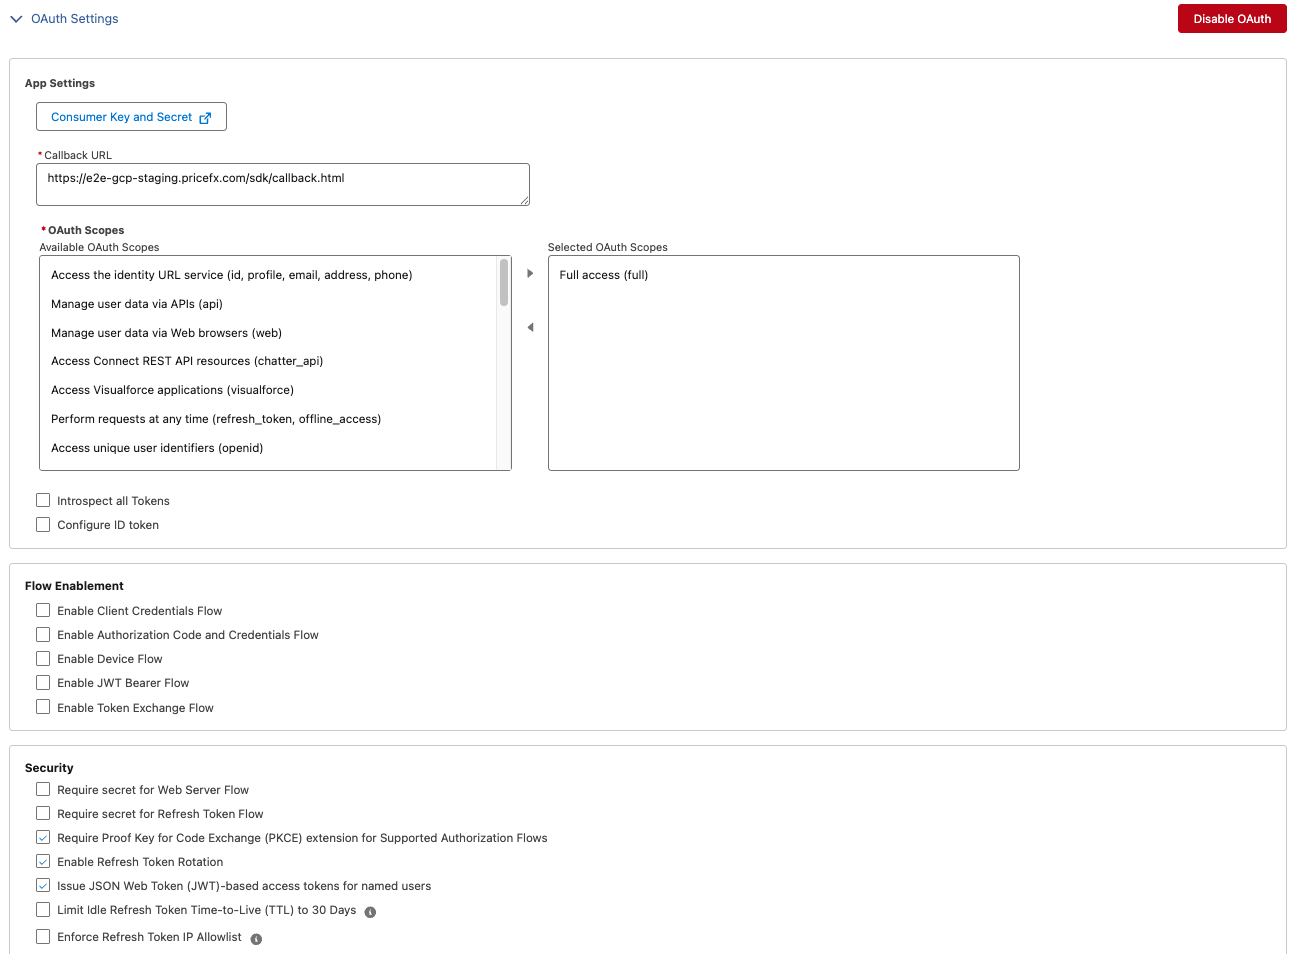
c. Enable these three security settings:
- Require Proof Key for Code Exchange (PKCE) extension for Supported Authorization Flows- Enable Refresh Token Rotation
- Issue JSON Web Token (JWT)-based access tokens for named users
-
-
Web App Settings
If Salesforce acts as the Identity Provider (IdP):-
Check Enable SAML.
-
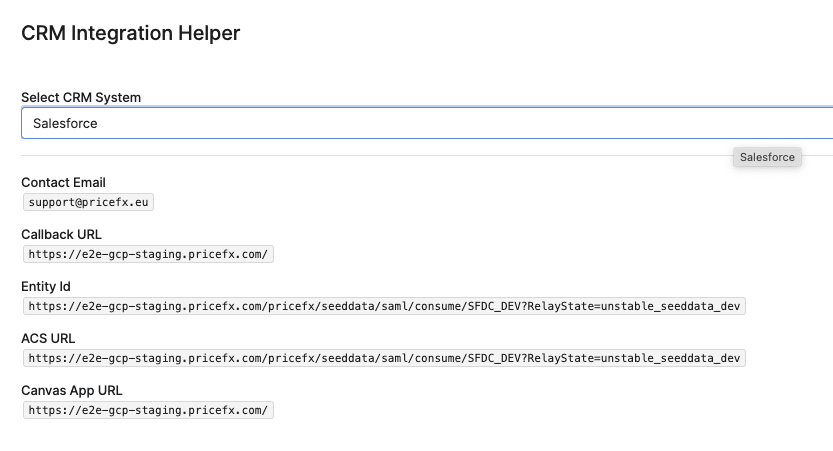
Enter the Entity ID:
https://<cluster>.pricefx.com/pricefx/<partition>/saml/consume/<SAML Configuration Name>?RelayState=<RelayState>. -
Enter the ACS URL (same as Entity ID).
-
Set Signing Algorithm for SAML Messages to
SHA256.
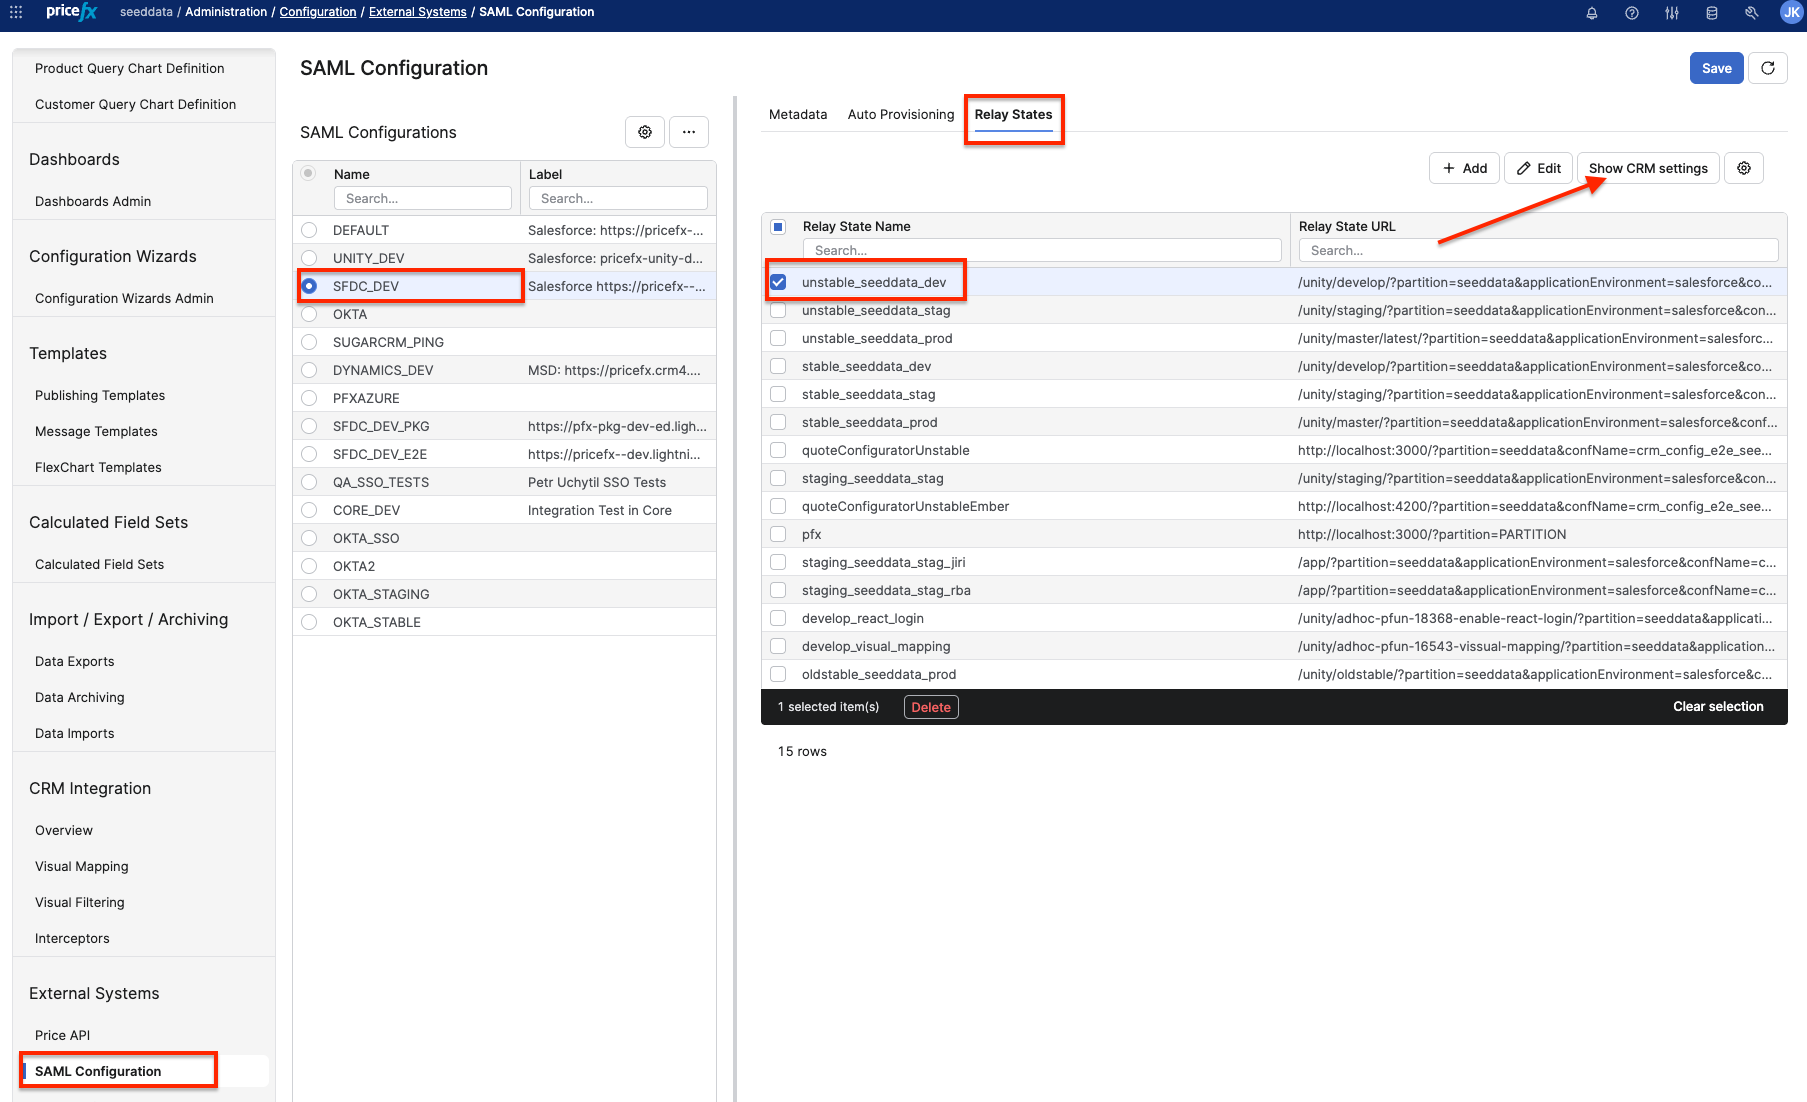
🔎 Tip: You can find required values for Entity ID, ACS URL etc. in the SAML Configuration page in Pricefx. Select SAML configuration, Relay States Tab, one particular Relay State Name and click on “Show value for CRM”.
-
-
Canvas App Settings
-
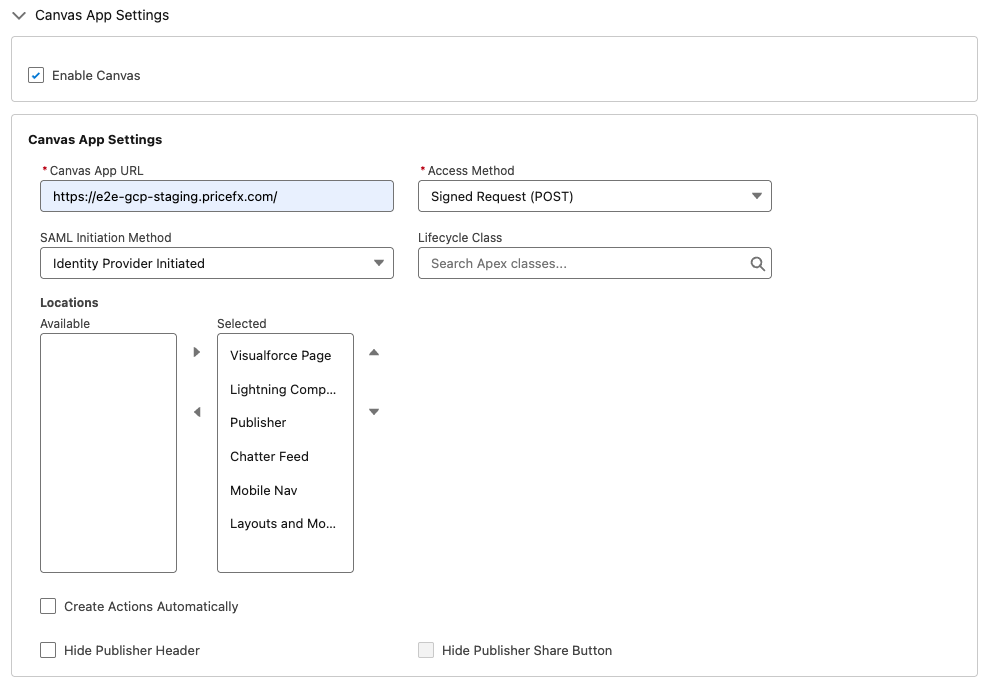
Enable Canvas.
-
Enter Canvas App URL:
https://<cluster name>.pricefx.com/
(Confirm with Pricefx support or SAML Configuration page.) -
Access Method:
Leave as Signed Request (POST). -
SAML Initiation Method:
Choose between:-
Identity Provider Initiated
-
Service Provider Initiated (if Salesforce is not the IdP)
-
-
Locations:
Select:-
Lightning Component
-
Mobile Nav
-
-
-
Click on Create button.
Set App Permissions
-
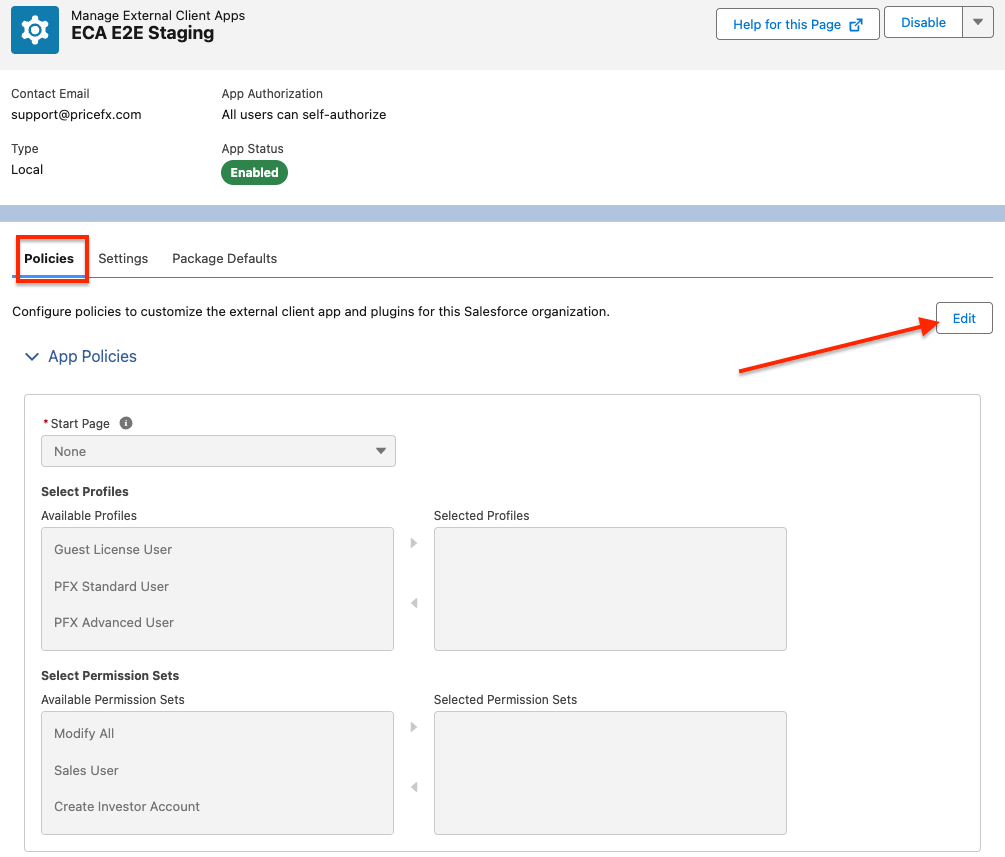
Go to External Client App Manager and locate your newly created app.
-
-
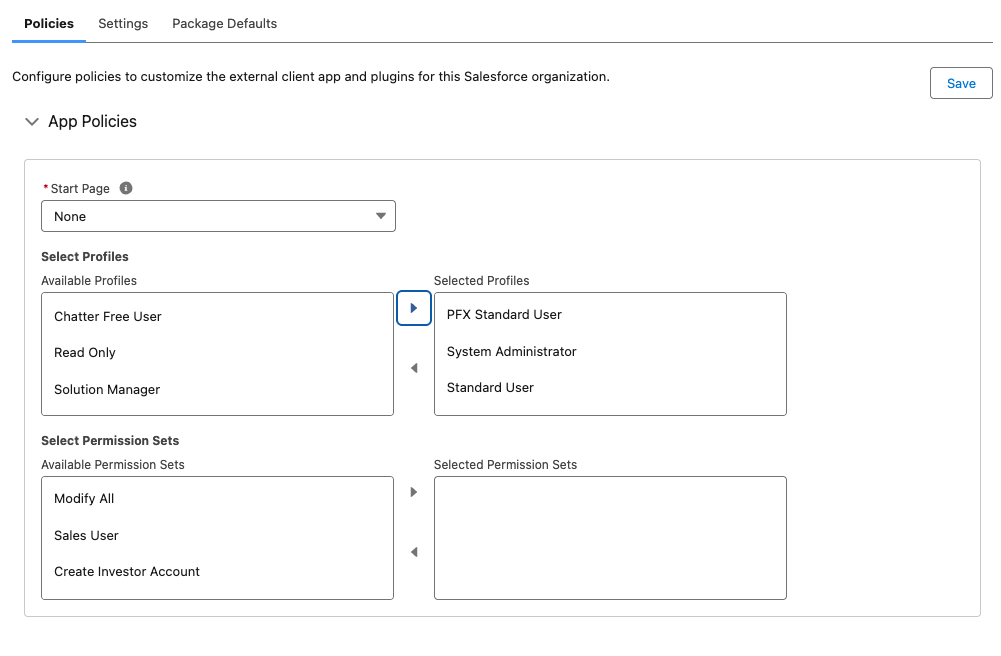
Click Edit, on the Policies tab.
-
Add all relevant profiles that will use this application
-
Under OAuth Policies, change:
-
Permitted Users to Admin approved users are pre-authorized.

-
-
Click Save.
Create Lightning Component
Take the following steps:
-
Open the Developer Console in Salesforce.
(Setup > Developer Console)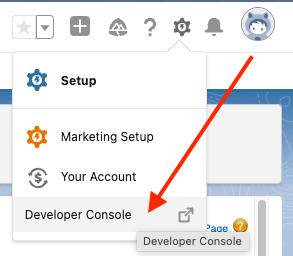
-
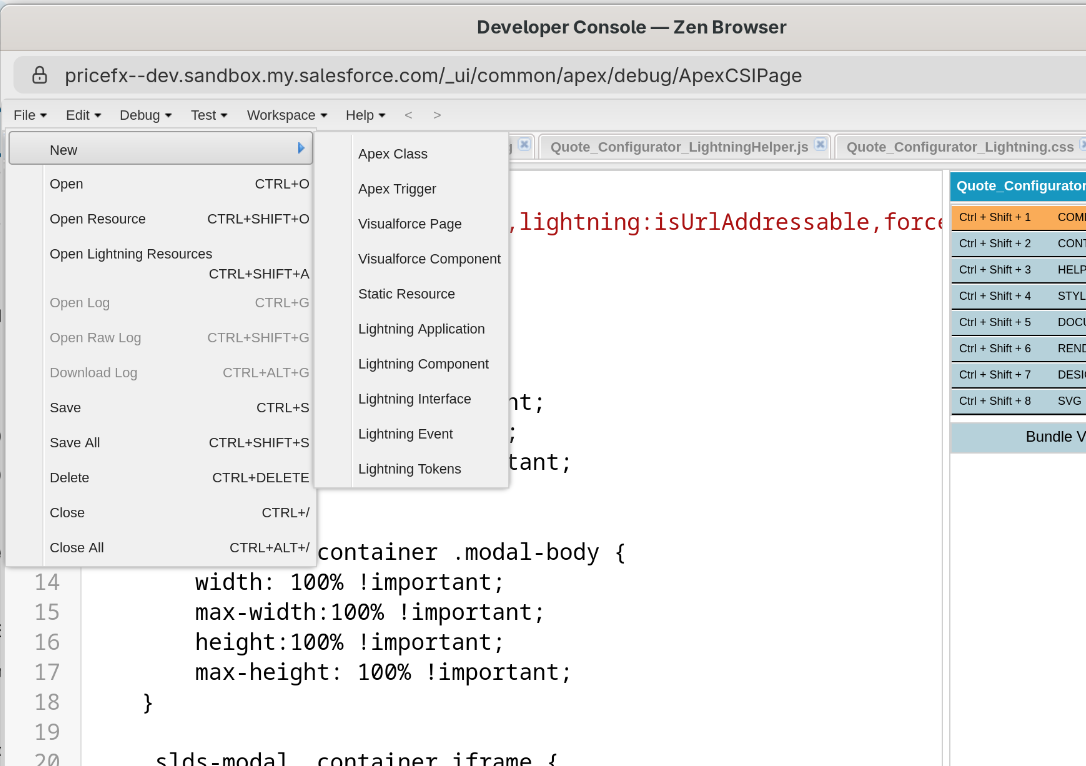
Create a new Lightning Component.
-
Name it, for example:
pricefx_app.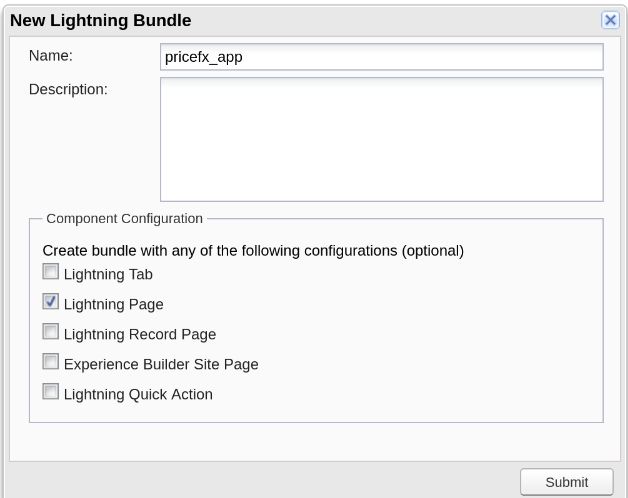
-
Insert the Following Code
-
COMPONENT Section:
📢 Note:
In our example, we are using a connected app with the API namepricefx_app.
In your case, this name may be different — make sure to replace it in thedeveloperNamefield in the code below.<aura:component implements="force:appHostable,lightning:isUrlAddressable,force:hasSObjectName,force:hasRecordId,flexipage:availableForRecordHome" access="global" > <aura:html tag="style"> .slds-modal__container { width: 95% !important; max-width: 95% !important; height: 100% !important; max-height: 100% !important; } .slds-modal__container .modal-body { width: 100% !important; max-width:100% !important; height:100% !important; max-height: 100% !important; } .slds-modal__container iframe { width: 100% !important; max-width:100% !important; } .slds-modal__container .quick-actions-panel .slds-modal__content { height:100% !important; max-height: 100% !important; } </aura:html> <aura:attribute name="getRecordId" type="Object"/> <aura:attribute name="opportunityRecord" type="Object"/> <aura:attribute name="recordLoadError" type="String"/> <force:recordData aura:id="recordLoader" recordId="{!v.recordId}" fields="Id,AccountId" targetFields="{!v.opportunityRecord}" targetError="{!v.recordLoadError}" /> <aura:handler name="init" value="{!this}" action="{!c.doInit}" /> <force:canvasApp developerName="pricefx_app" width="100%" parameters="{!v.getRecordId}"/> </aura:component> -
CONTROLLER Section:
({
	doInit: function(cmp) {
        var recordId = cmp.get("v.recordId");
        var sObjectName = cmp.get("v.sObjectName");
        // NOTE: Lightning is very picky about quotes.
        // JSON keys and values MUST be wrapped with double quotes.
        // See: https://salesforce.stackexchange.com/questions/120473/canvas-app-in-lightning-component
    	var output = '{"recordId": "' + recordId + '","type":"' + sObjectName + '"}';
    	cmp.set("v.getRecordId", output);
    }
})
📢 This code enables communication between Pricefx and Salesforce.
-
Save All your changes
-
Embed Lightning Component into Salesforce Object
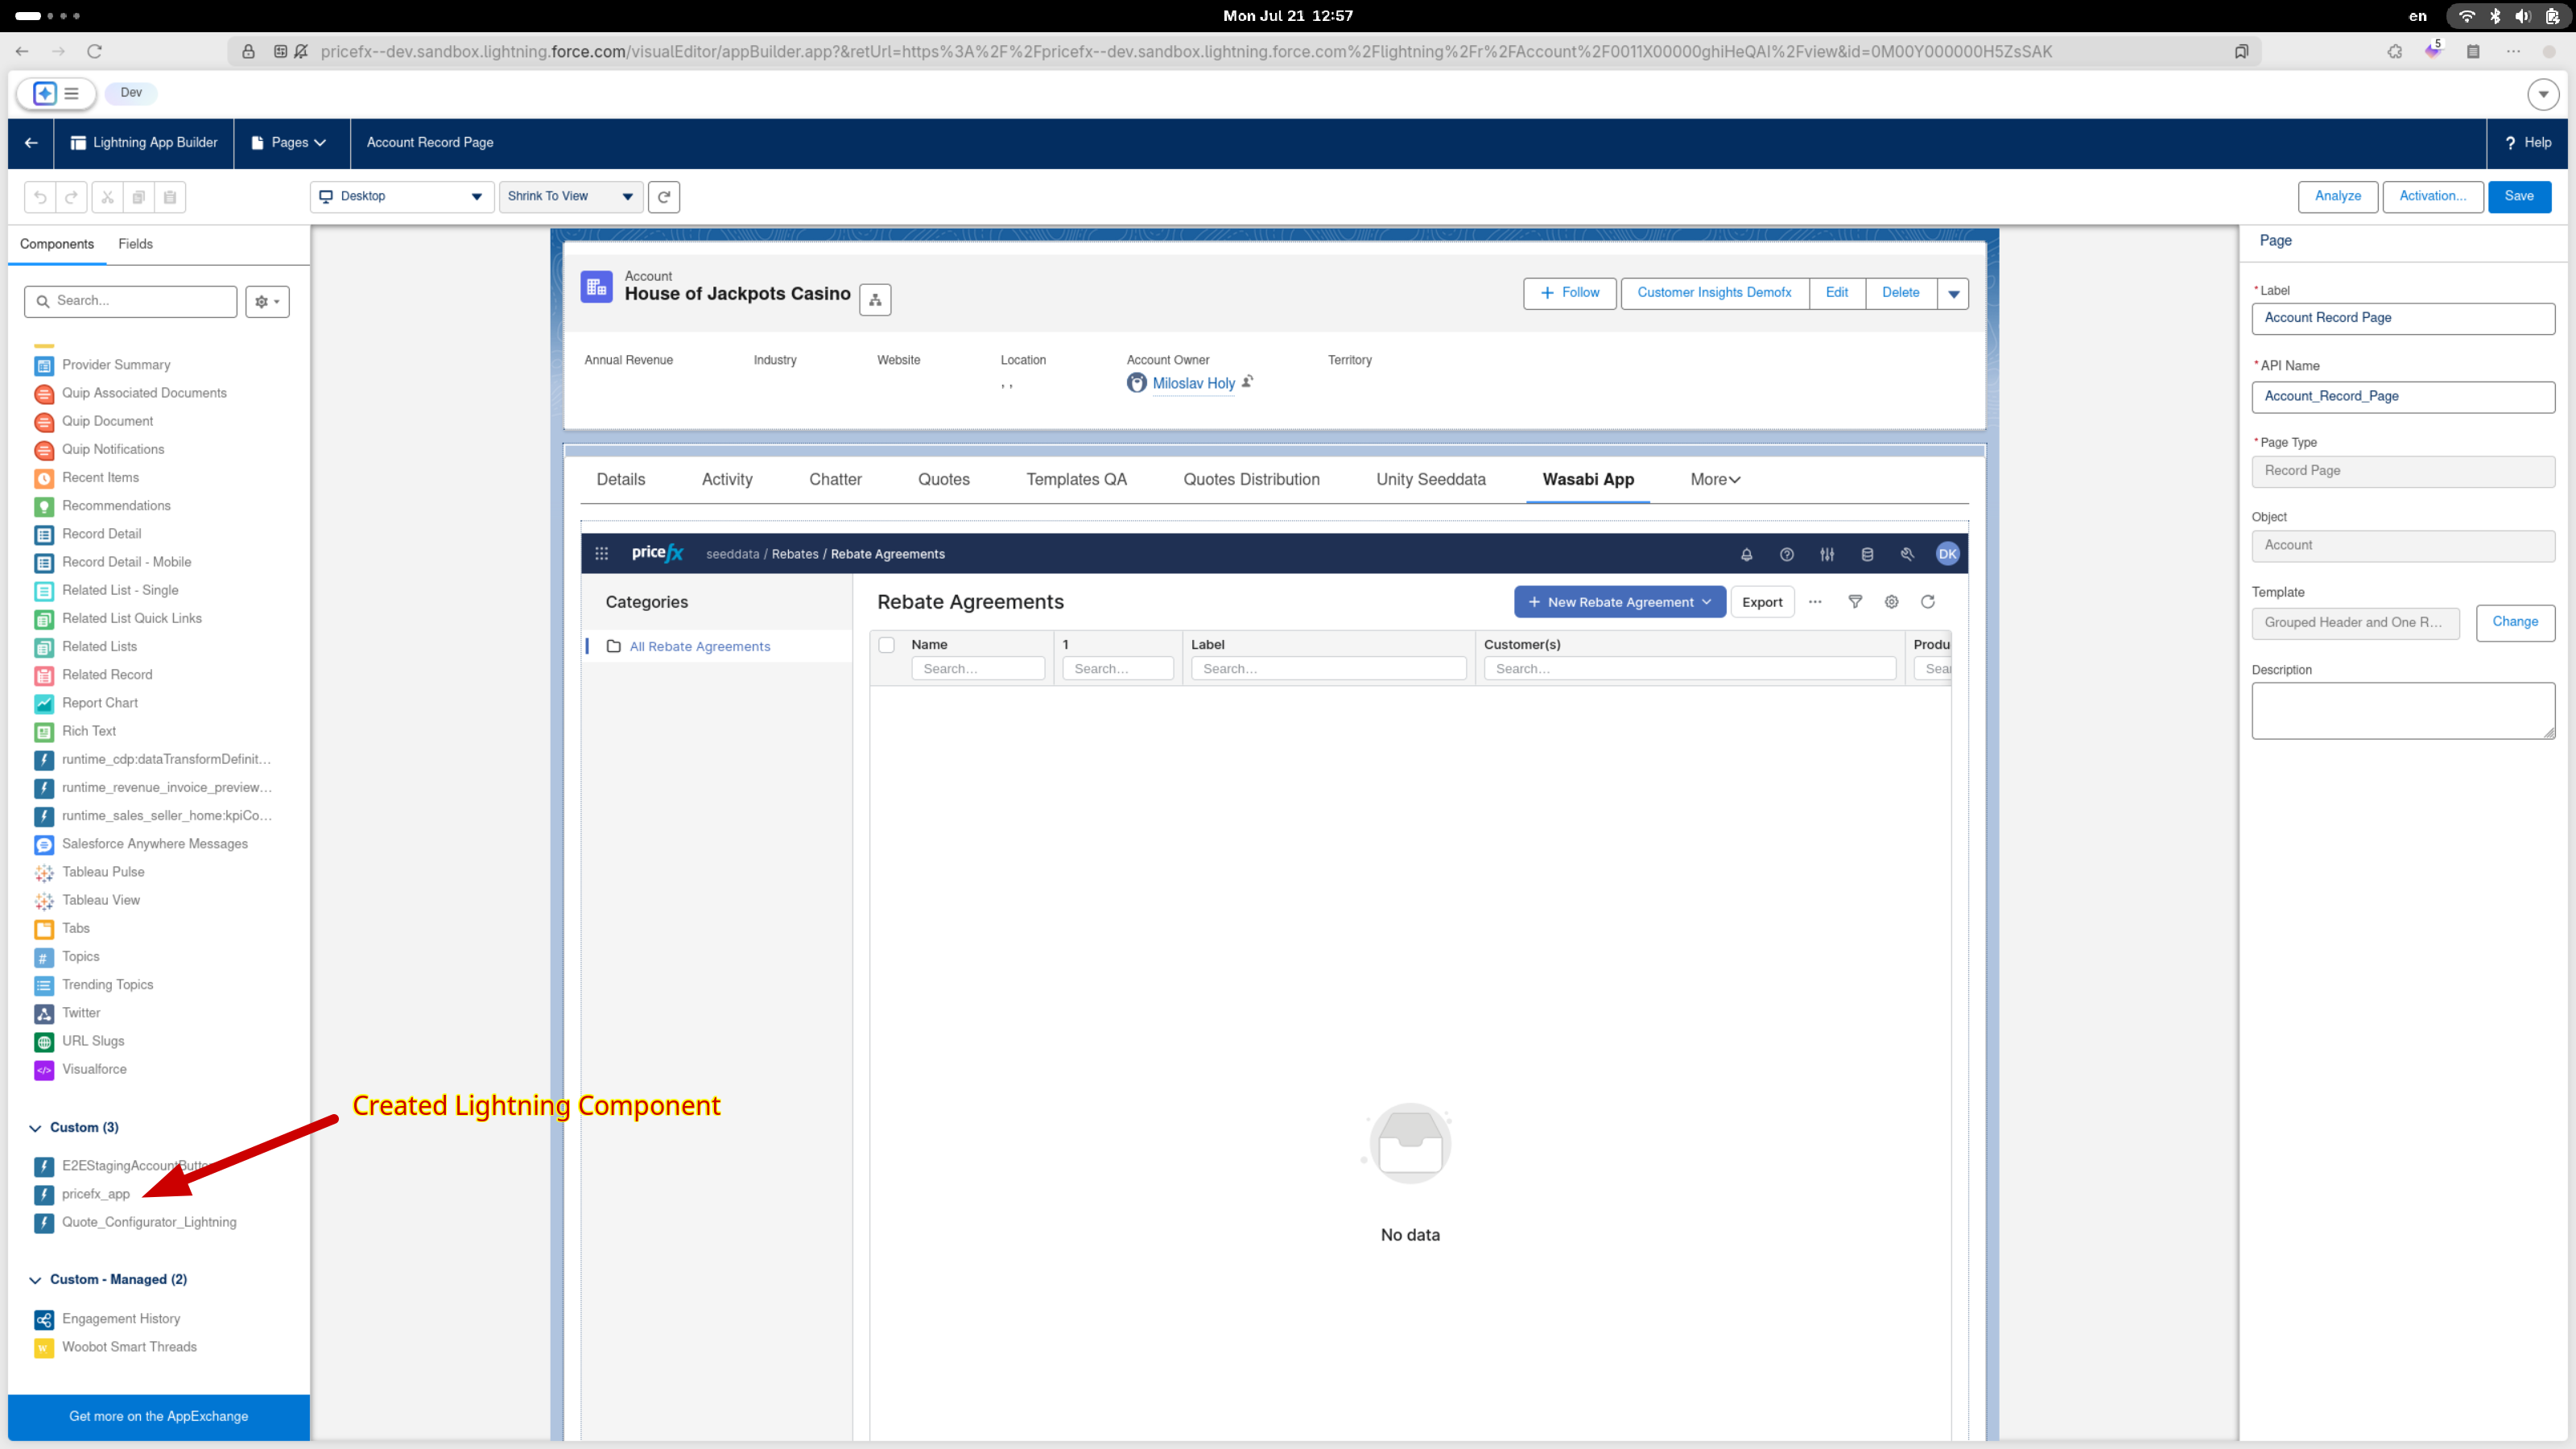
-
Open the object page in App Builder:
(Setup > Edit Page on the target object)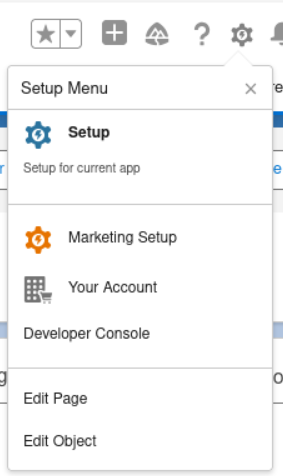
-
Locate your Lightning Component in the Custom Components section.
-
Drag and drop it into the desired tab or layout region.
-
Save and Activate the page if needed.
Adjusting the Pricefx Lightning Component Height in Salesforce
When editing feature flags, ensure you are modifying the correct configuration file.
Please note that the embedded application may use a different configuration file than the standalone application.
-
Open the Salesforce window where the Pricefx app is embedded and where you want to change the height.
-
Navigate to the Feature Flags page in Pricefx:
Administration > Feature Flags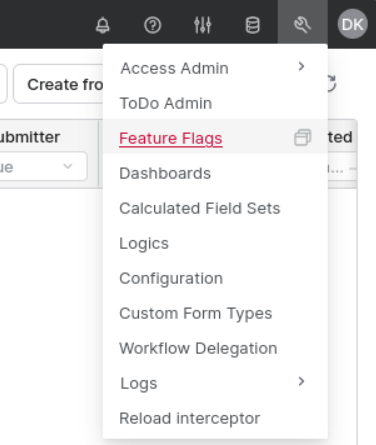
-
Locate the flag:
environmentSettings.salesforce.displayLocation.Aura. -
Change its value to the desired height in pixels, e.g.:
1000px. -
Reload the Salesforce page to apply the new height.
To manually control the height, disable the auto-resize behavior by setting the following flag to false: environmentSettings.salesforce.displayLocation.Aura.autoGrow
One Canvas App for All Partitions
Instead of having one canvas app for each partition, you can have a configuration in which there is just one app that redirects the user to the correct partition.
In this configuration, the app's URL does not point to a concrete partition but to 'system'. For example:
https://pricefx.eu/pricefx/system/saml/consume?RelayState=quoteConfigurator&applicationEnvironment=salesforce
When this request is sent to Pricefx, it is consumed by 'system' SAML Consume service. This backend service resolves the target partition based on the user ID or email address. The service utilizes a user-partition map and redirects the authenticated user to the partition where the user has an account.
In cases when the same email address or user ID exists in multiple partitions (e.g., IT support users), the user will be redirected to a so called "preferred partition". The preferred partition is set on the Pricefx side as a feature flag.
Note: This solution is suitable only for customer dedicated clusters.