It is possible to have Pricefx Unity displayed in a new sub-tab connected to the account page.
Steps
-
Create a Visual Force Page (e.g. Custom_Quote_Configurator).
<apex:page cache="false"> <apex:canvasApp applicationName="E2E_staging_seeddata_Unity_staging" height="300px" width="100%" border="0" scrolling="yes"/> </apex:page> -
Create a Visual Force Page (Quote_Configurator_For_Console).
<apex:page > <apex:includeScript value="/support/console/48.0/integration.js"/> <style> .m-iframe{ width: 100%; border: 0px; height: 95vh; } </style> <iframe class="m-iframe" src="/apex/Custom_Quote_Configurator?Id={!$CurrentPage.parameters.aId}"/> </apex:page> -
Add a Lightning Component (E2EStagingAccountButton). It is described at Show Unity as Modal/Tab in Salesforce Lightning, just step 1.
Here is the code for Component:<aura:component implements="force:appHostable,flexipage:availableForAllPageTypes,flexipage:availableForRecordHome,force:hasRecordId,force:lightningQuickActionWithoutHeader,lightning:isUrlAddressable" access="global"> <lightning:workspaceAPI aura:id="Workspace"/> <aura:handler name="init" value="{!this}" action="{!c.doInit}" /> </aura:component>Code for Controller:
({
	doInit : function(component, event, helper) {
        var dismissActionPanel = $A.get("e.force:closeQuickAction");
   		dismissActionPanel.fire();
        helper.openSubtab(component, event, helper);
	}
})
Code for Helper:
({ openSubtab: function(component, event, helper) { var workspaceAPI = component.find("Workspace"); debugger; workspaceAPI.getFocusedTabInfo().then(function(response) { workspaceAPI.openSubtab({ parentTabId: response.tabId, url: '/apex/Quote_Configurator_For_Console?aId='+response.recordId, focus: true }).then(function(subtabId) { console.log("The new subtab ID is:" + subtabId); }).catch(function(error) { console.log("error1",error); }); }); } }) -
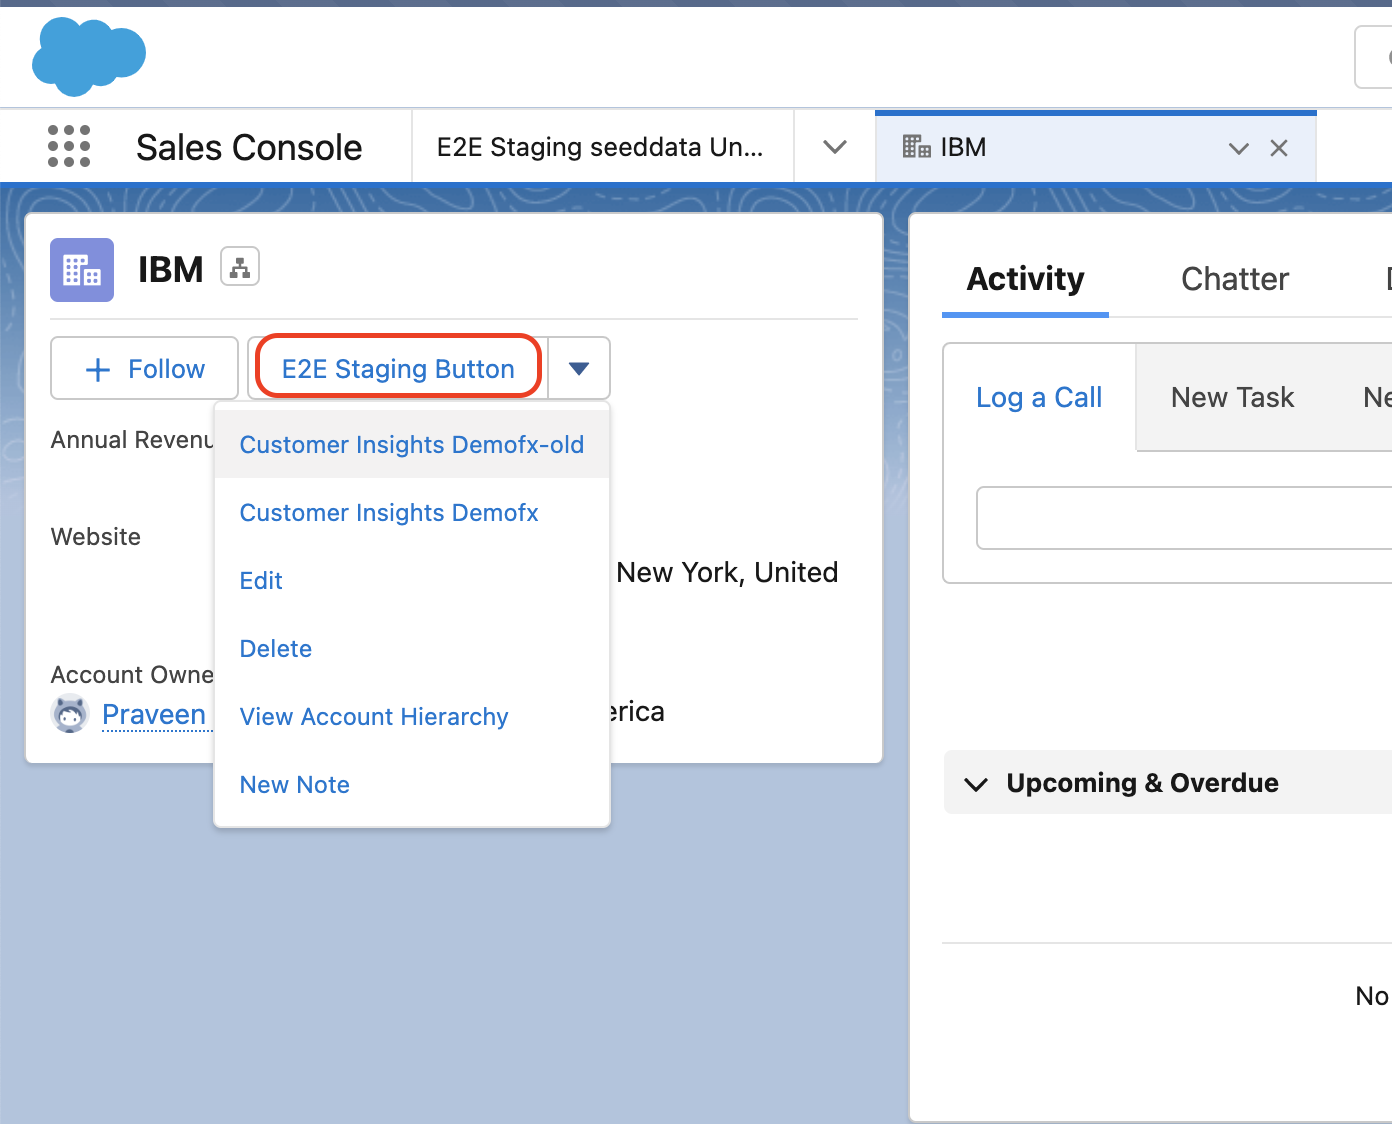
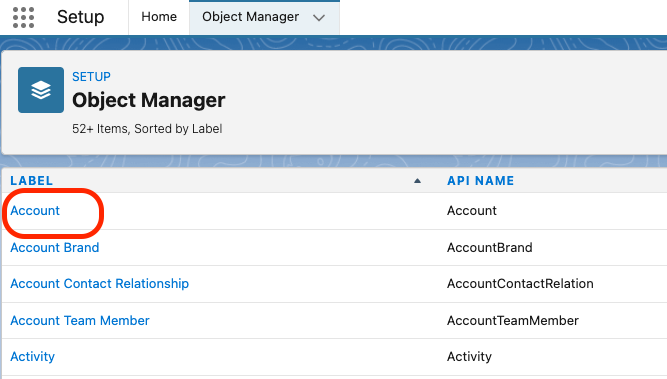
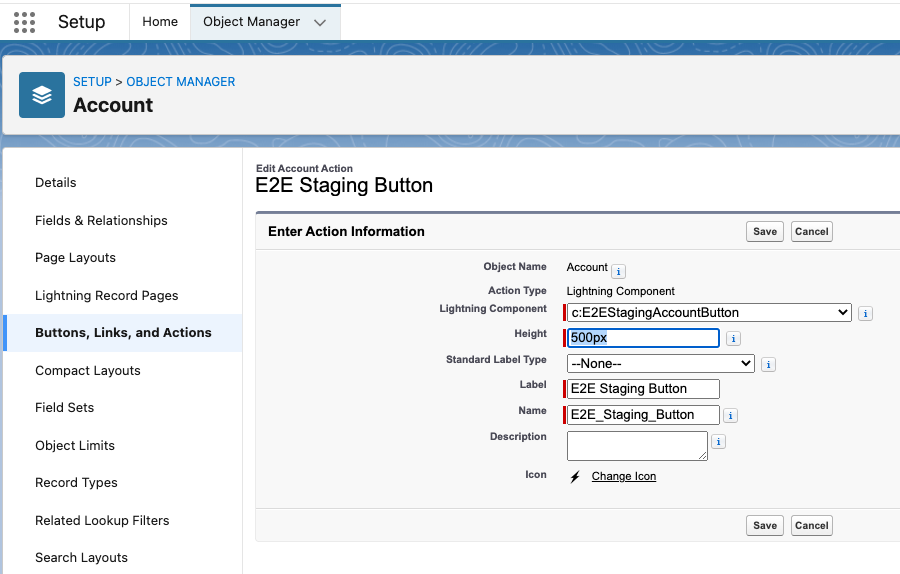
Add a button with an action. Go to Setup > Object Manager, open Account.
-
Go to Buttons, Links, and Actions and create a New Action. Choose your Lightning component created in the third step.
-
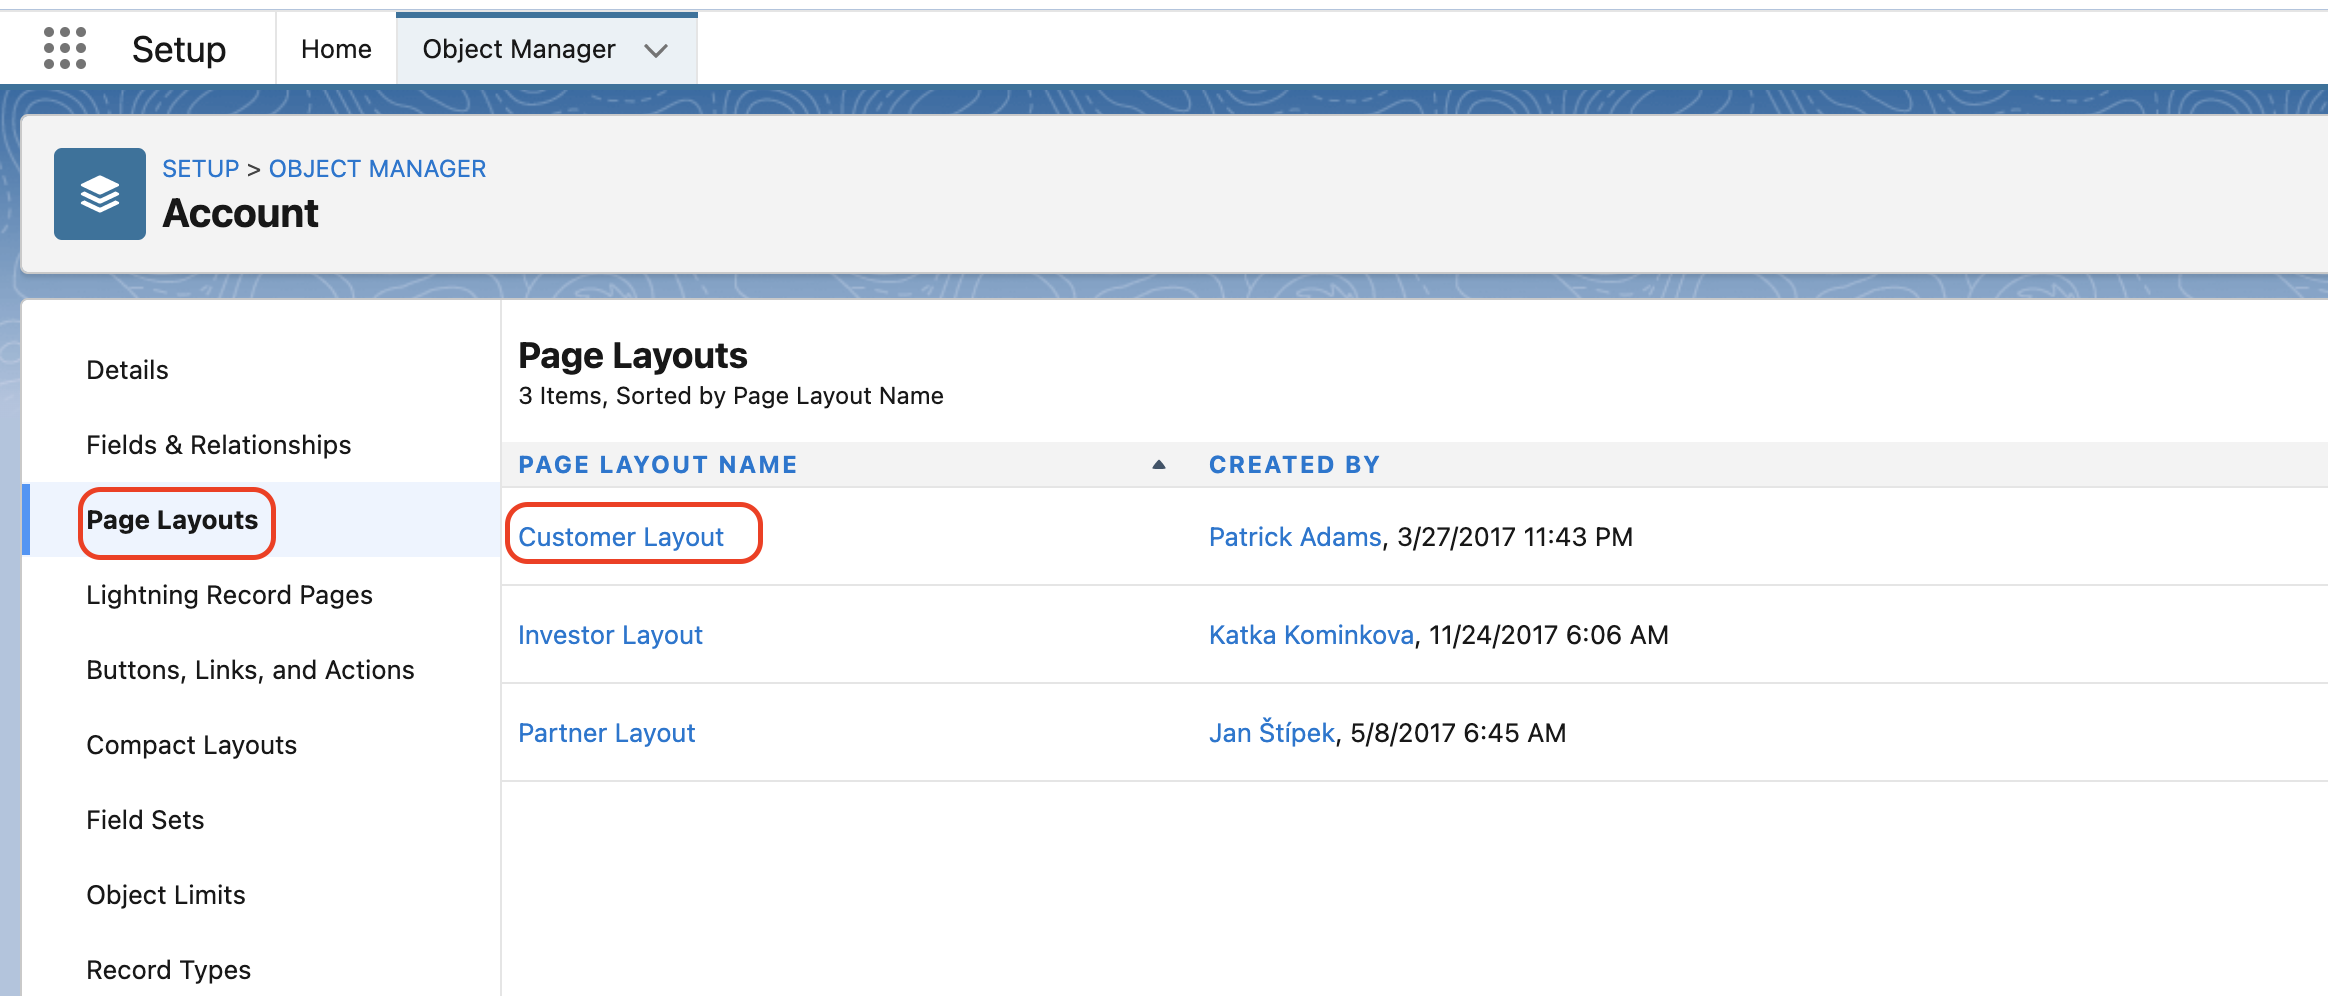
Go to Page Layout and open Customer Layout.
Under Mobile & Lightning Actions locate your button (E2E Staging Button) and activate it for this layout.
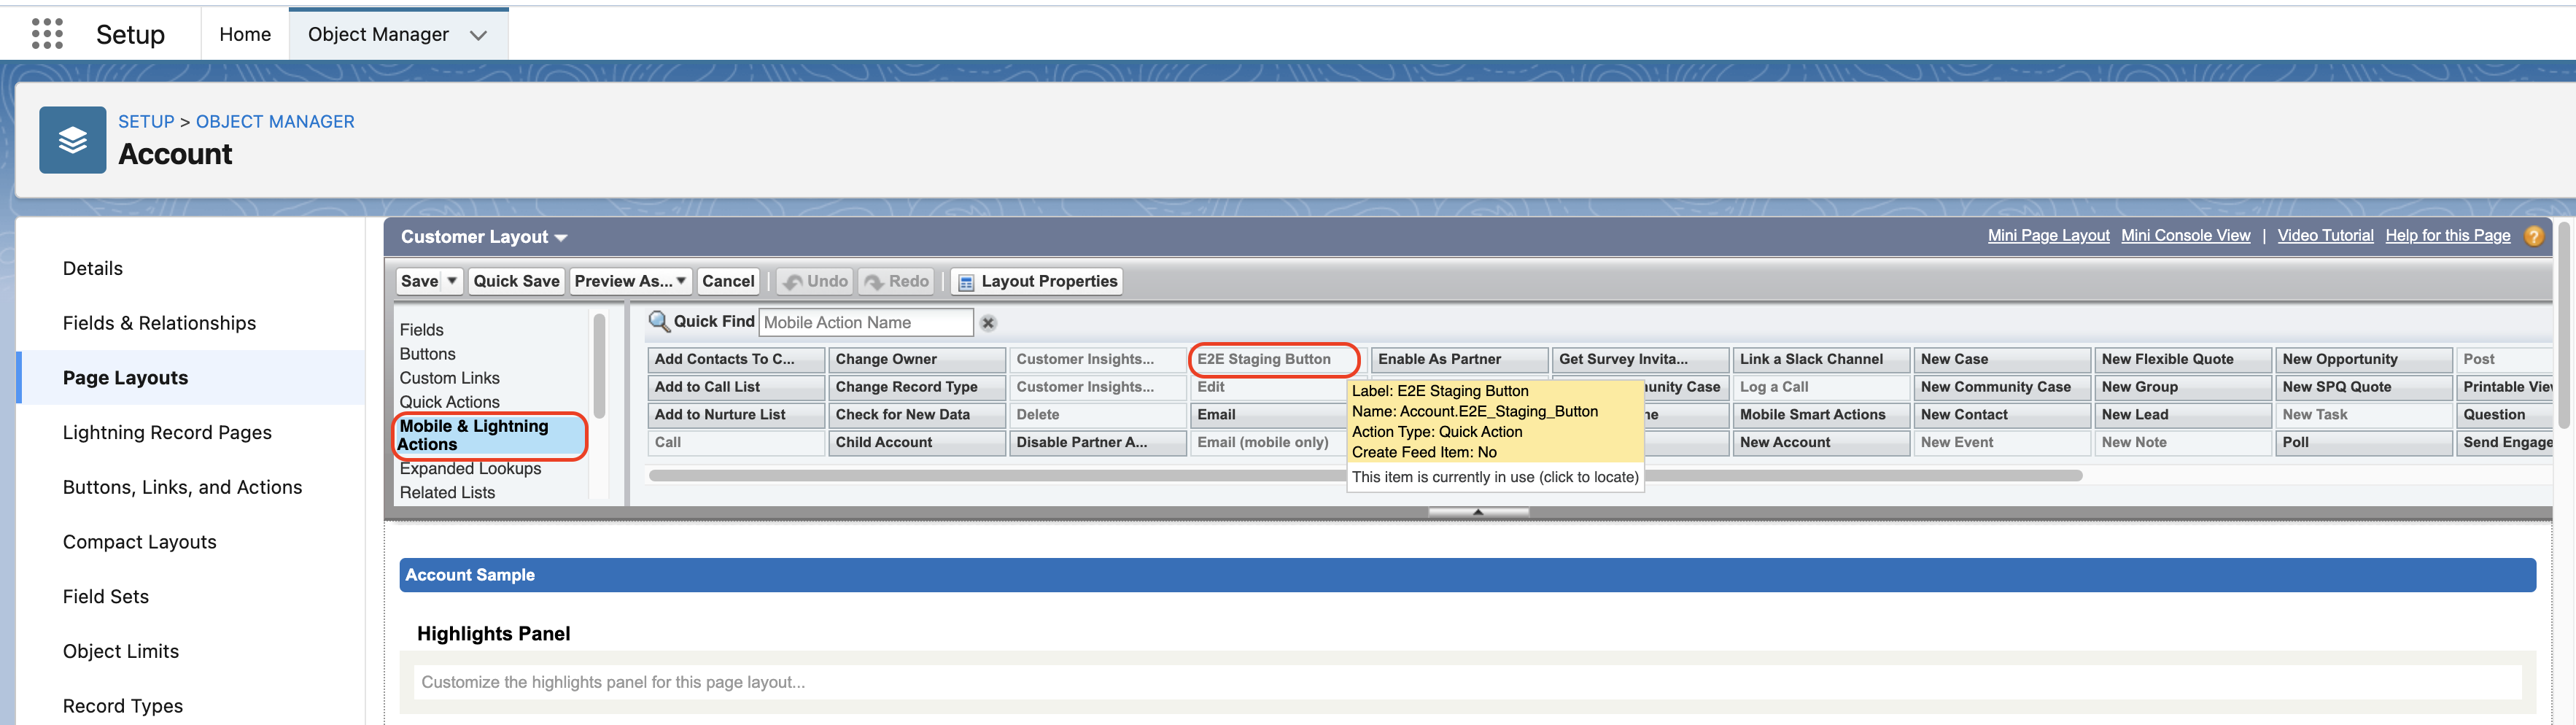
Save the Page layout.
-
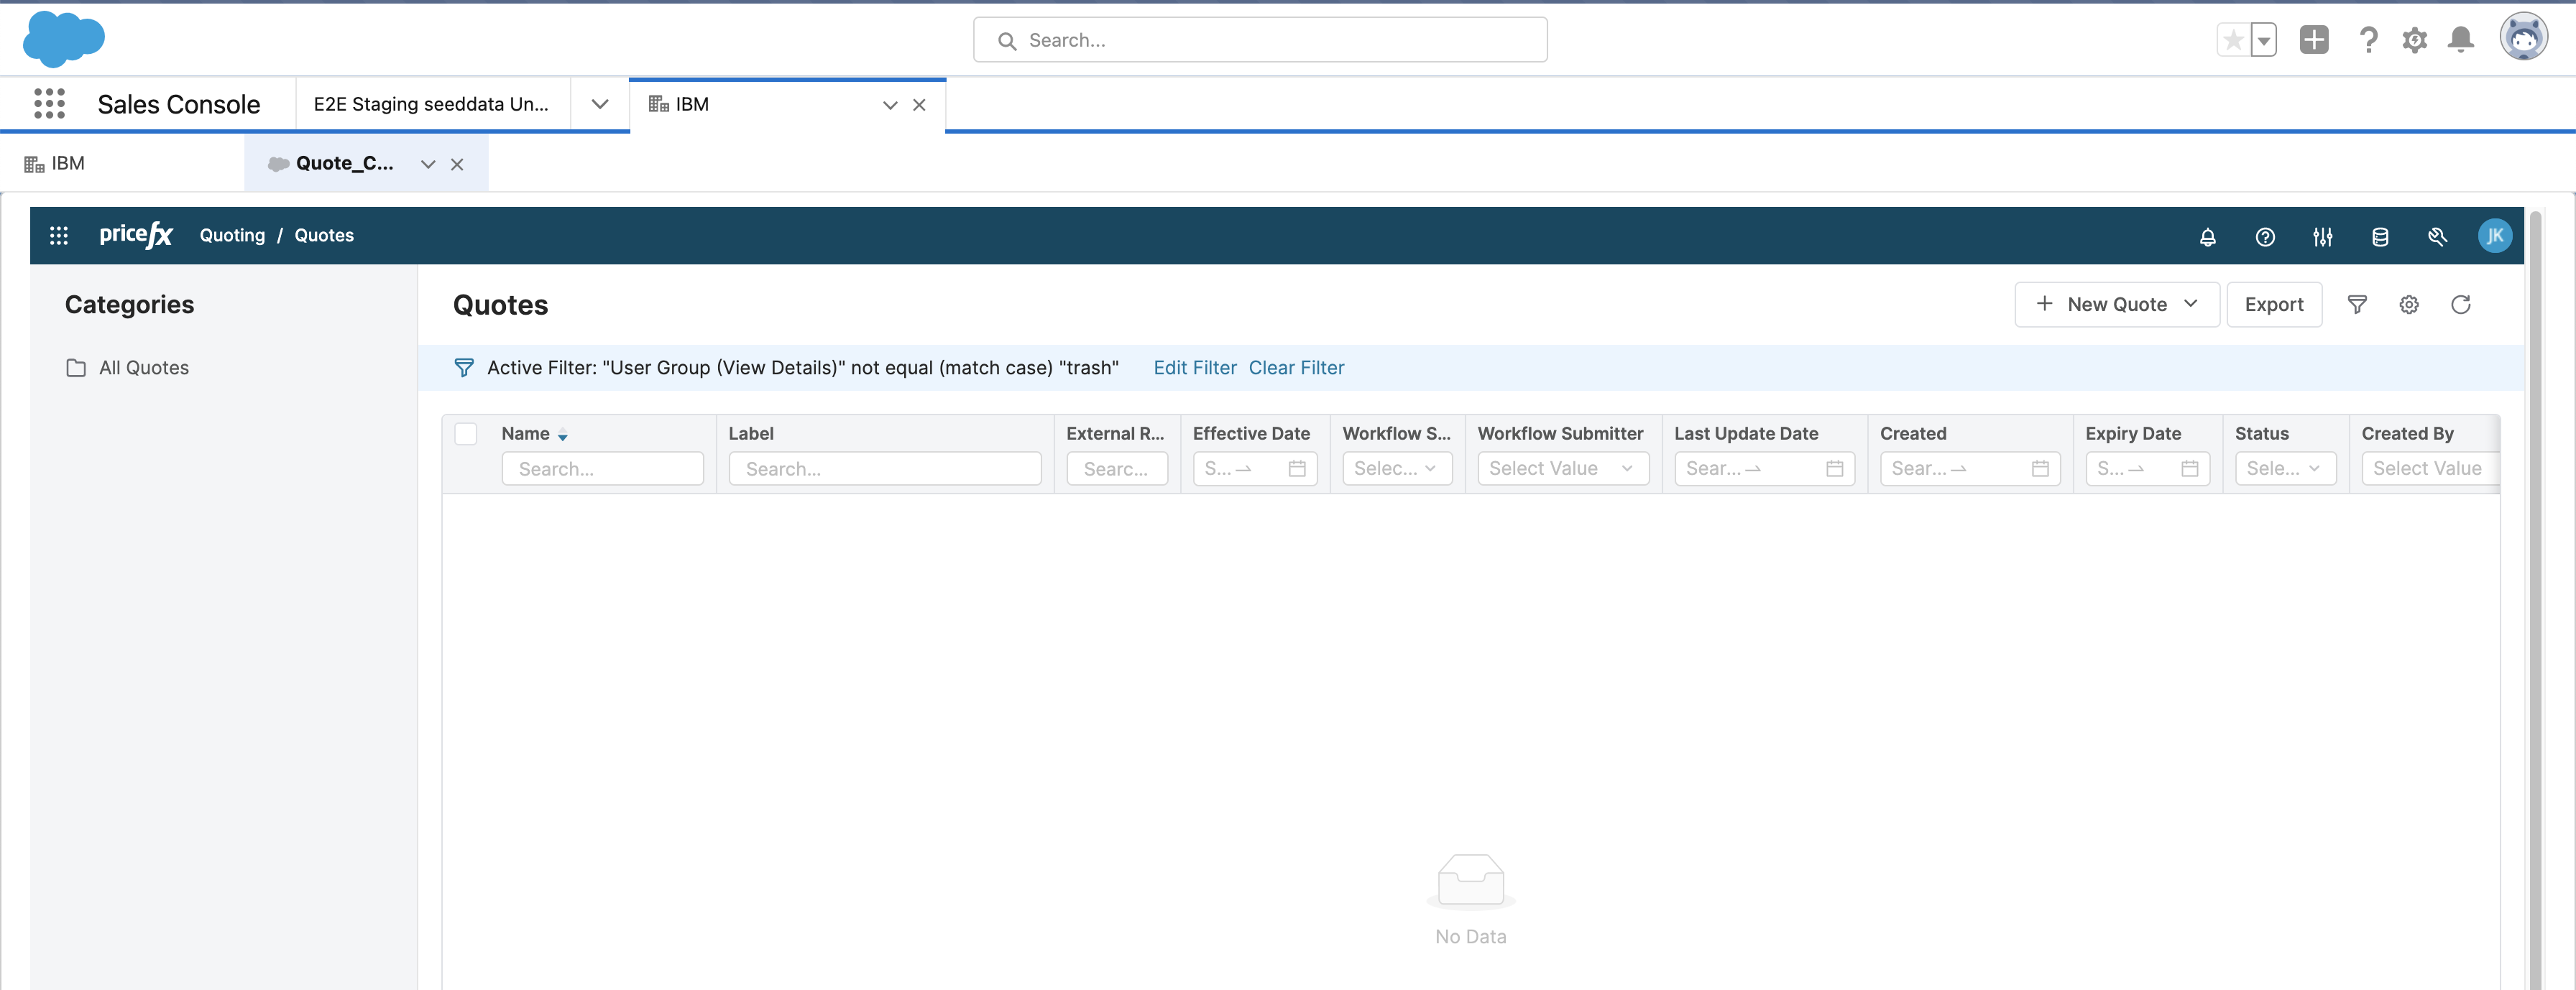
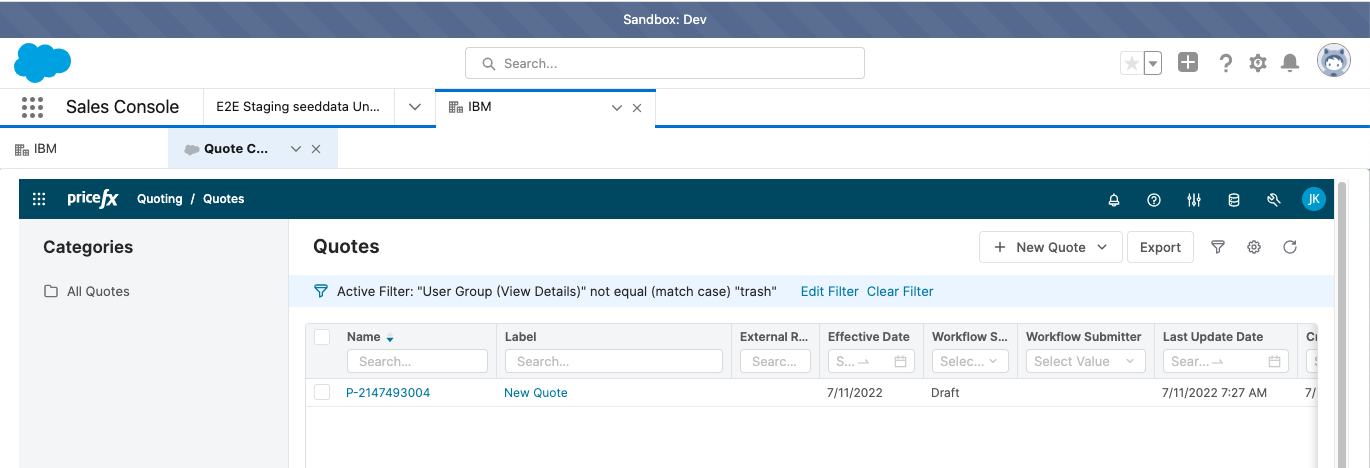
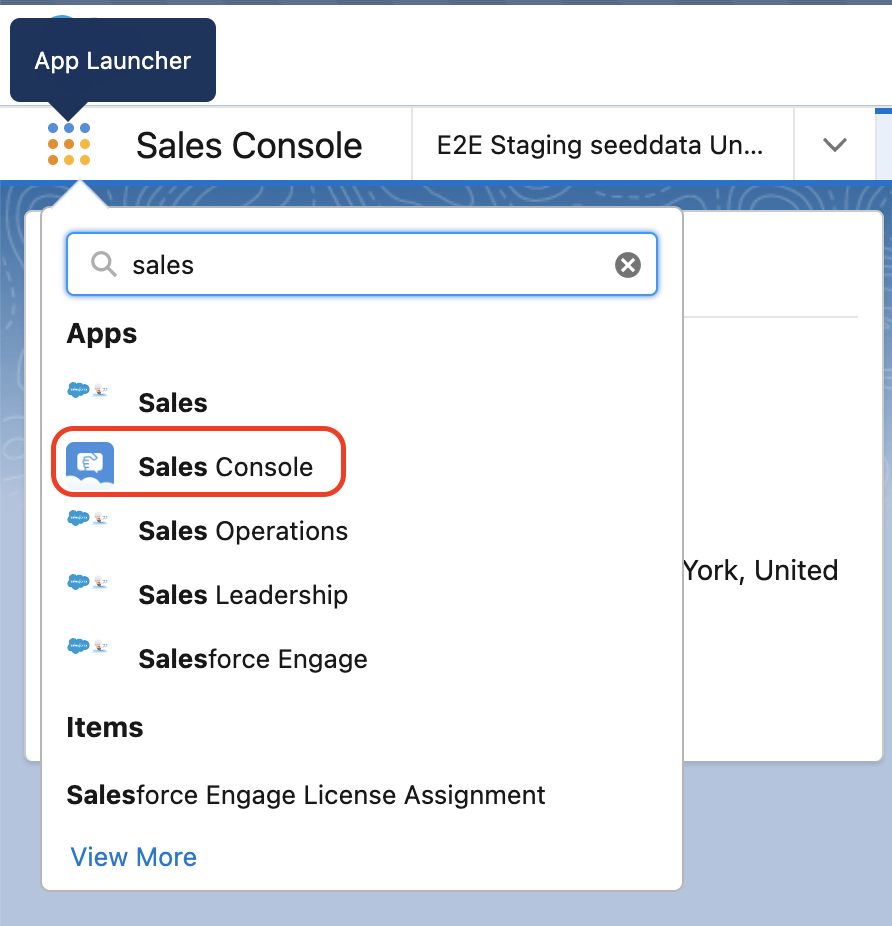
Switch to the Sales Console app in Salesforce.
Open some account and locate your new button. Check the functionality.