This page shows how to integrate Pricefx Unity to the MS Dynamics Account/Opportunity page using IFrame.
-
Open MS Dynamics and locate the gear icon in the top-right corner of the interface.
-
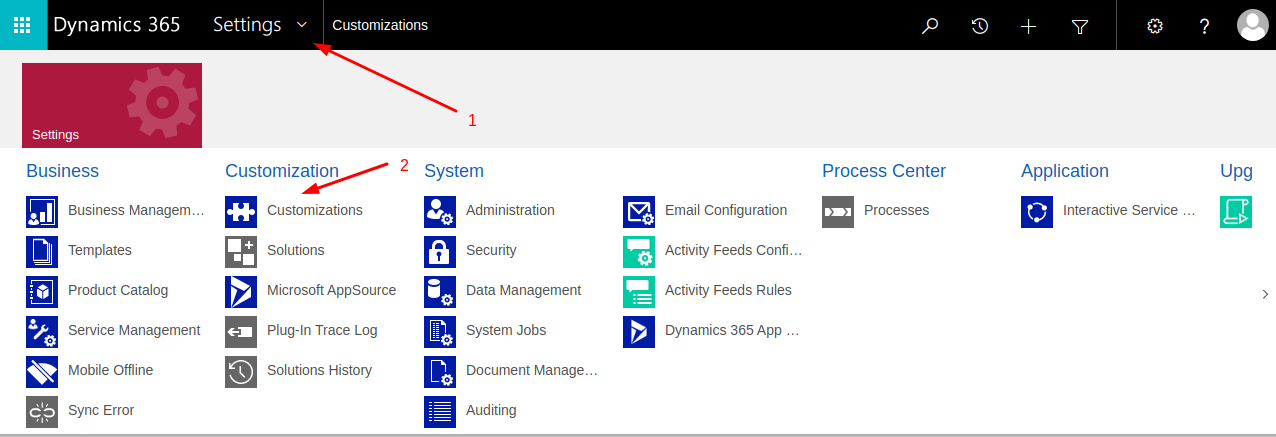
Click the gear icon to access the Advanced Settings menu.
-
In the Settings dropdown, locate and select the Customizations option from the Customization list.
-
In the Search field, type either “Opportunity” or “Account” to initiate a search.
-
In the list, locate “Opportunity” or “Account”.
-
Click Opportunity or Account which appeared in the list and click Forms.

-
Select Form in which you want to add iFrame.
The same library can be used for Account and Opportunity Pages.
PFXRegisterListenerandPFXInputsLookupmust be unique for every library. -
Add JavaScript code to the MS Dynamics library.
-
In the opened Form open the JavaScript library tab.
-
Click Add Library.
-
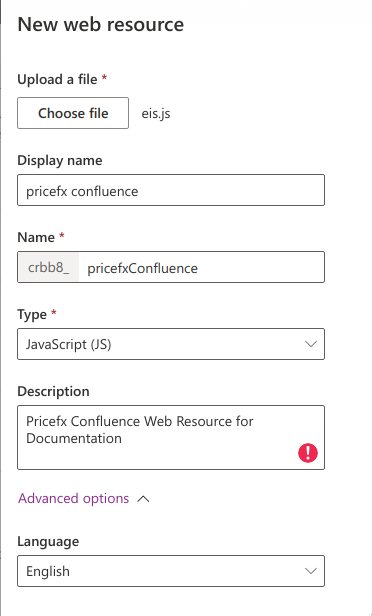
In the modal window, click New web resource.
-
Fill in the form and upload the JavaScript file (Edit Code).
const TAG = "pricefx-js.dynamics_crm";

var PFXRegisterListener = function () {
  //TODO: Change to unique name
  if (window.XMLHttpRequest) {
    //for browsers other than ie
    window.parent.parent.addEventListener("message", PFXInputsLookup, false); //TODO: change PFXInputsLookup
  } else {
    window.parent.parent.attachEvent("onmessage", PFXInputsLookup); //TODO: change PFXInputsLookup
  }

  window.parent.document.getElementById("IFRAME_<iframe name>").style.height = "1000px"; // TODO: Edit height if needed
};

var PFXInputsLookup = function (event) {
  //TODO: Change to a unique name and update all occurrences
  if (event.origin != "https://<customer cluster domain name>") {
    //TODO: add customer cluster domain name
    return;
  }
  console.debug(`[${TAG}] Event received`, event);

  const jsonData = JSON.parse(event.data);
  const { action, data } = jsonData;

  switch (action) {
    case "executeScript": {
      if (typeof data === "string") {
        const newFunction = new Function(`return (${data})`);
        newFunction()().then((res) => {
          res.action = action;
          event.source.postMessage(JSON.stringify(res), event.origin);
        });
      } else {
        console.error(`[${TAG}] executeScript: parameter data should be type of string")`);
      }
      break;
    }
    default: {
      console.error(`[${TAG}] ${action}: actions do not exist`);
      const response = { action };
      event.source.postMessage(JSON.stringify(response), event.origin);
    }
  }
  return;
};
-
e. Click Save and Publish.
-
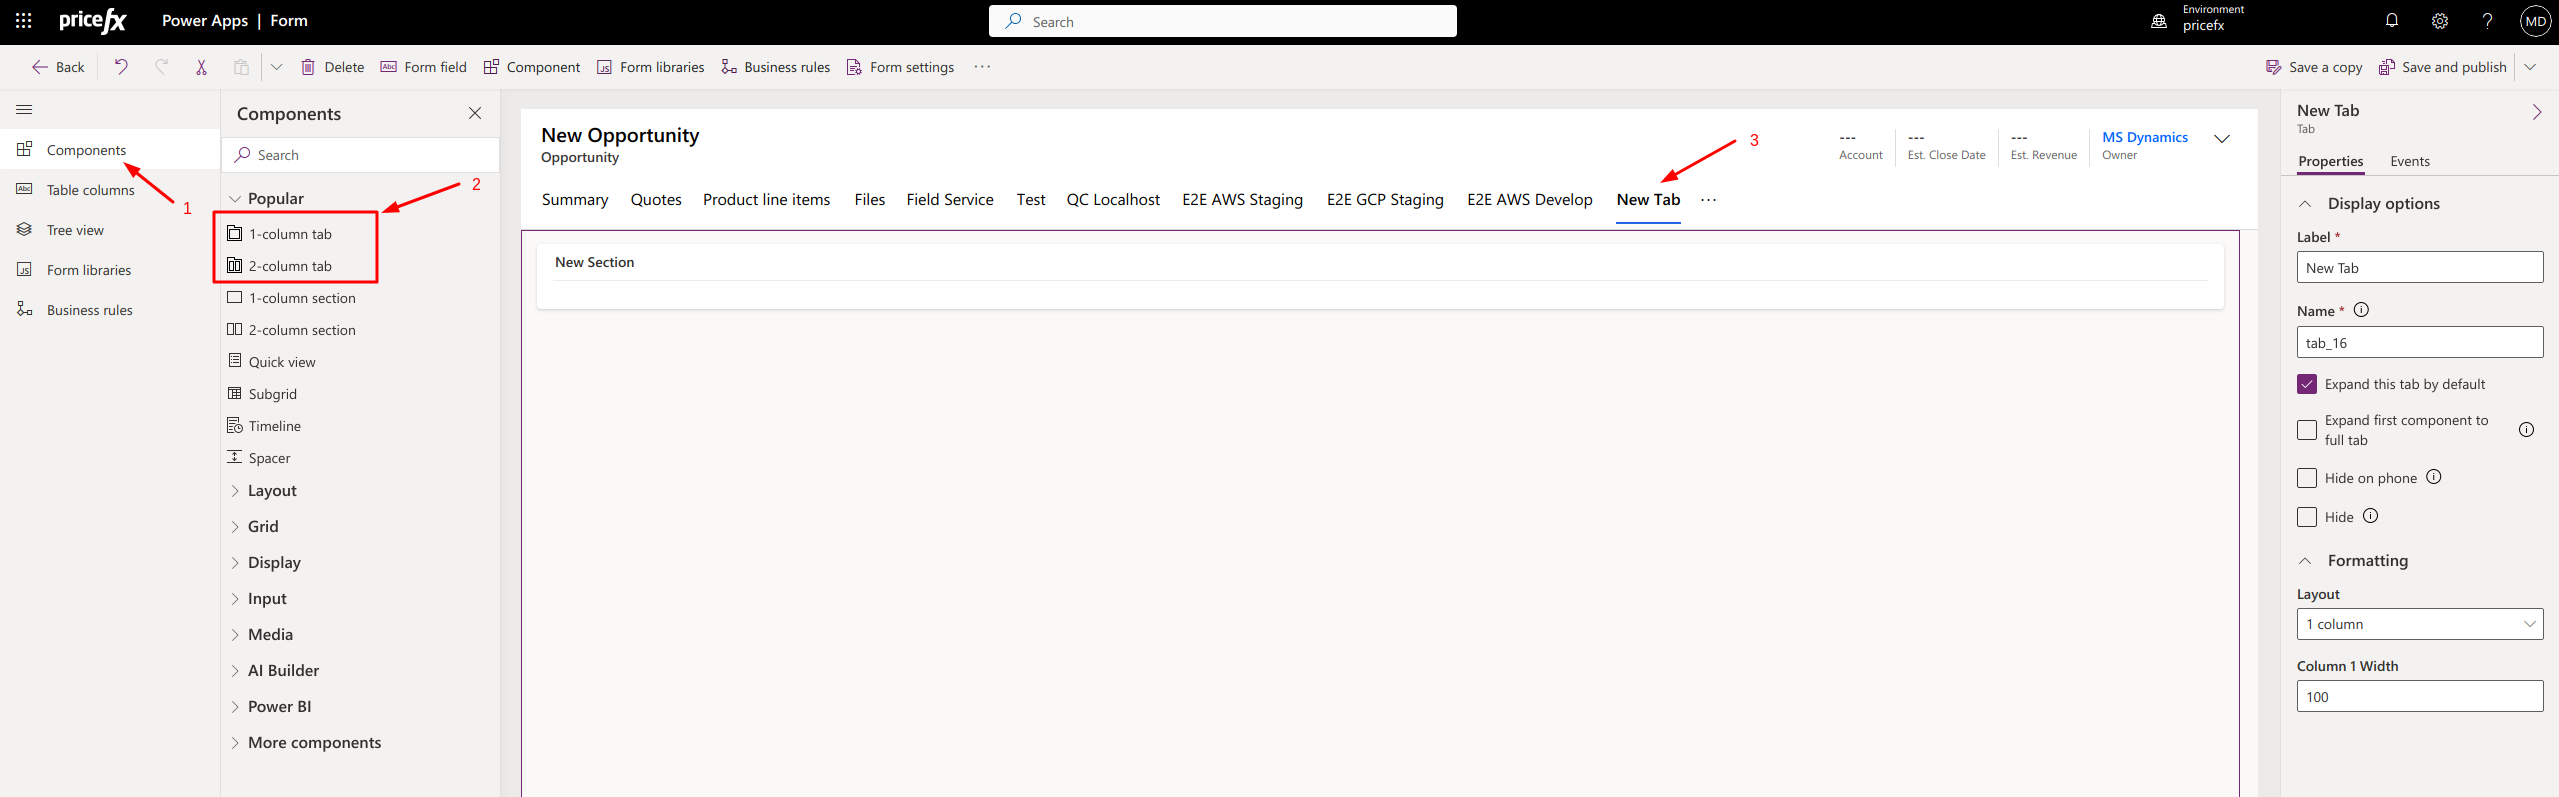
Add a new tab to Form (optional).
-
To locate an external website, use the Component search field or navigate to Display > External website.
-
Drag and drop the External website into the desired section.
-
A popup will appear next to the External website. In this popup, enter the following URL:
https://<customer cluster>.pricefx.com/pricefx/<partition>/saml/signon/<SAML configuration>/?RelayState=<relaystate>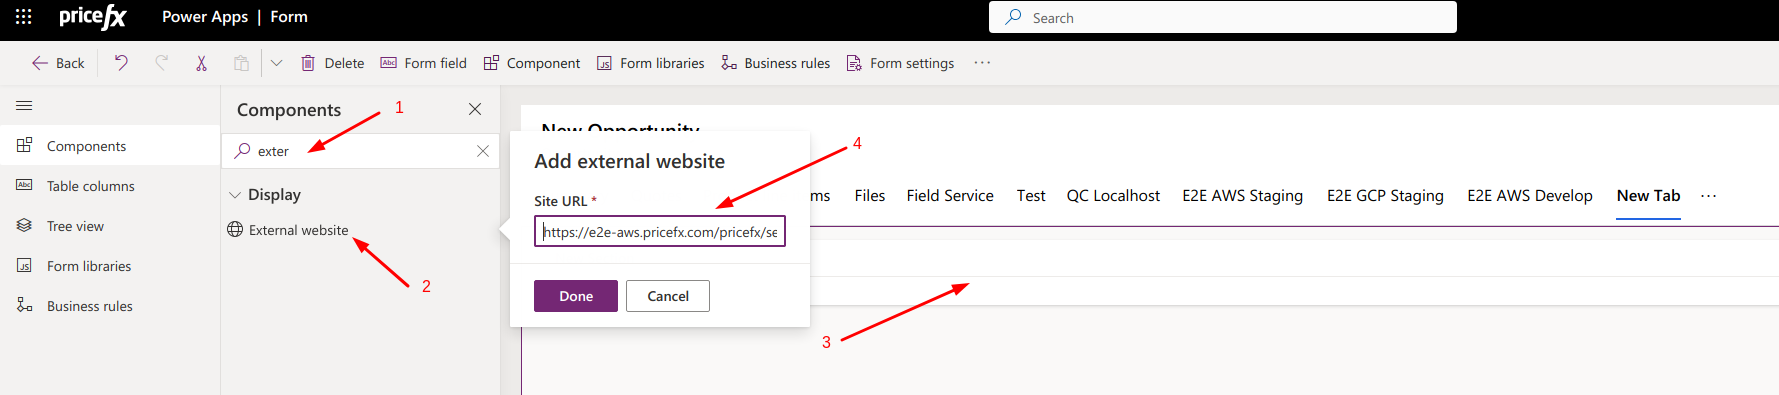
-
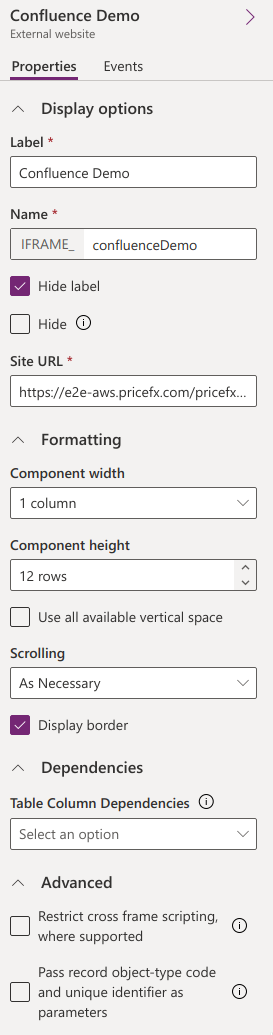
Modify fields in External Website:
-
Label (optional)
-
Name – Should be the same as in JavaScript code.
-
Site URL – If URL was not added during Add external website, then it can be added now:
https://<customer cluster>.pricefx.com/pricefx/<partition>/saml/signon/<SAML configuration>/?RelayState=<relaystate> -
Restrict cross frame scripting where supported – Should be unchecked.
-
-
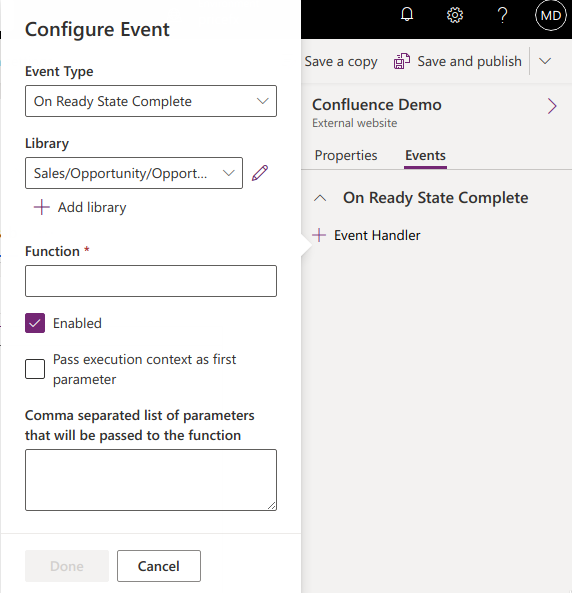
Click the Events tab in External website sidebar.
-
To add a Pricefx event, click 'Event Handler.
-
Add Library that you created in Step 8.
-
Insert Function name that you created instead of
PFXRegisterListener.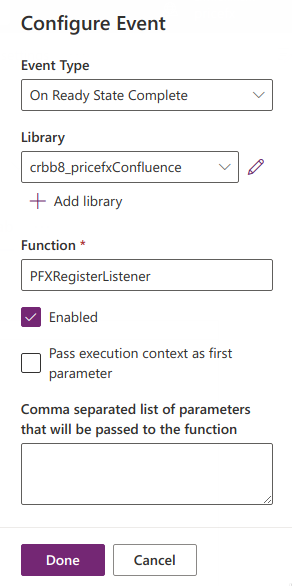
-
Now click Save and Publish and verify if iFrame works.