|
Aim of this article |
Explain how to download data from a Pricefx partition using the PlatformManager’s Data Download feature. |
|---|---|
|
Related sections |
|
|
Required permissions |
|
|
Prerequisites |
The existing data you want to download from the Pricefx partition. |
Perform the following steps to download the desired data from the specified Pricefx partition:
These steps describe creating a new Data Download, where PlatformManager guides you through one step at a time. When you edit a download that already exists, the same content is presented as tabs instead: each step below becomes a tab you can open in any order, and Save applies the changes from every tab at once. Switching tabs with unsaved changes prompts you to confirm and saves them first. Entity Type and Entity Name are read-only in an edit, and for an automated download the Name is read-only too.
STEP 1 – Entity Type
-
Navigate to Partitions > select partition > Data Management > Downloads > click Create Data Download to open the Edit Data Download dialog.
-
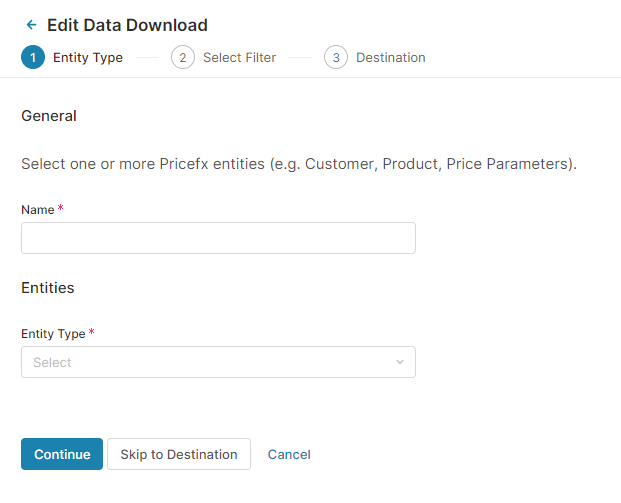
Provide Data Download Name and select Entity Type:
-
Name: Enter a name for the Data Download that describes the download job.
-
Entity Type: Select from the dropdown menu. This determines the type of data (e.g., Customer, Product, Price Parameters, Datamart) that will be downloaded.
-
Entity Name: Select the particular table within the entity.
-
Create New Table: Opens a dialog where you can create a new table for the specified entity. Available for Company Parameters, Customer Extension, Product Extension, Seller Extension tables.
-
-
Click Continue to move to next step (Filter), or click Skip to Destination to skip filter settings.
STEP 2 – Fields
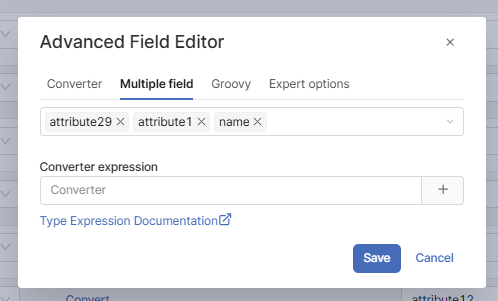
Here you can define, map, and optionally rename data fields from the source (entity within Pricefx) to the destination (exported) file structure. You can also remove or add column mappings as needed. Optionally, data conversions (including, for example, concatenation of multiple fields) for specific fields can be applied. This step can be skipped if not required.
Column headers in the exported file use the field’s Label, which is the same human-readable name the field has on the partition, rather than its technical name. Both sides of the mapper show the label, so what you see in Pricefx Columns is what the header in the exported file will say.
On a Product entity, for example, the technical field sku is exported as Product Id and label as Product Name, and an extension field such as attribute1 is exported under the label given to it on the partition, for example business_unit.
When a field has no label of its own on the partition, its label is the technical name, so the exported header shows that name unchanged, for example attribute8. To get a readable header in that case, set a label for the field on the partition, or rename the column in this step.
STEP 3 – Filters (Optional)
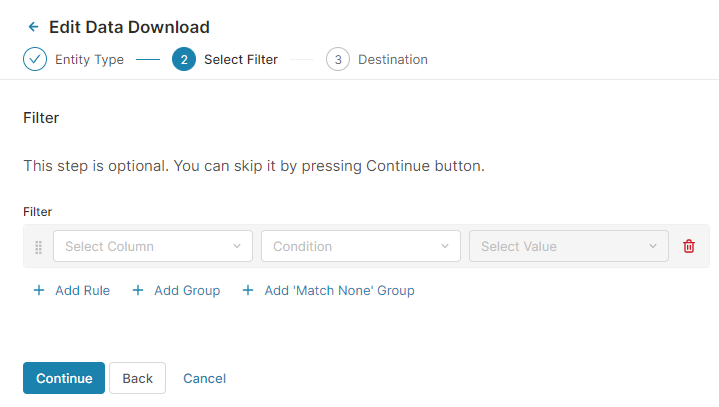
Filter tab: To download specific subsets of data, you can apply filters in this step. Filters allow you to narrow down the data to be downloaded based on specific criteria. For more details about filtering, see the Filtering article. After the filter is set, click Continue.
Supports also lastUpdateDate, lastUpdateByName, createdBy system fields.
STEP 4 – Destination
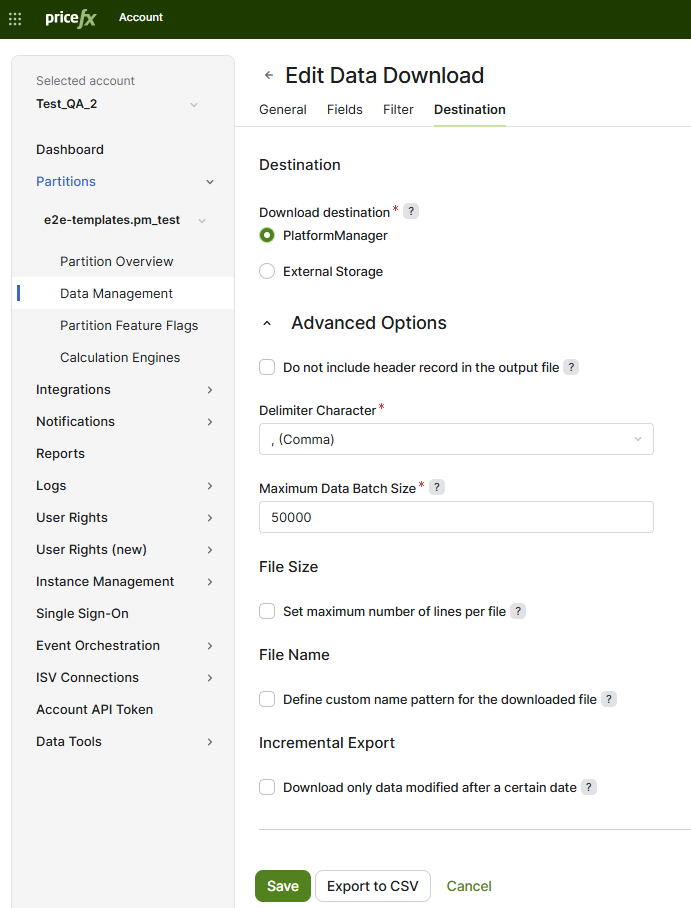
Defines where the data will be stored after the download.
-
Download Destination:
-
PlatformManager: The data will be stored within the internal storage of the PlatformManager. Keeps data within the Pricefx environment.
-
External Storage: Allows data to be stored in an external storage managed by an independent service vendor. Ideal for scenarios where data needs to be accessed by external systems.
-
-
Existing Connection: Select a connection for an existing external storage from the dropdown menu. You can manage these connections in Data Management > Connections tab.
-
New Connection button: If no suitable existing connection is available, you can set up a new connection by clicking the New Connection button.
-
Save button: Saves the Data Download configuration with the selected destination option.
-
Export to CSV button: This option allows you to export the data directly into a CSV format.
Advanced Options
Expand Advanced Options in the Destination step to control the format and size of the exported file. The section is collapsed by default, and the settings apply to a manual download in the same way as to an automated one.
-
Do not include header record in the output file – Decide whether to skip the header row.
-
Delimiter Character – Required. Select the character that separates the columns. The default is , (Comma). Choose Custom Delimiter to enter a character that is not in the list.
-
Maximum Data Batch Size – Required. Specifies how many data items are processed in one load. If the selected entity has more items, it will be split into multiple loads to optimize performance. The result is presented as a single record in the history of runs.
File Size
-
Set maximum number of lines per file – If the maximum is reached, the download is split into multiple files. Enter the limit in Max. Number Of Lines Per File.
-
Add file counter suffix when multiple files are exported – The exported files are numbered.
File Name
-
Define custom name pattern for the downloaded file – Enter the pattern in Downloaded File Name. You can combine text with tokens that are replaced with actual values:
[object-type]for the exported object type,[object-name]for the object name of extension objects, and[timestamp]for the time of export. Leave the field blank to use the default file name. Set Timestamp Format Used In File Name to control how the timestamp is rendered.
Incremental Export
-
Download only data modified after a certain date – Restricts the export to records changed since a given point. Choose what to include in Data To Be Downloaded. If you choose Data modified after date in custom timestamp column, select a column in Custom Timestamp Column Name. The download writes the export time into this column, so select a column reserved for this purpose. For details, see How to Create Automated Data Download.
Now you can run the download job from the Data Management > Downloads table. See Downloads | Available options.
To schedule the Data Download, see How to Create Scheduler.