Our goal will be to clone the Git repository to our local machine.
-
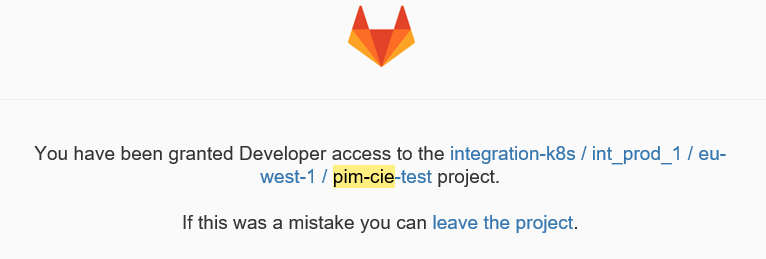
Once your integration instance has been created, it will be linked to a project in Gitlab and you will receive an email with the following information:
2. Next, we need to connect to the Git repository that is linked to our IM instance. Go to gitlab.pricefx.eu and login with O365 login.
3. Next, search for our new Gitlab project by filtering on the IM instance name:

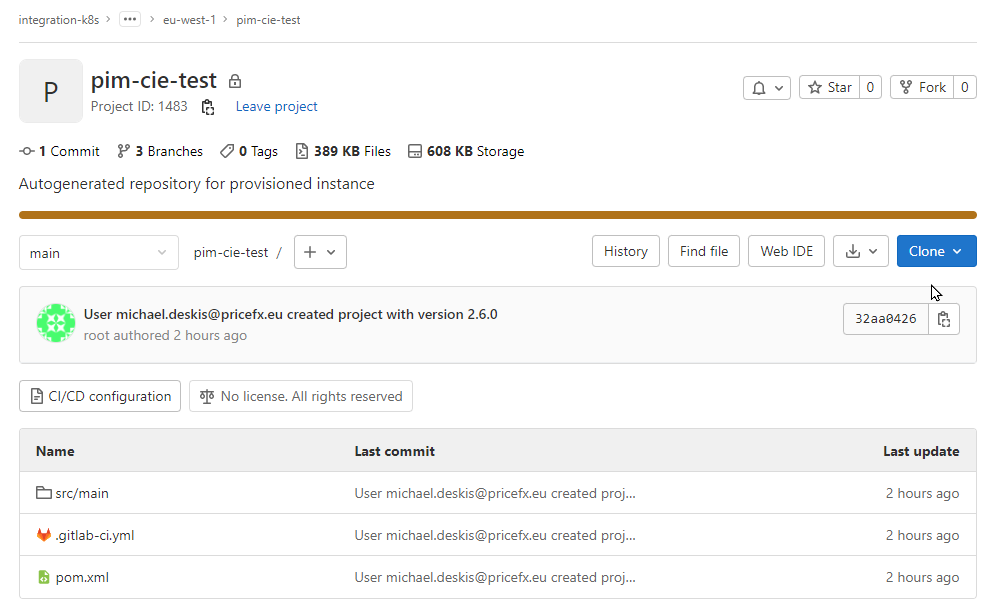
4. Your IM instance project should appear as:
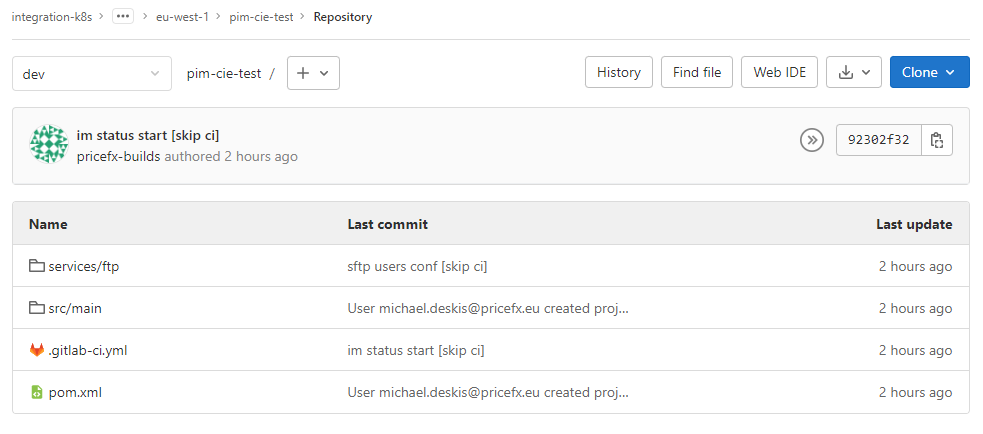
5. Switch to the dev branch and the following will appear:
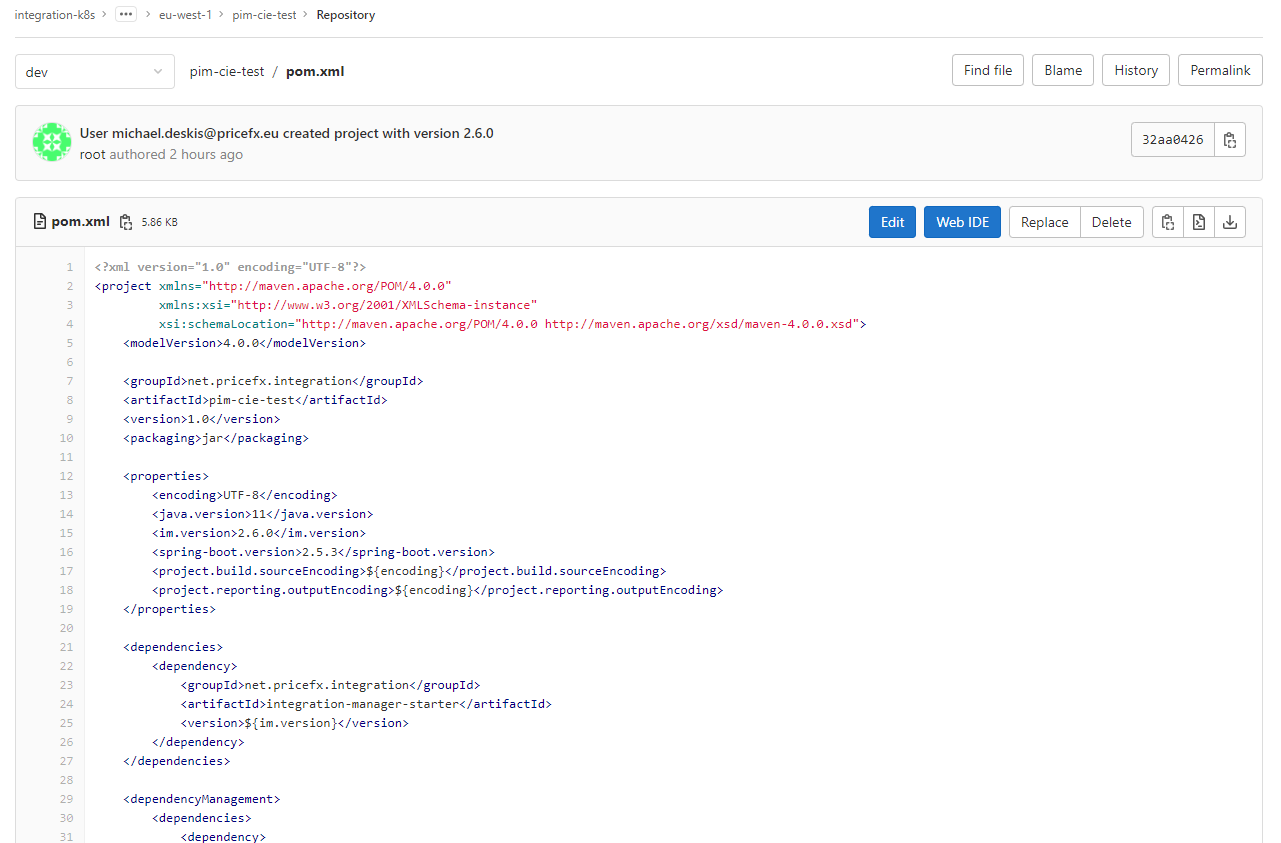
6. The POM file will be created automatically with all of the necessary dependencies. Click on the pom.xml to view this file:
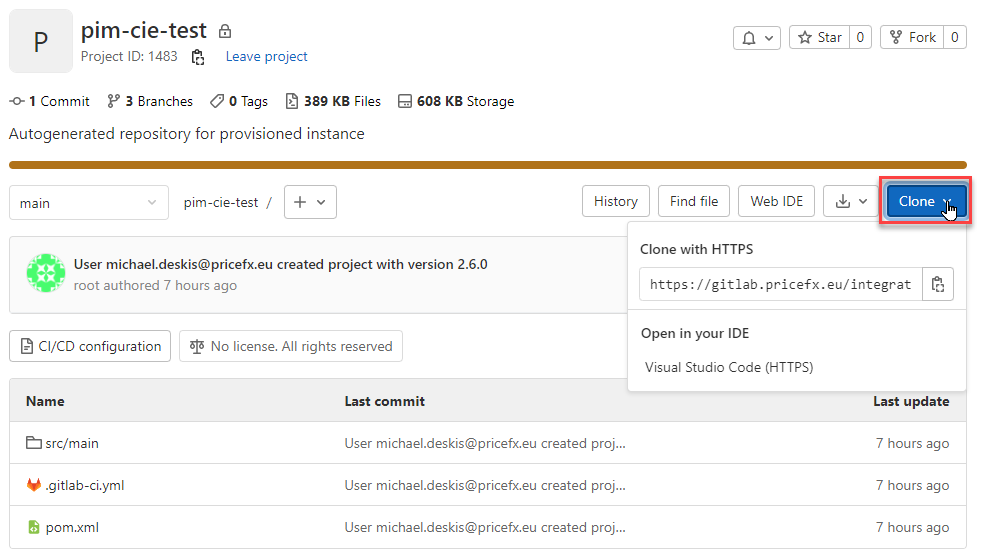
7. Next, we will clone our repository to our local machine. From Gitlab, click on the Clone option:
8. Then, in a command window, enter the following to clone our repository:
git clone https://gitlab.pricefx.eu/integration-k8s/int_prod_1/eu-west-1/pim-cie-test.git
In this example, the project name is “pim-cie-test” and we should replace this with the actual name of our Git project.
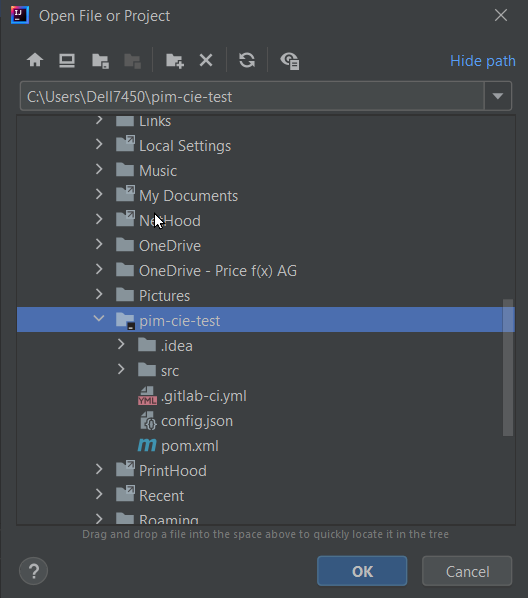
9. Finally, open IntelliJ and point it to the local copy:
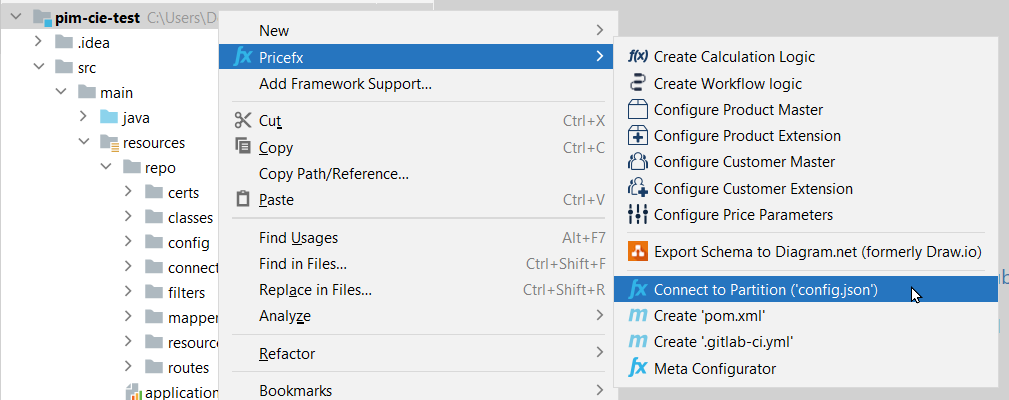
10. Next, we need to configure our access to our partition. Right-click off of our project and select Pricefx | Connect to Partition option:
11. On the panel that appears enter your partition name, login ID, password and the URL path of https://training.pricefx.eu .
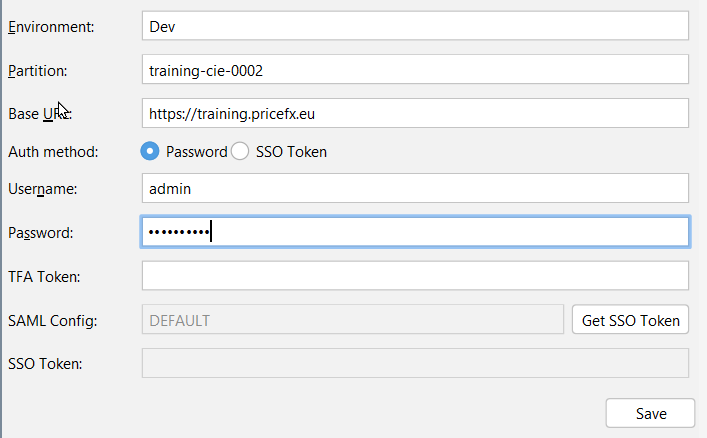
Click Save button.
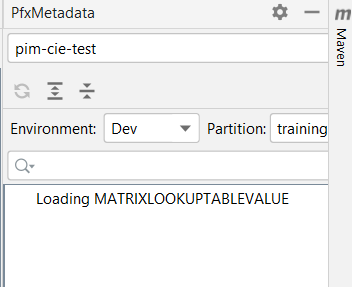
You should be able to verify that the partition connection is working properly by viewing the loading of the Pricefx metadata:
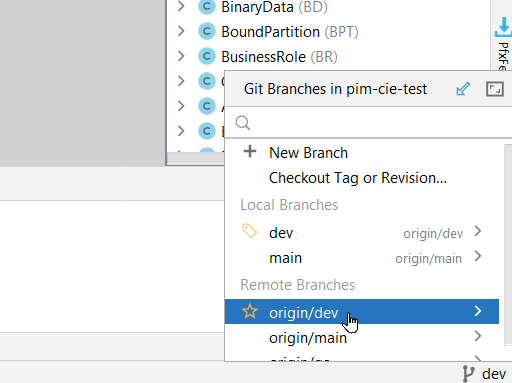
12. Next, we need to switch to the dev branch and this will sync our project with the Dev implementation that we created in PlatformManager.