Example test case.
Create Agent and Configure Context Linking
-
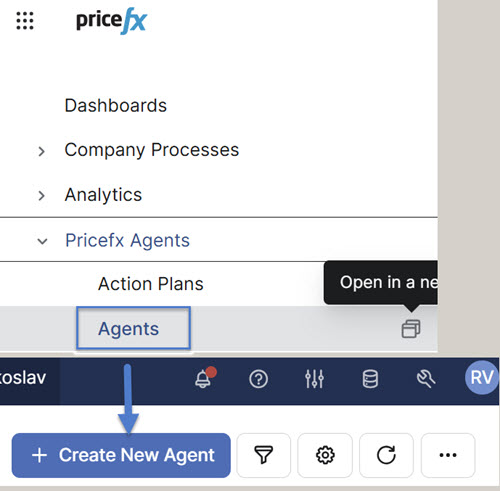
Go to Pricefx Agents > Agents.
-
Click Create New Agent.
Definition Step
-
Data Label – Enter any free text or name as desired.
-
Data Source – Select the Datamart from which the information will be retrieved.
-
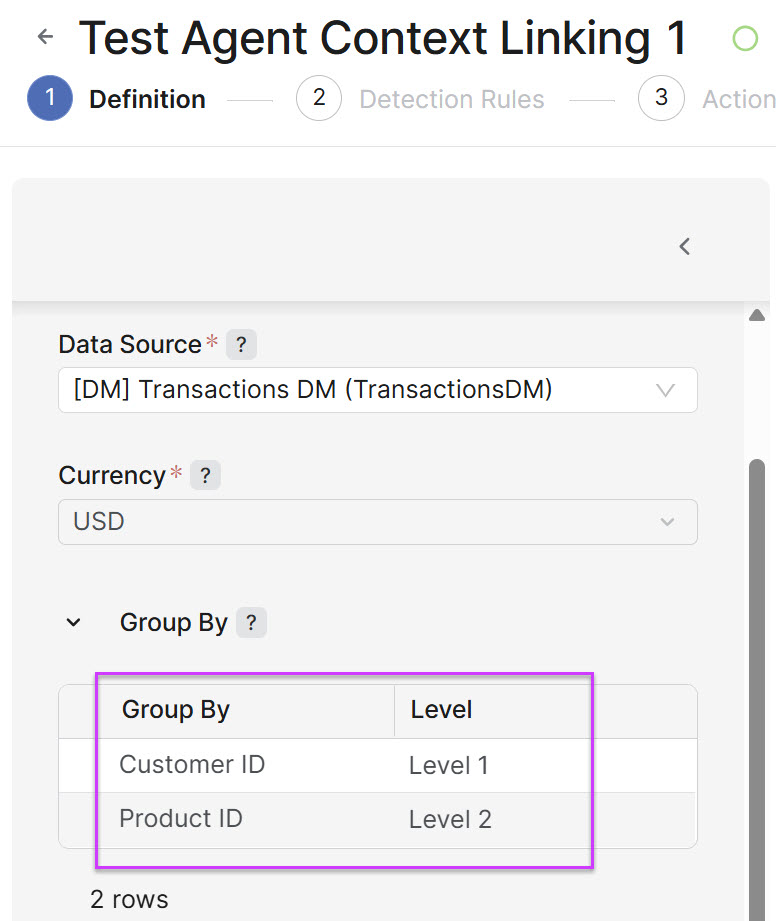
Group By – Lists the dimensions used to aggregate data (for example, customer, product, segment). Levels also determine how Actions are grouped and displayed. Level indicates the position of a grouping field in the hierarchy.
Maximum is 8 levels of grouping.
|
Group By |
Level |
|---|---|
|
Customer ID |
Level 1 |
|
Product ID |
Level 2 |
-
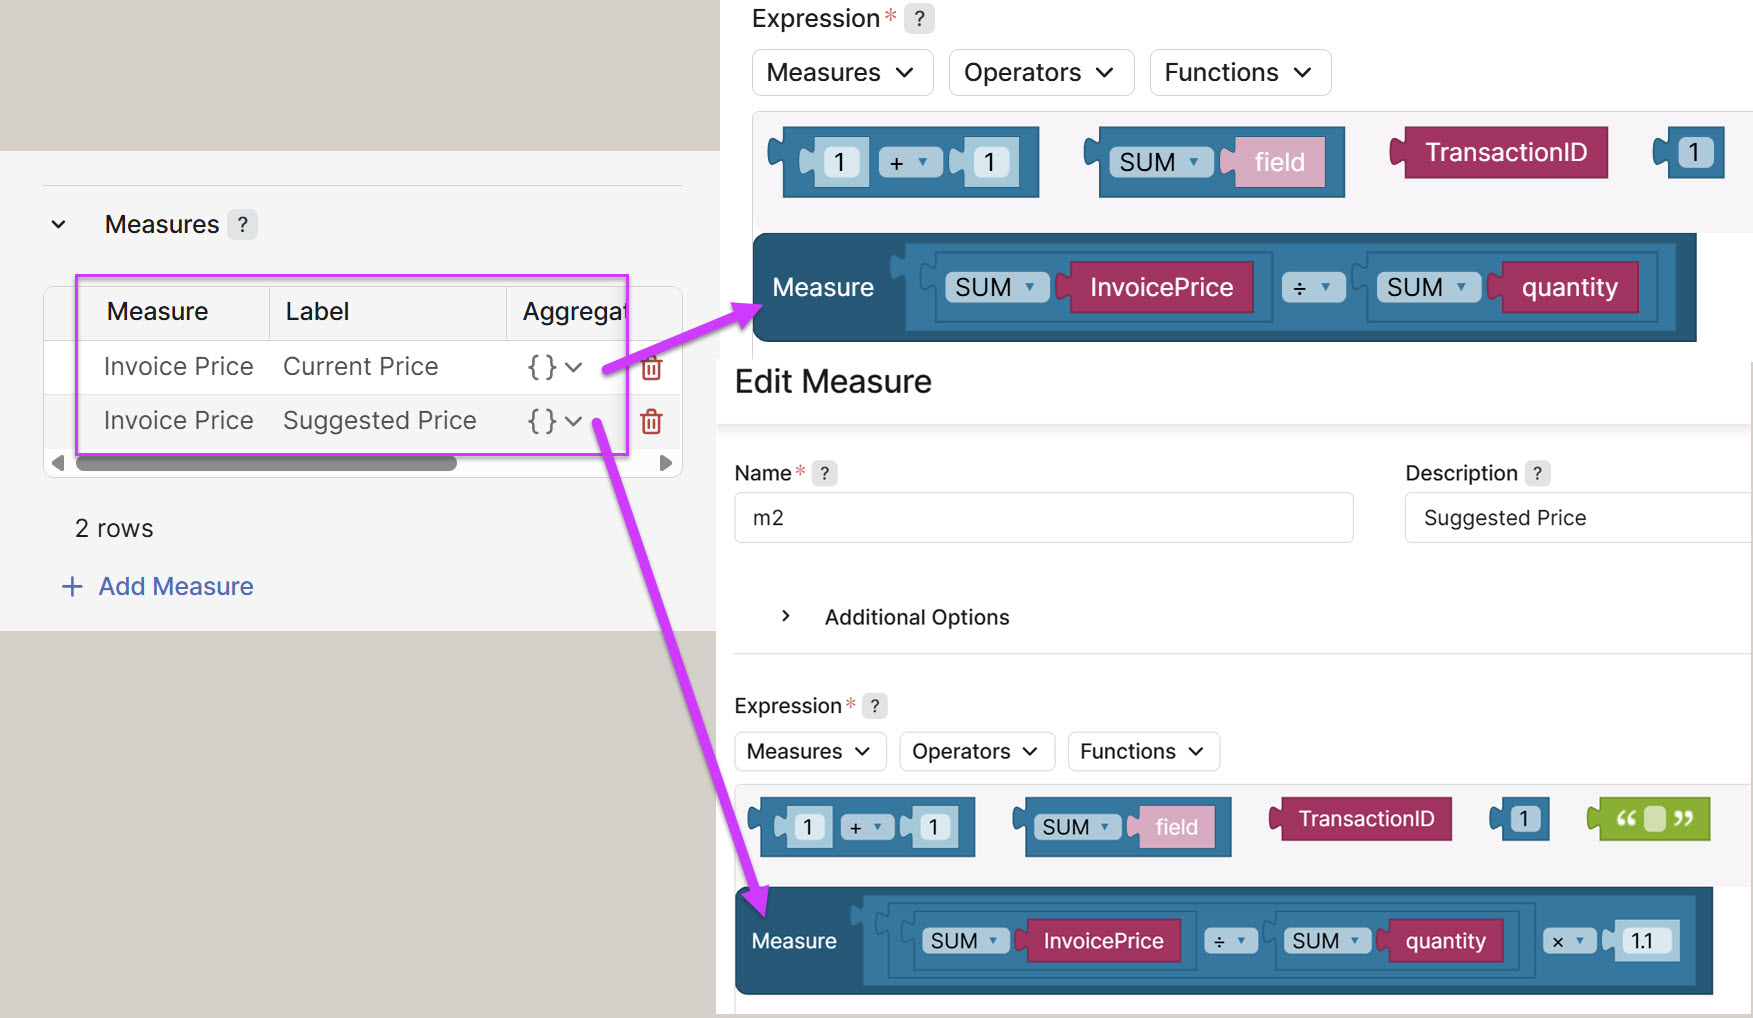
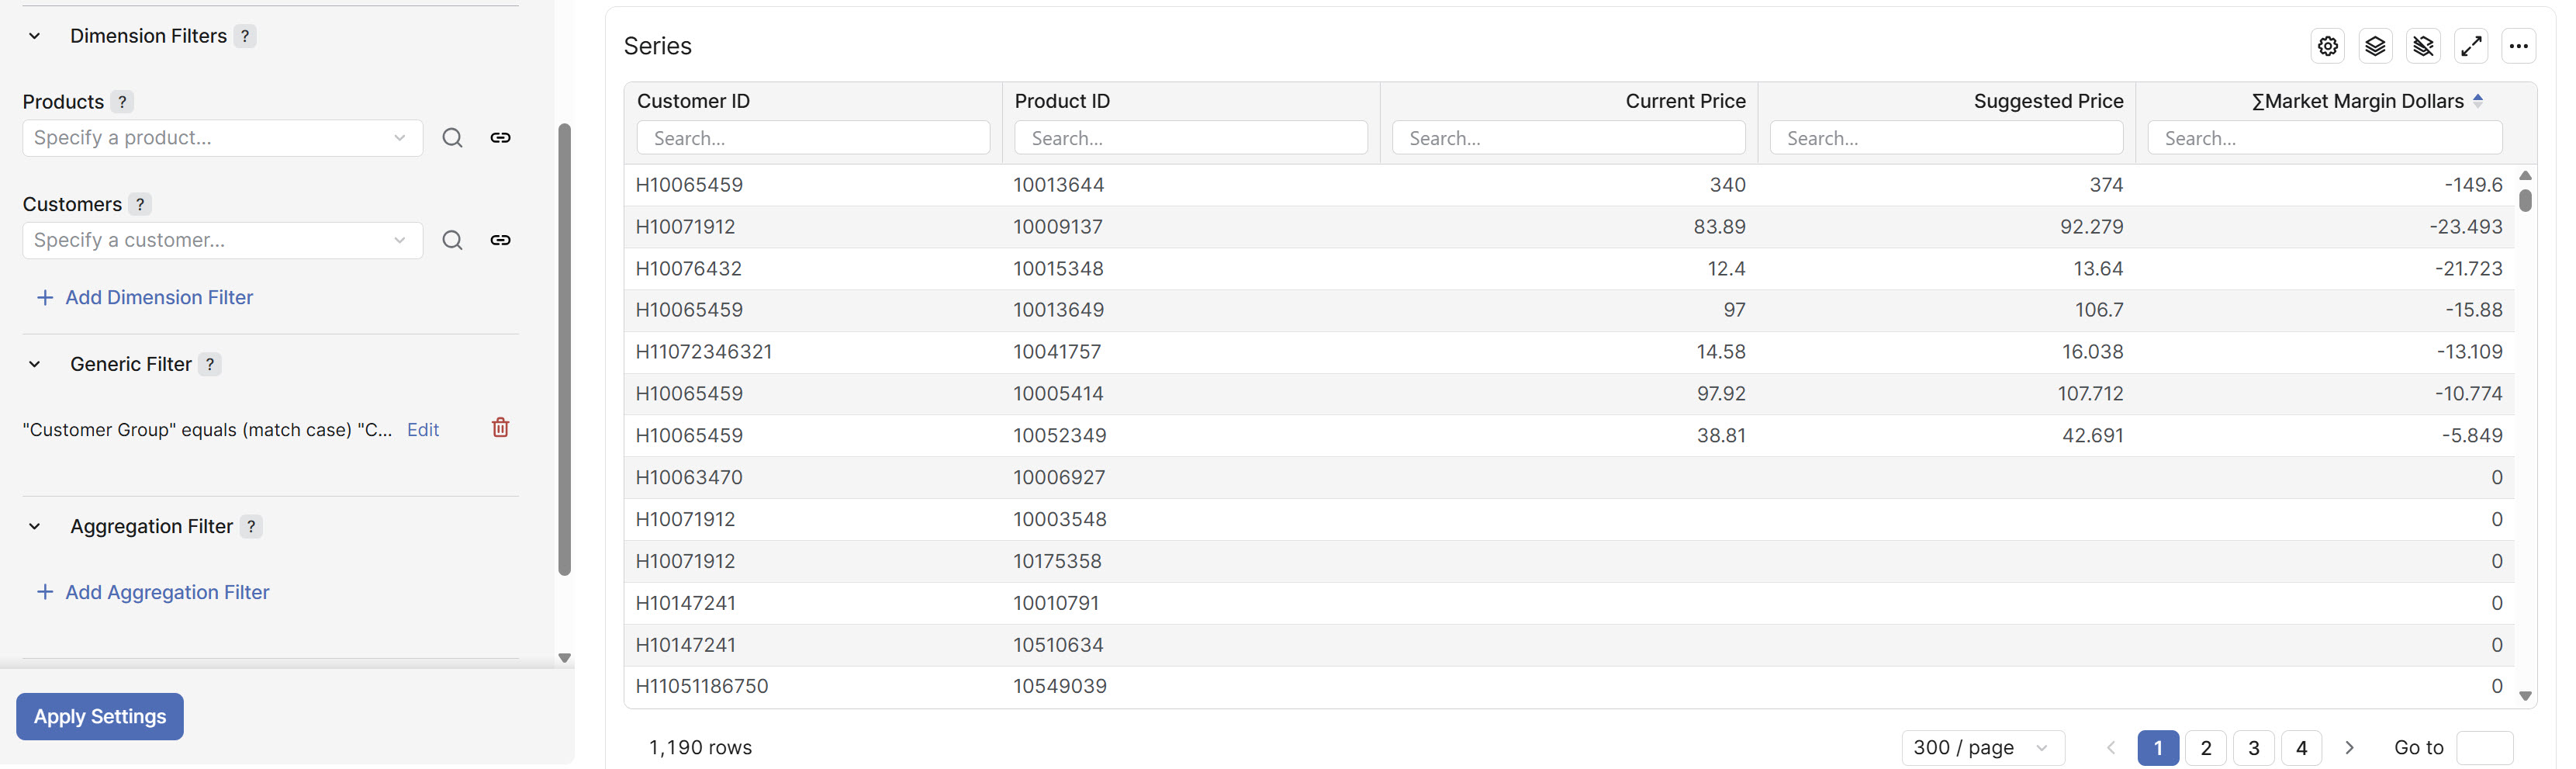
Measures – Defines calculated metrics (for example, revenue, margin %, discount %) that will later be used in Detection Rules and Impact Calculation.
|
Measure |
Label |
Aggregation |
Function |
|---|---|---|---|
|
Invoice Price |
Current Price |
{} |
Invoice Price per Unit. |
|
Invoice Price |
Suggested Price |
{} |
Current Price increased by 10%. |
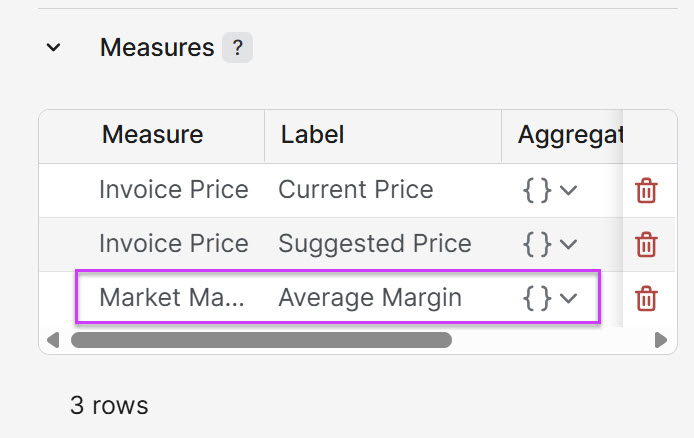
You may want to add another measure, such as Margin % or Average Margin, which can then be used for evaluation in the Detection Rule step.
-
Generic Filter – Narrow down the results to obtain a smaller, more manageable list of entries for evaluation.
Click Apply Settings.
Result
A list of items will be generated for evaluation in the next step. Keep this list as concise as possible by applying the Generic Filter and/or Product/Customer filters.
Detection Rules Step
-
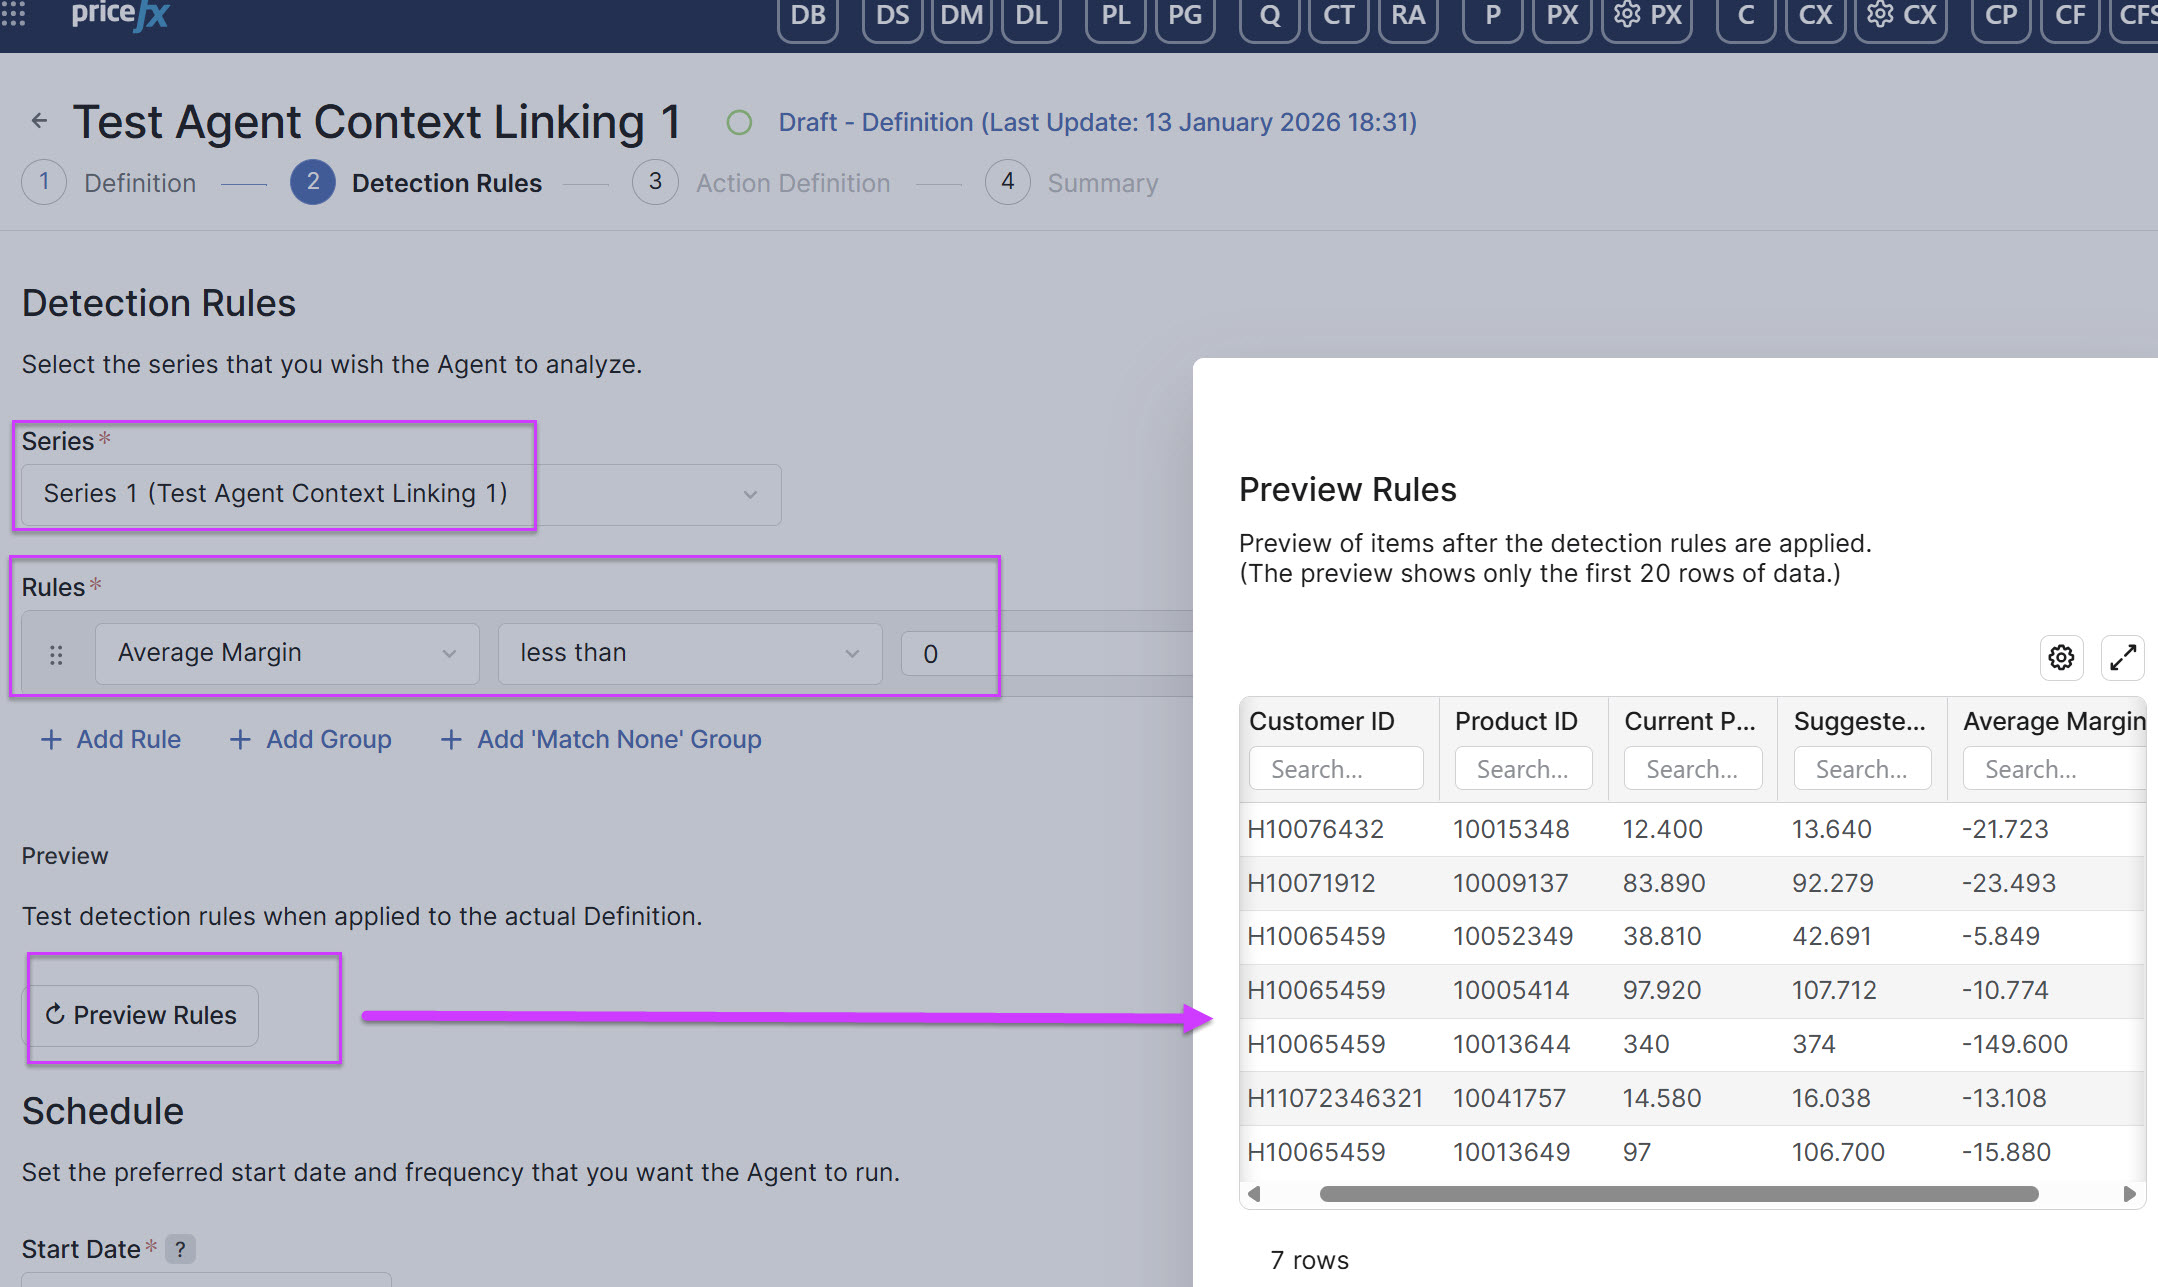
Series – Select your
Test Agent Context Linking 1. -
Rules – Create a rule that will be evaluated by the Agent. In this case, use the Average Margin defined in the previous step to identify all Customer–Product combinations with a negative margin. Based on this detection, the intended action is to increase prices for these combinations.
-
Start Date – Set it to a date and time in the near future. Ensure that the Agent creation process is completed and submitted before the specified start date.
-
Period – This setting is not critical; for example, you may configure it to run every 30 days (Day / 30).
Action Definition Step
-
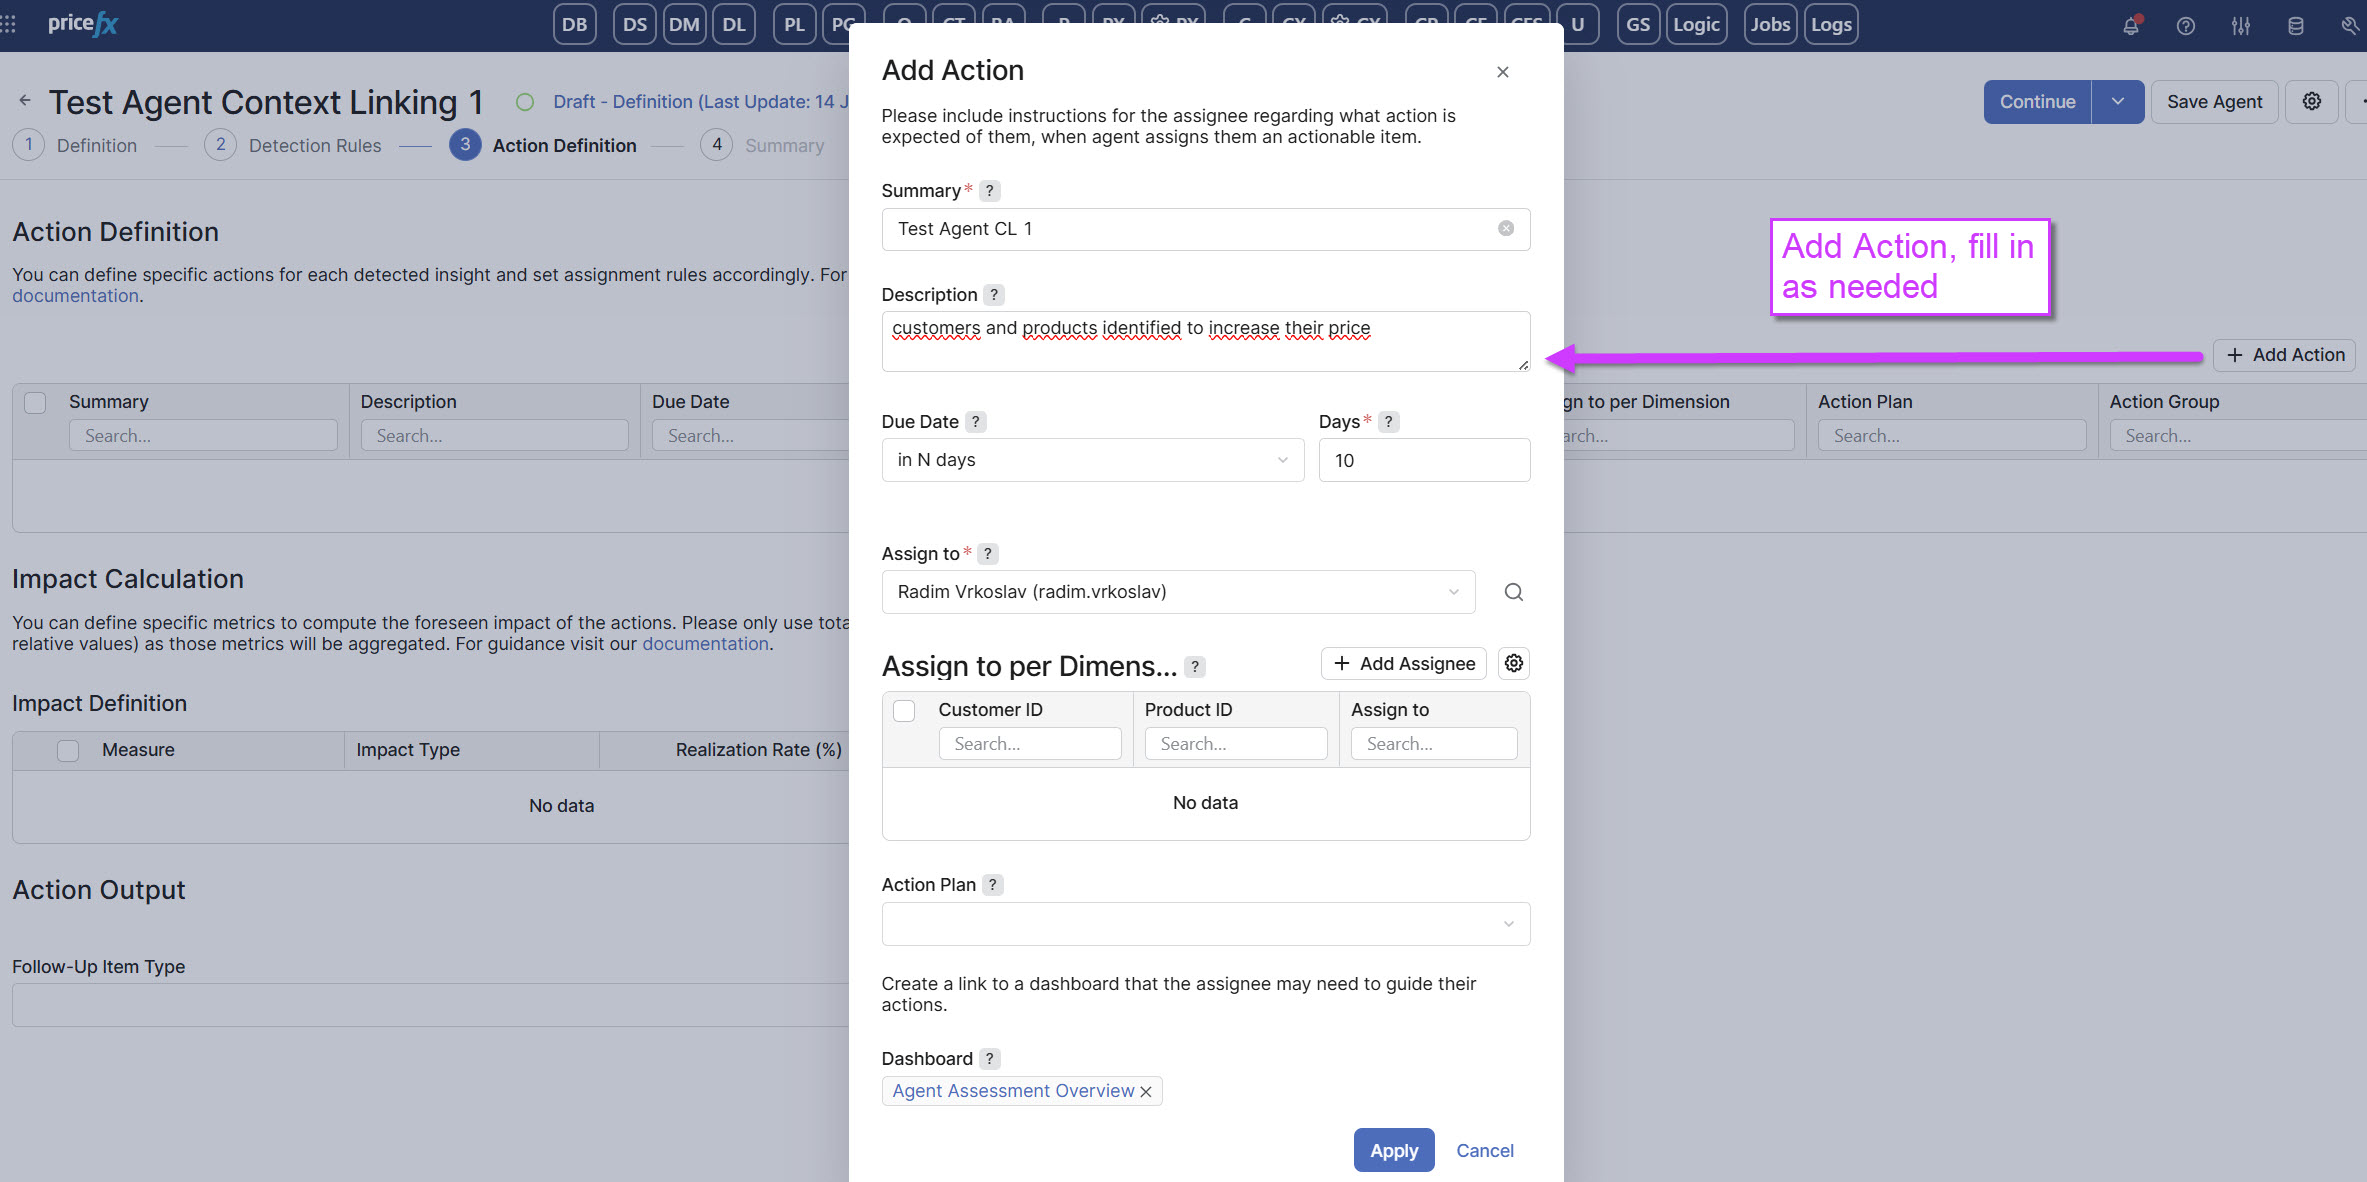
Action Definition – Click Add Action and complete the required fields as needed. See the example below.
-
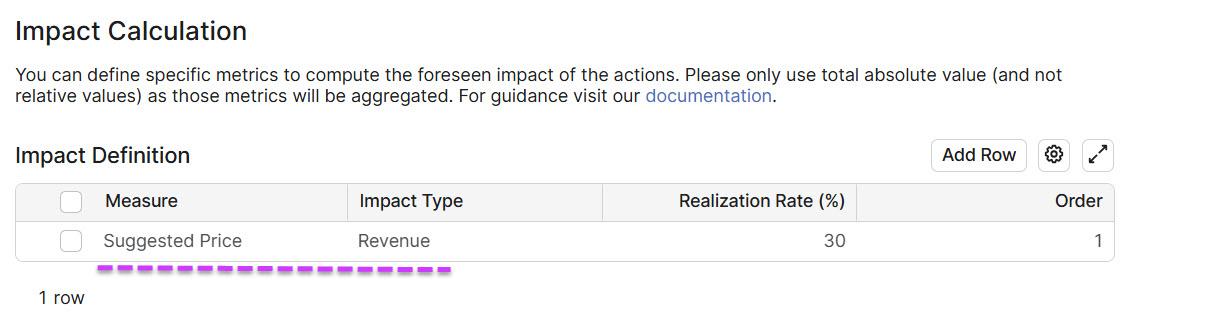
Impact Calculation – Click Add Row.
-
Measure >
Suggested Price. -
Impact Type >
Revenue. -
Realization Rate (%) > Enter an appropriate value, for example, 30.
-
-
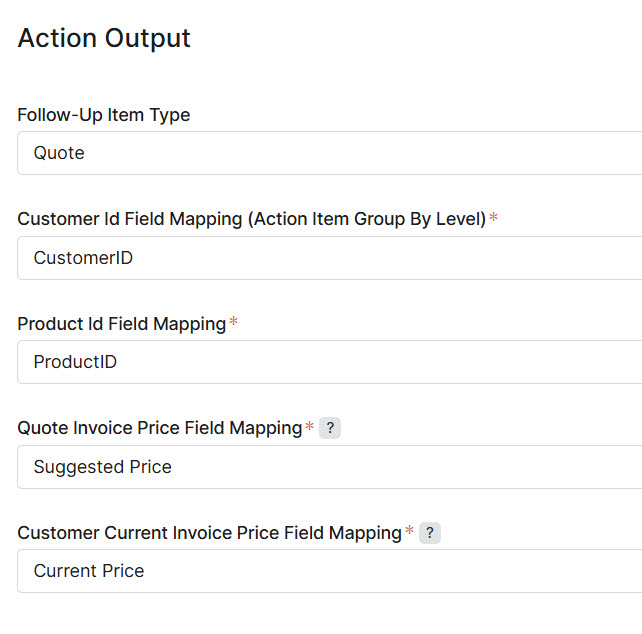
Action Output – Complete the fields accordingly, then click Continue.
-
Follow-Up Item Type >
Quote. -
Customer Id Field Mapping (Action Item Group By Level) >
CustomerID. -
Product Id Field Mapping >
ProductID. -
Quote Invoice Price Field Mapping >
Suggested Price. -
Customer Current Invoice Price Field Mapping >
Current Price.
-
Summary Step
-
Submit for Approval.
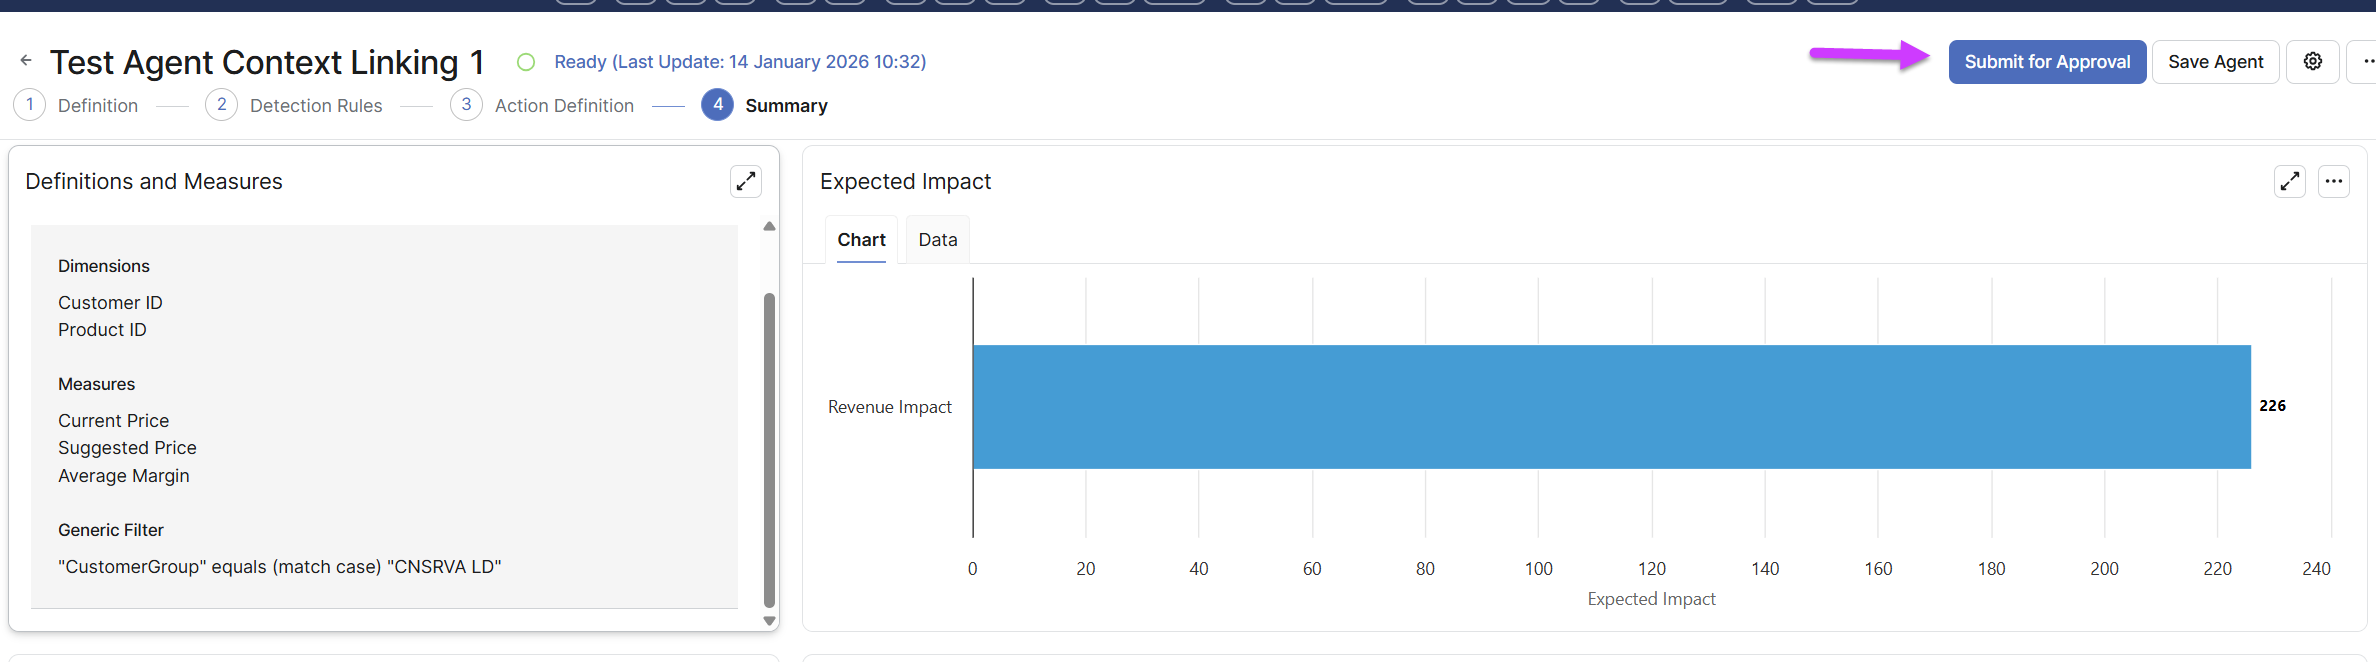
Wait until the Agent runs at the time configured in Step 2 – Detection Rules / Schedule.
Create Quote from Action Item
-
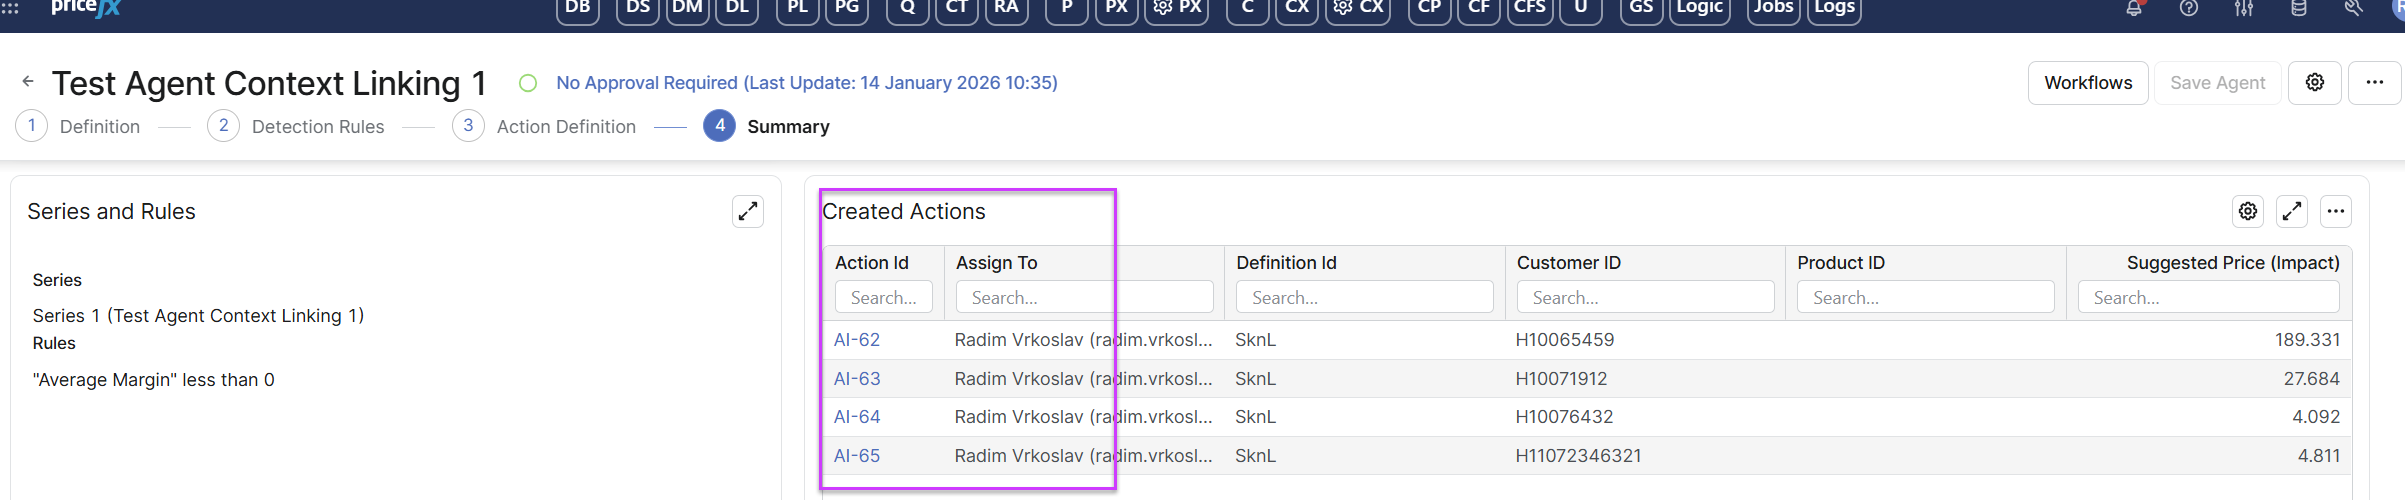
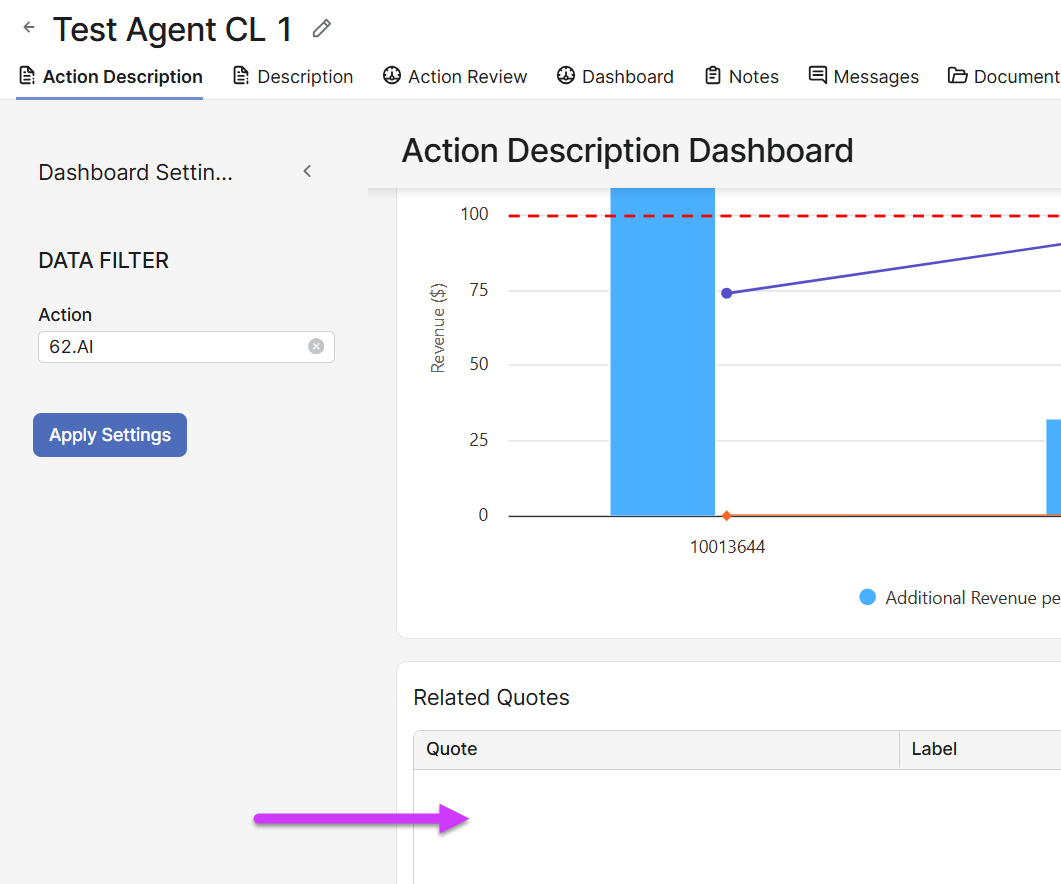
After the Agent runs and the Detection Rule is triggered, the Agent creates the corresponding Action Items.
-
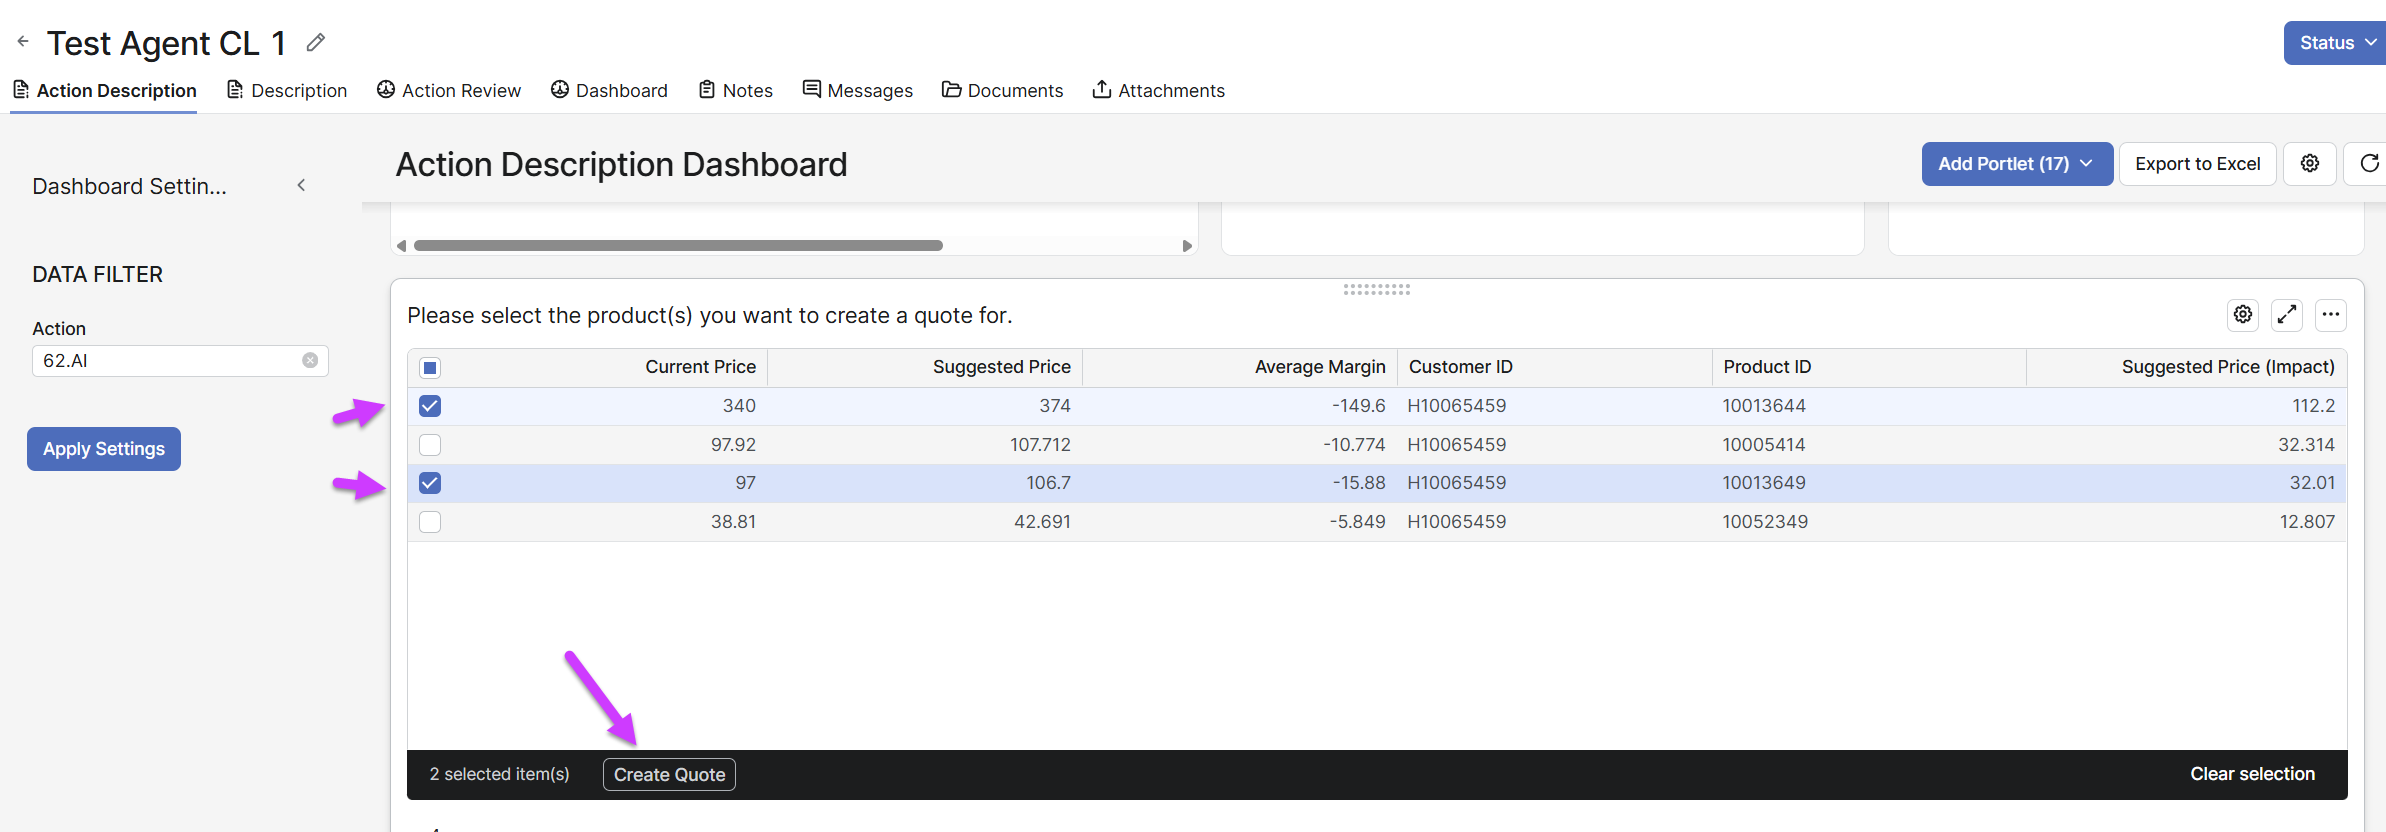
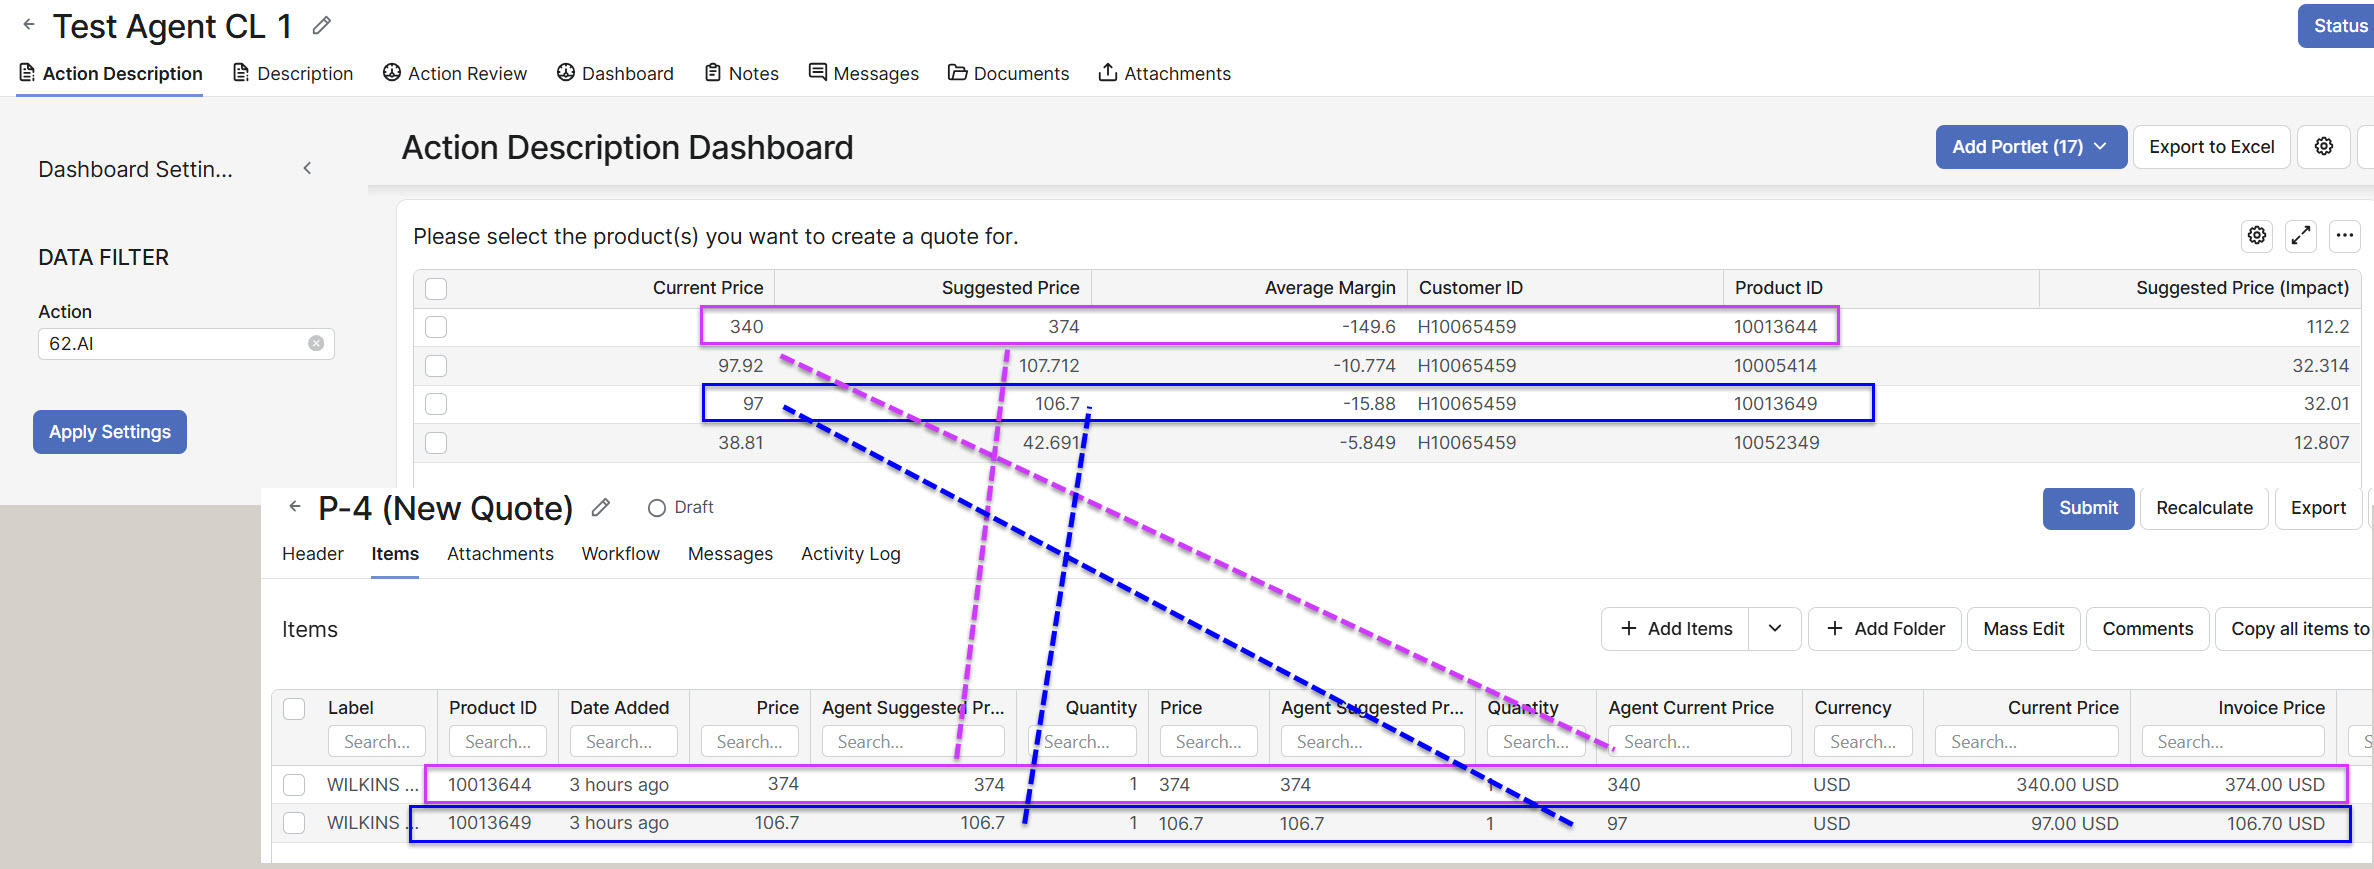
Navigate to the Action by clicking the AI number, select the product(s) for which you want to create a Quote, and then click Create Quote.
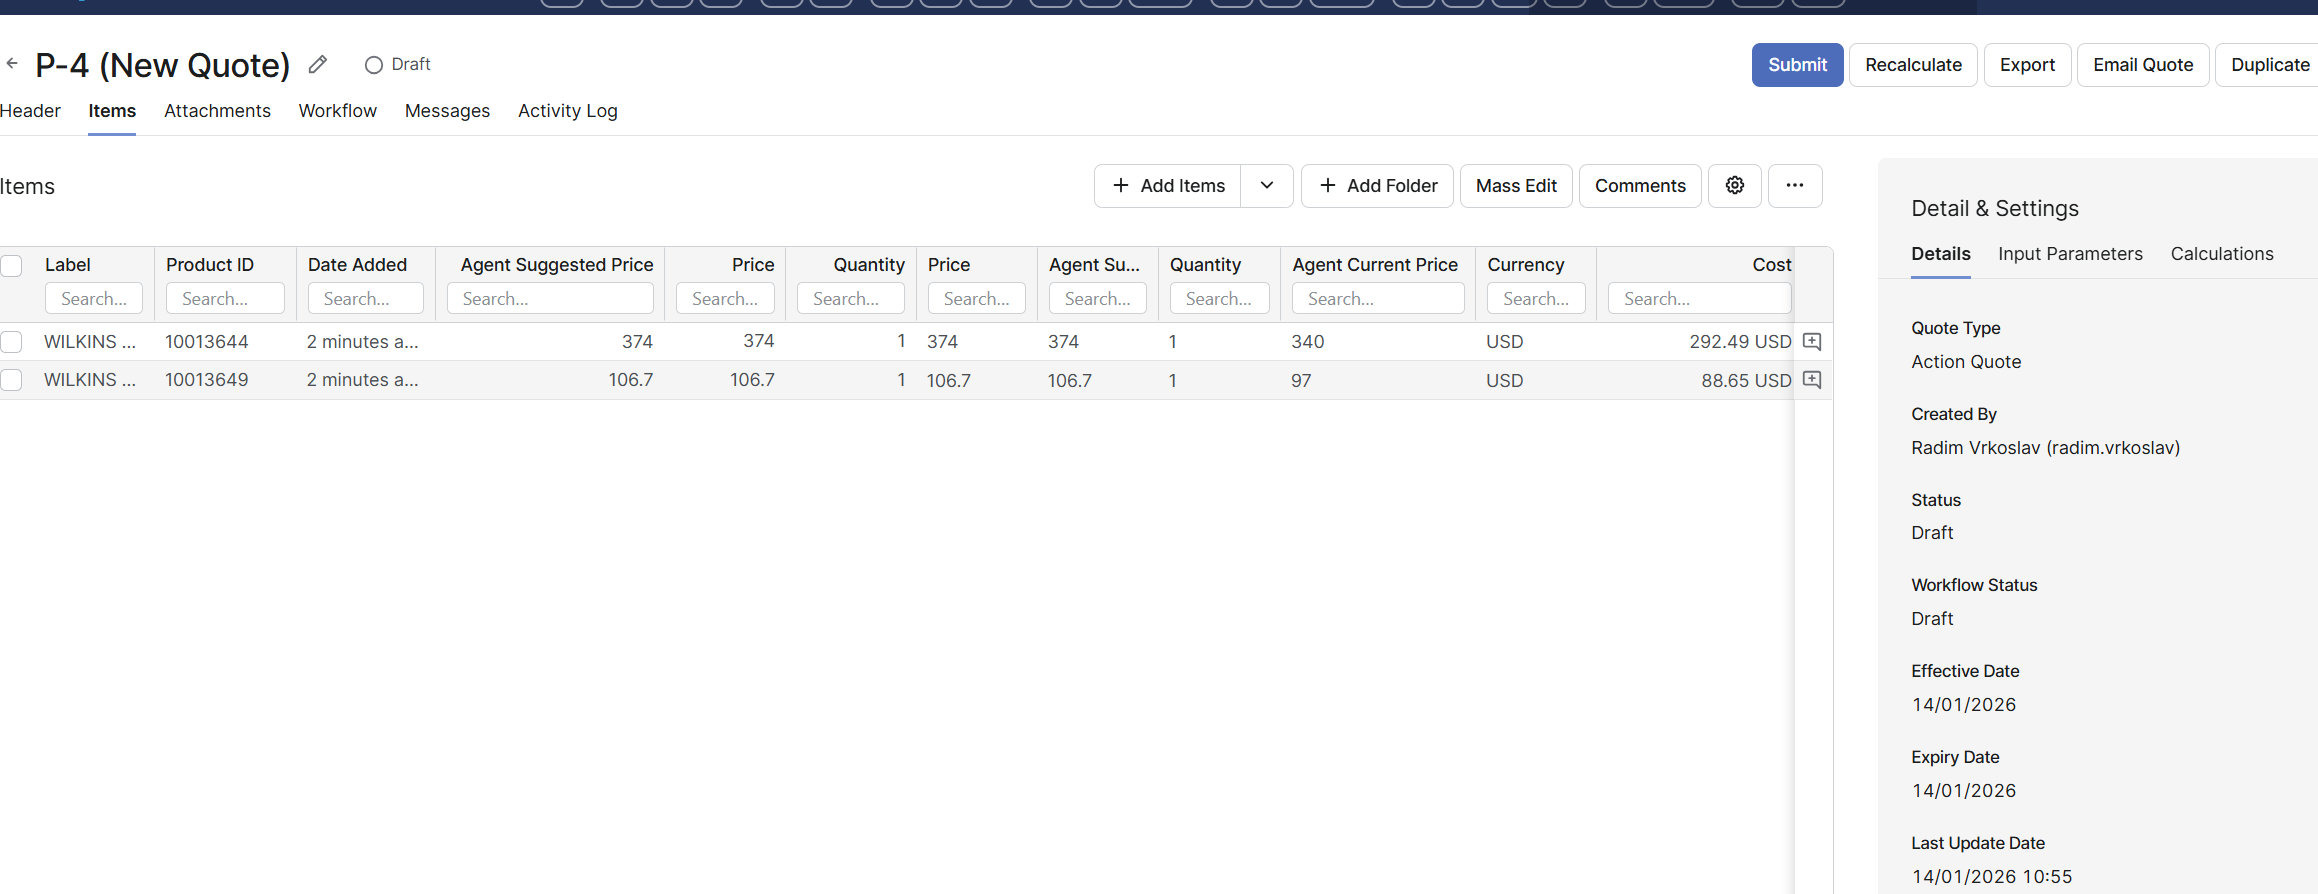
Verify Newly Created Quote
-
Quote Header – The External Reference corresponds to the Action Item number from which the Quote was created, and the Customer matches the one specified in the Action Item. The customer and the total revenue impact are also populated in the section below.

Quote Line Item Verification
-
Confirm that only the products initially selected in the Action Item have been transferred to the Quote.
-
Verify both the Current Price and the Suggested Price values.
Verify Action Item
-
Related Quote Section – Only Submitted or Approved Quotes should be displayed here.
Quote Line Item Other
-
List Price – This needs to be configured by the Configuration Engineer, who must implement a query to retrieve list prices based on customer data. The value is set in the List Prices element within the header logic, and custom code must be added to retrieve this value. If list price data is not available, the field can be hidden.