Example test case.
The Pricefx Agents Live Price Grid Content Linking is only supported for the SIMPLE Live Price Grid type.
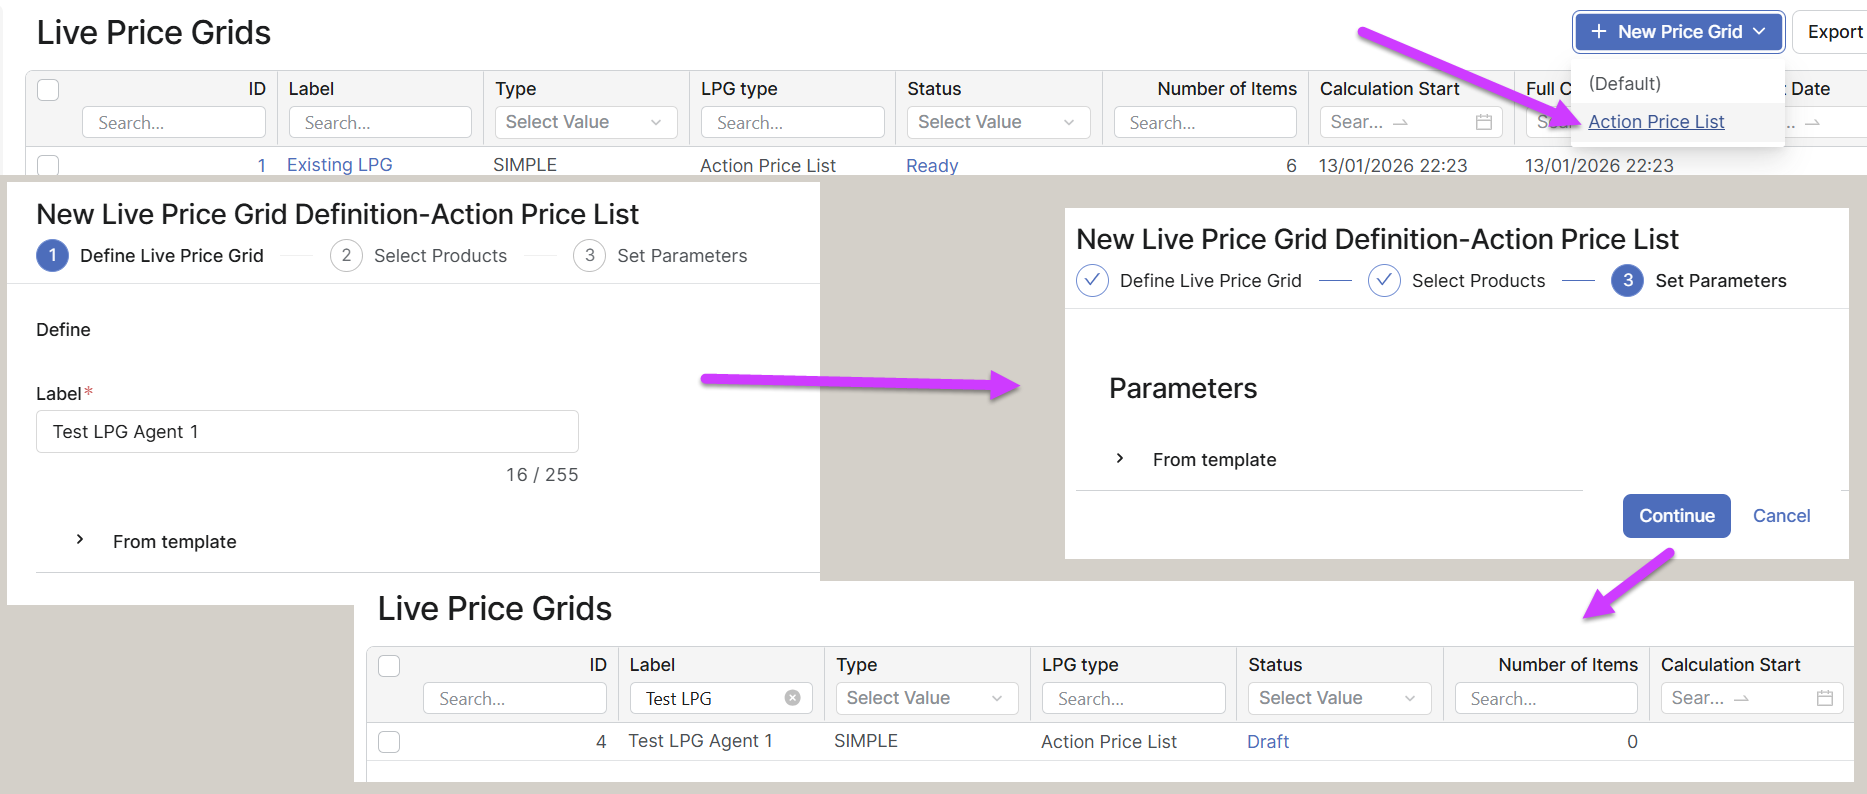
1. Create Empty LPG
-
Go to Price Settings > Live Price Grids.
-
Click New Price Grid / Action Price List.
-
Define Live Price Grid:
-
Enter Label , e.g. Test LPG Agent 1.
-
Click Continue to Products.
-
-
Select Products:
-
Do not select anything, only skip this step by clicking Skip.
-
-
Set Parameters:
-
Do not do anything, only click Continue.
-
Empty LPG is created.
-
Recalculate LPG.
If the LPG is new and empty, it must be recalculated so that it is no longer in Draft status. Otherwise, the Agent will not be able to locate the LPG.
Alternatively, users can reuse an existing LPG that is already in Ready status and link the existing LPG Id in the Company Parameters table with the geographical level defined in the Agent.
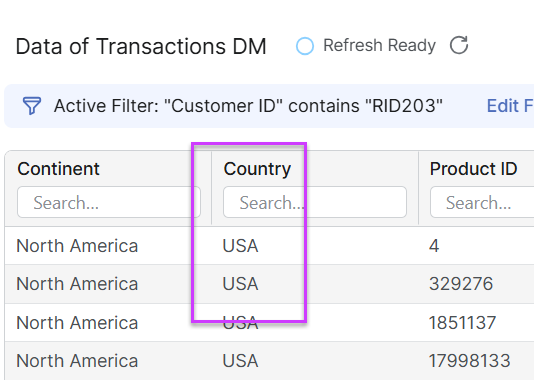
2. Find Suitable Geo Level Key in Datamart
During the Agent creation process, the user must select the geographical level for which the LPG will be created. Therefore, the user needs to determine which column in the datamart will be used when creating the LPG. Common choices include Country, Region, or another appropriate geographical classification. In this example, we will use the Country column and later select the value USA during the process. For now, simply make a note of this selection.
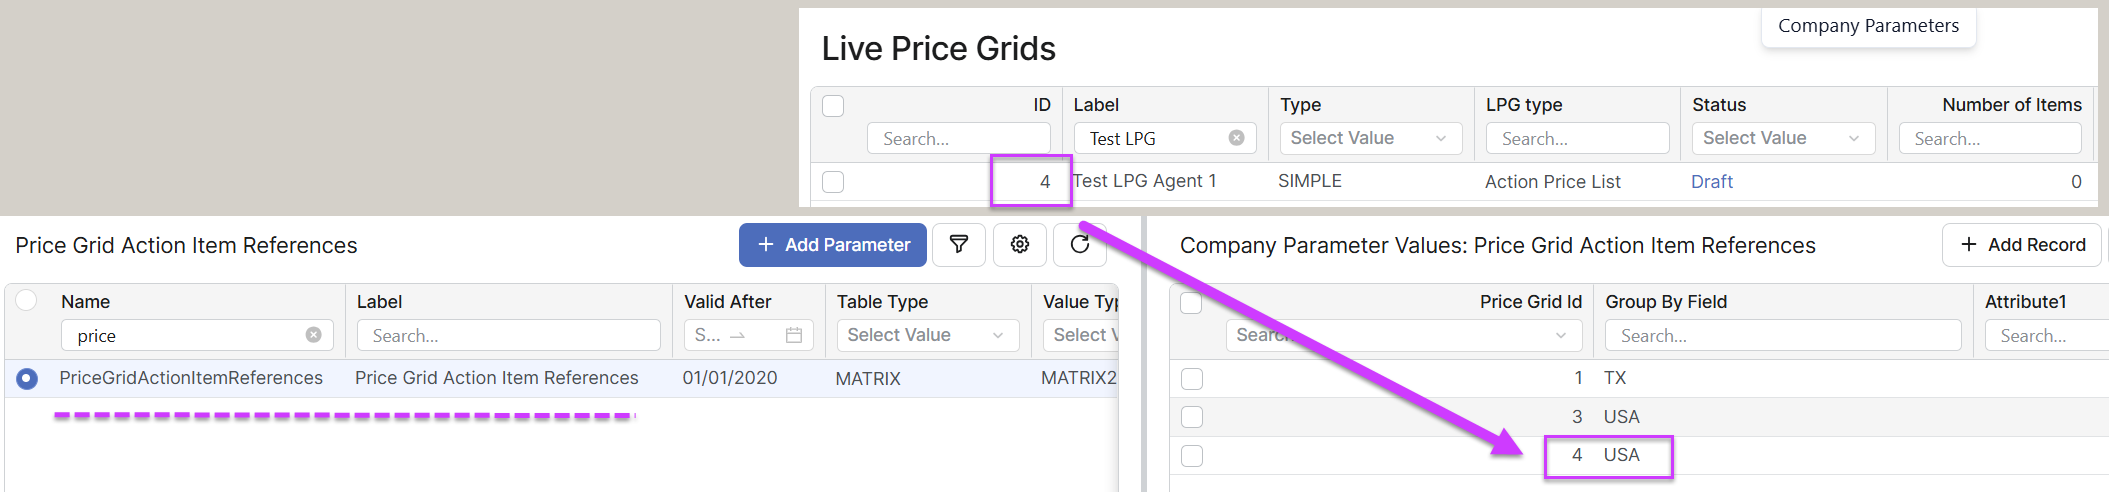
3. Add LPG Id into Company Parameter
Add the LPG Id into Company Parameter PriceGridActionItemReferences. Use the desired USA value from previous step
4. Create LPG Agent
-
Go to Pricefx Agents > Agents.
-
Click Create New Agent.
-
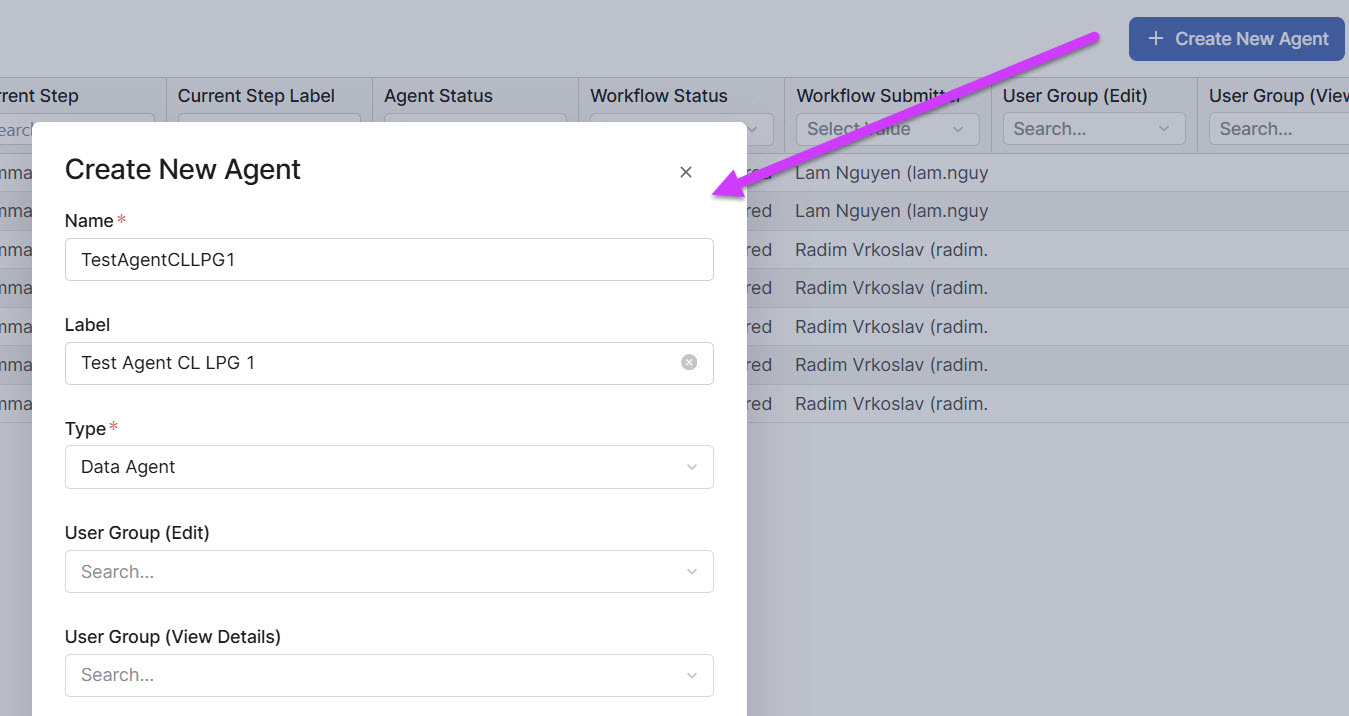
In the Create New Agent menu:
-
Name > TestAgentCLLPG1.
-
Label > Test Agent CL LPG 1.
-
Type >
Data Agent.
-
-
Click Create.
4.1 Configure LPG Agent
4.1.1 Definition Step
-
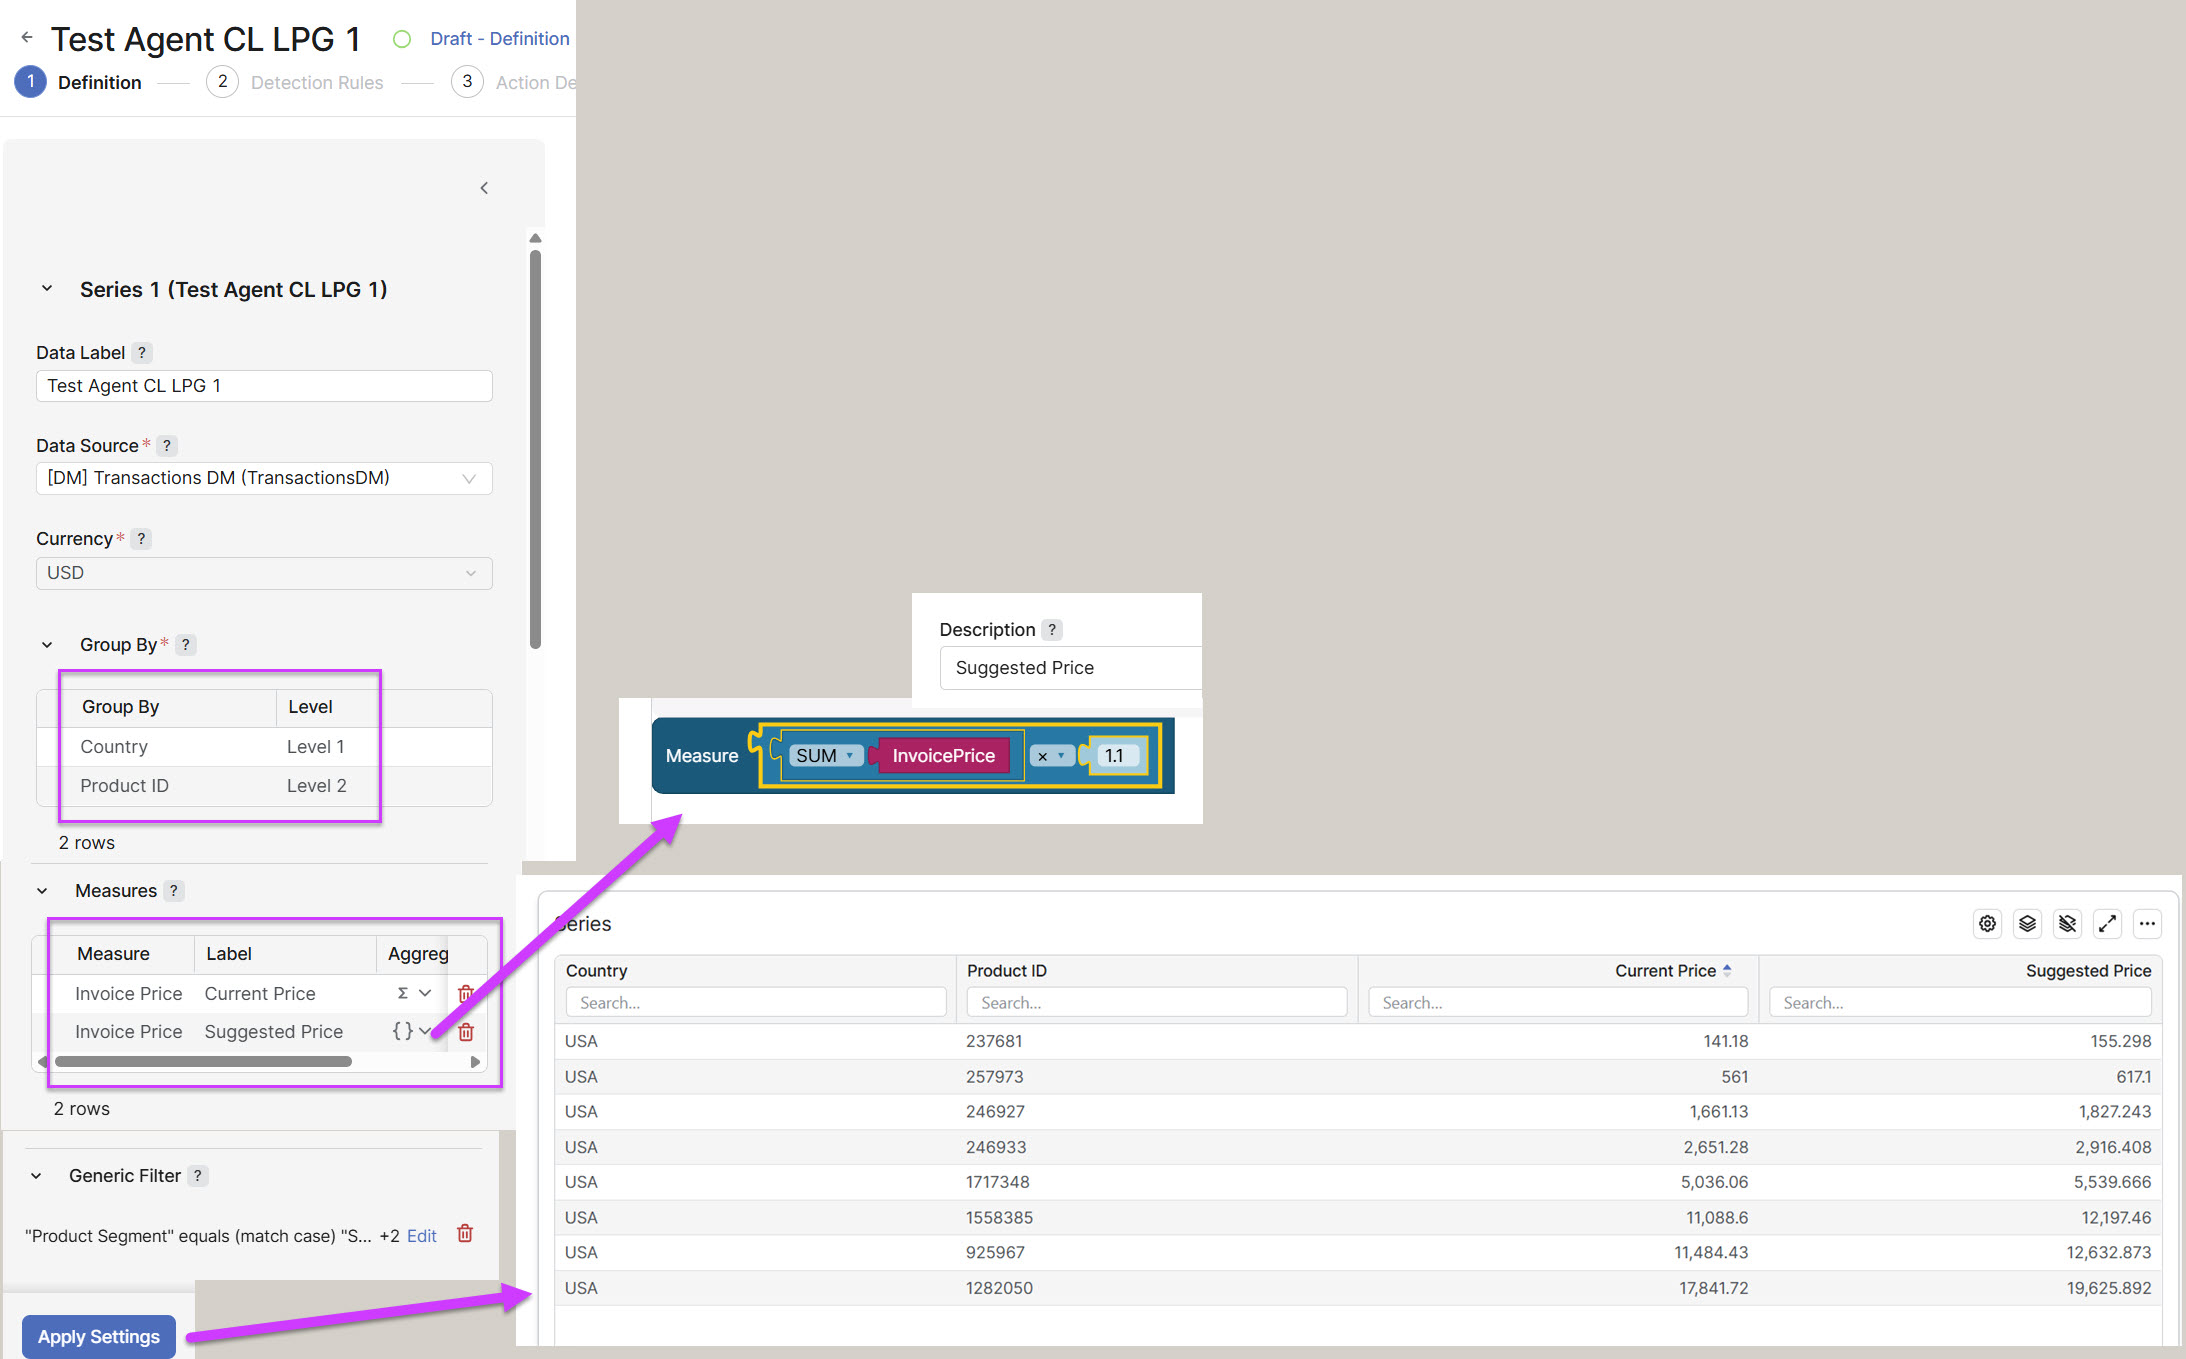
Data Label – Enter any free text or name as desired.
-
Data Source – Select the Datamart with transactions.
-
Group By – Lists the dimensions used to aggregate data (for example, customer, product, segment). Levels also determine how Actions are grouped and displayed. Level indicates the position of a grouping field in the hierarchy.
|
Group By |
Level |
Additional Information |
|---|---|---|
|
Country |
Level 1 |
Or the geo level you selected in the step 2, in our case we use the Country column from the Datamart. |
|
Product ID |
Level 2 |
This must be the column representing the SKU, not a product name or another column of attribute type. |
-
Measures – Defines calculated metrics (for example, revenue, margin %, discount %) that will later be used in Detection Rules and Impact Calculation.
|
Measure |
Label |
Aggregation |
Function |
|---|---|---|---|
|
Invoice Price |
Current Price |
SUM |
|
|
Invoice Price |
Suggested Price |
{} |
Current Price * 1.1 (= current price plus 10%) |
-
Generic Filter – Since this is a testing workflow, it is not necessary to include thousands of products in the LPG. A representative sample is sufficient. Therefore, limit the number of rows by applying appropriate filters in this section so that the final result contains only a few dozen rows. Please see the example below.
4.1.2 Detection Rules Step
-
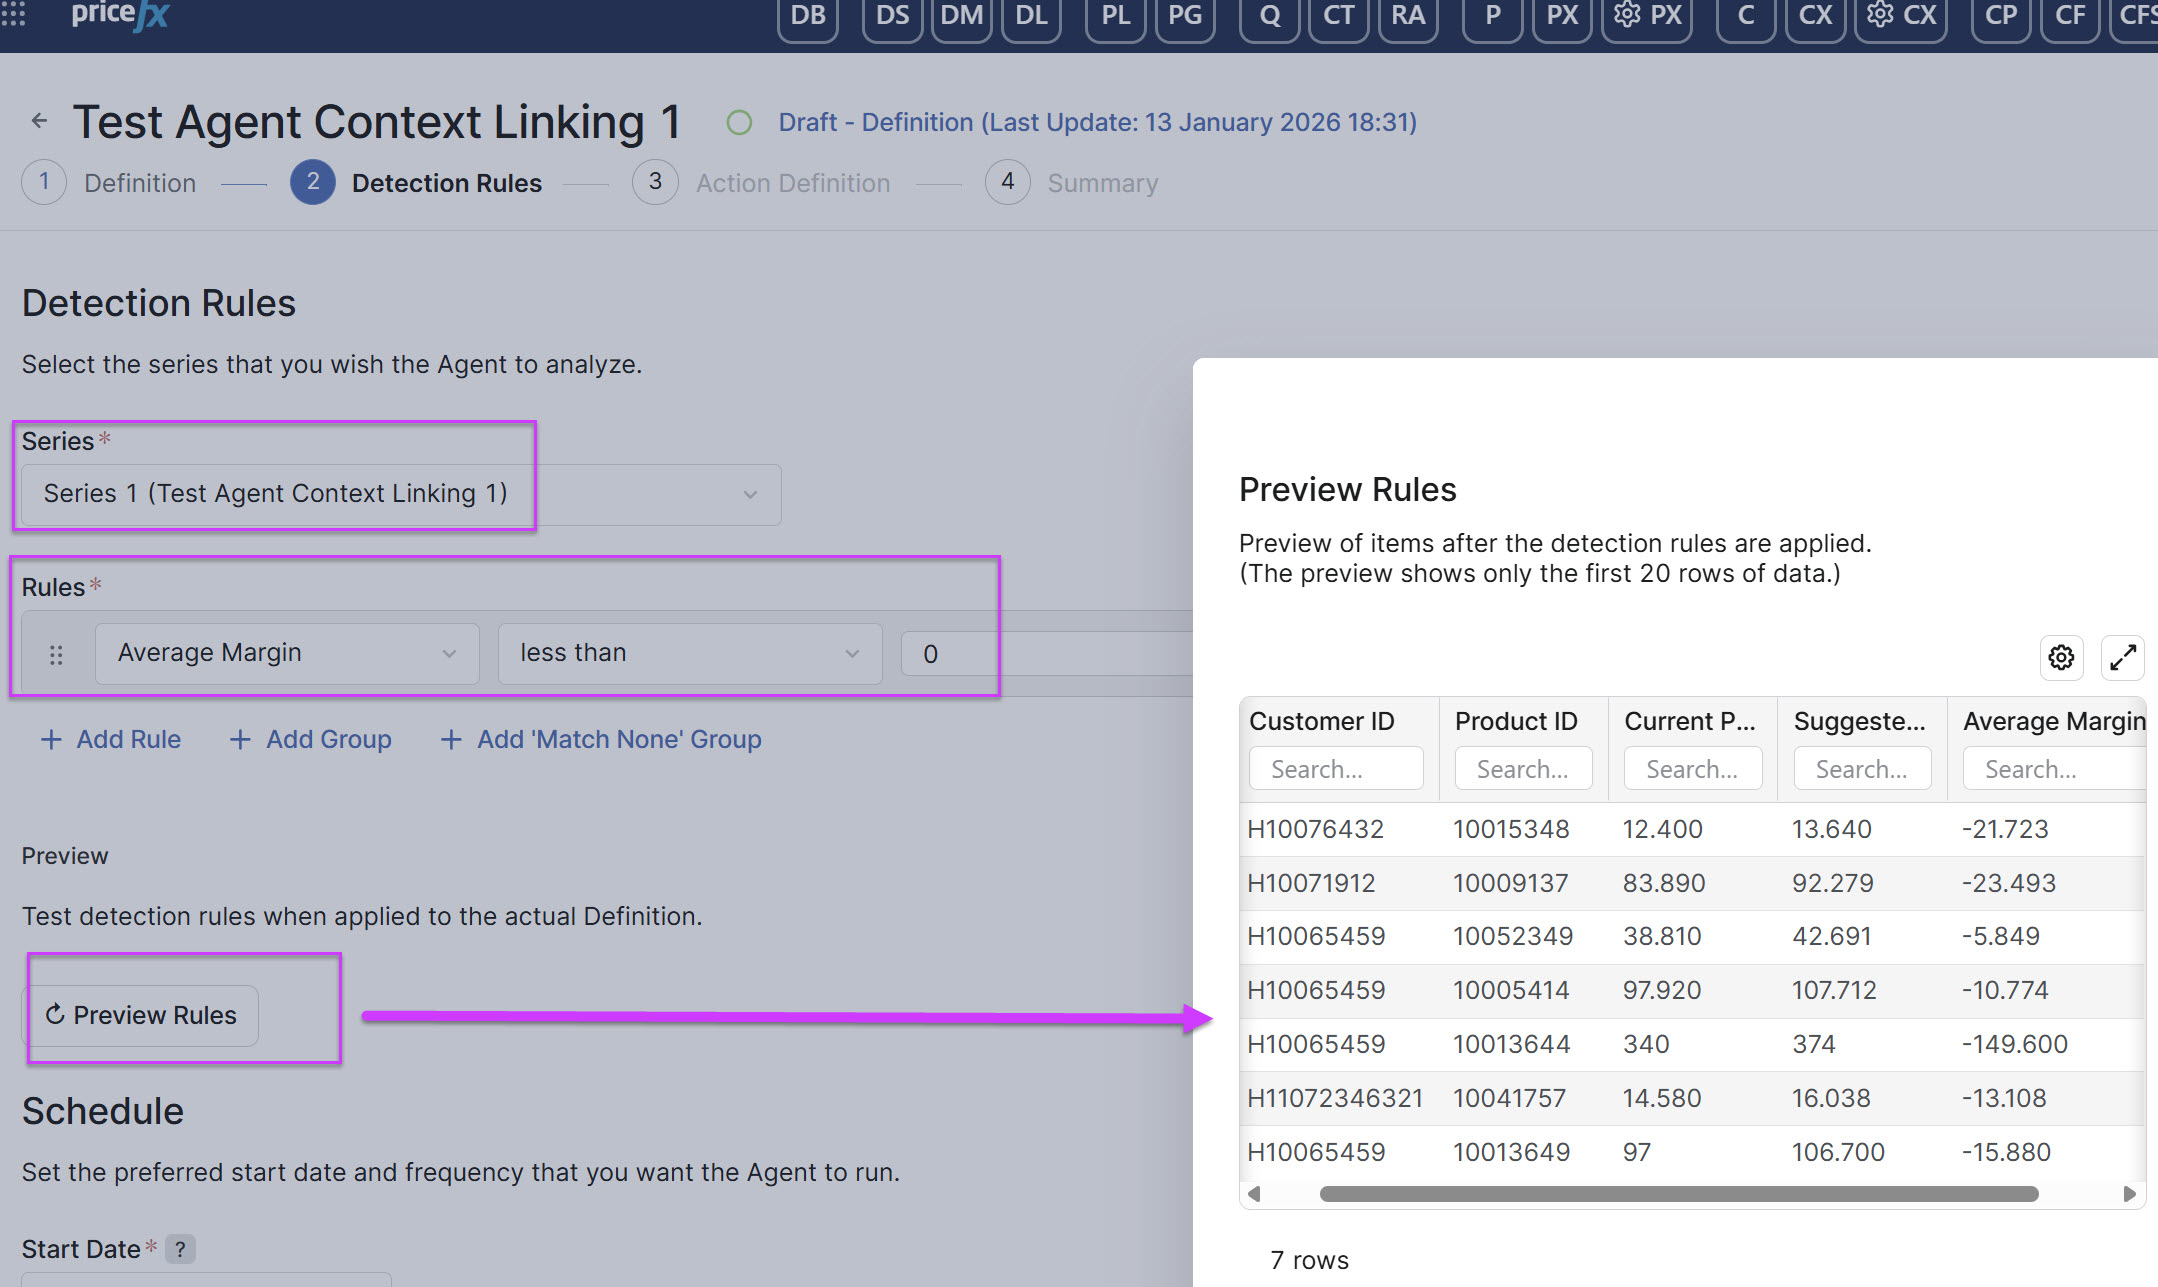
Series – Select your
Test Agent CL LPG 1. -
Rules – Create a rule that will be evaluated by the Agent. Since this is a test scenario, the goal is simply to reduce the list by applying a suitable condition.
In this case, apply the condition
Current Price > 100. This means that for all products in the list with a Current Price higher than 100, a 10% price increase will be applied, calculated as:Current Price × 1.1.
-
Start Date – Set it to a date and time in the near future. Ensure that the Agent creation process is completed and submitted before the specified start date.
-
Period – This setting is not critical; for example, it can be configured to run every 30 days (Day / 30).
4.1.3 Action Definition Step
-
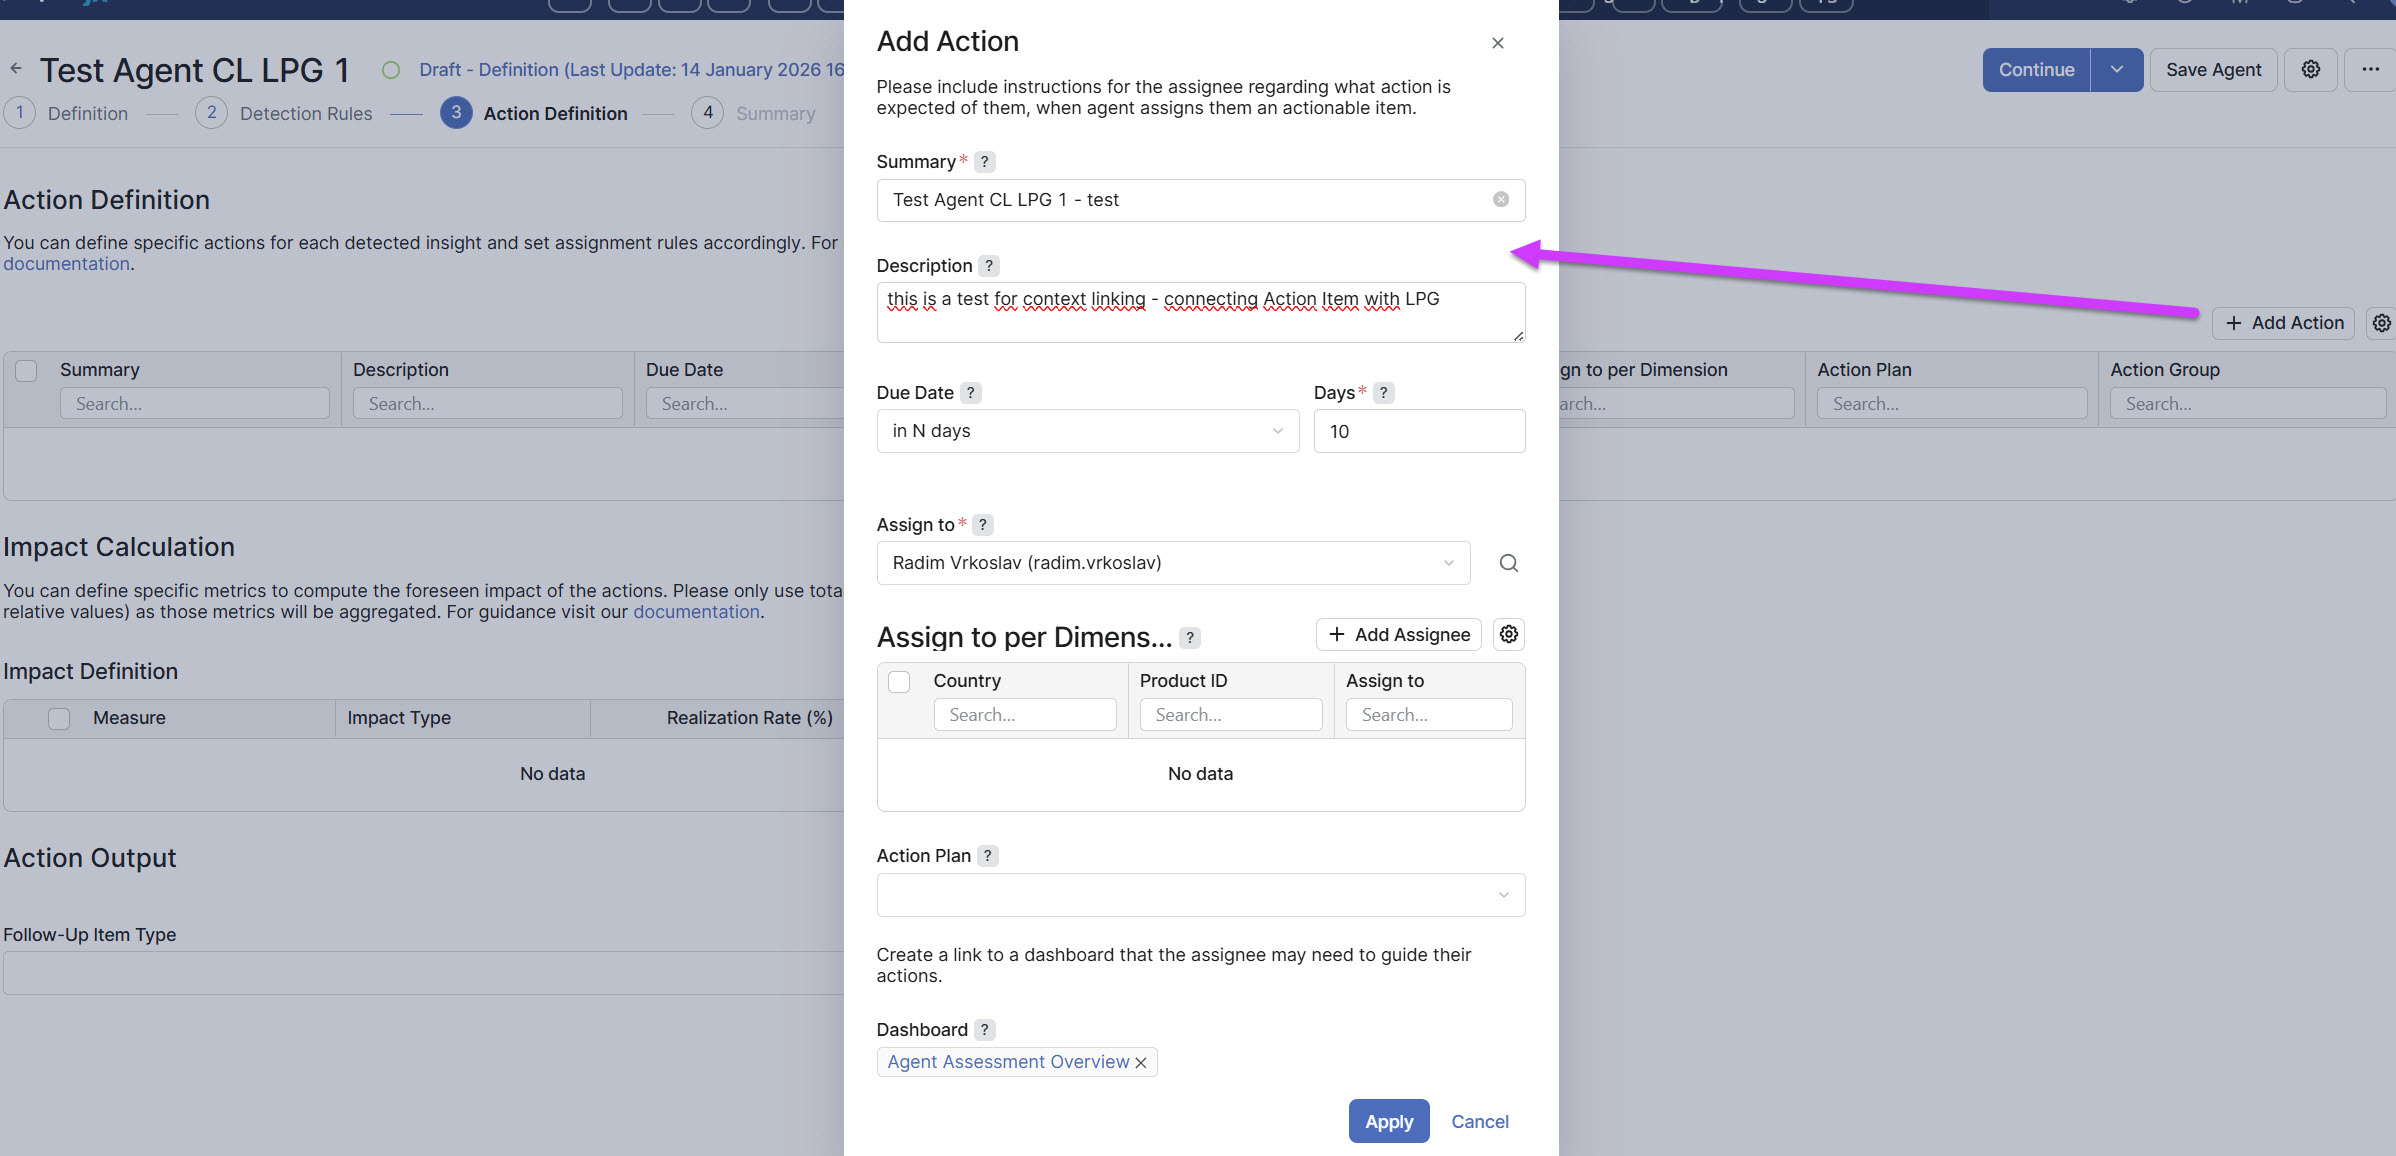
Action Definition – Click Add Action and complete the required fields as needed. See the example below.
-
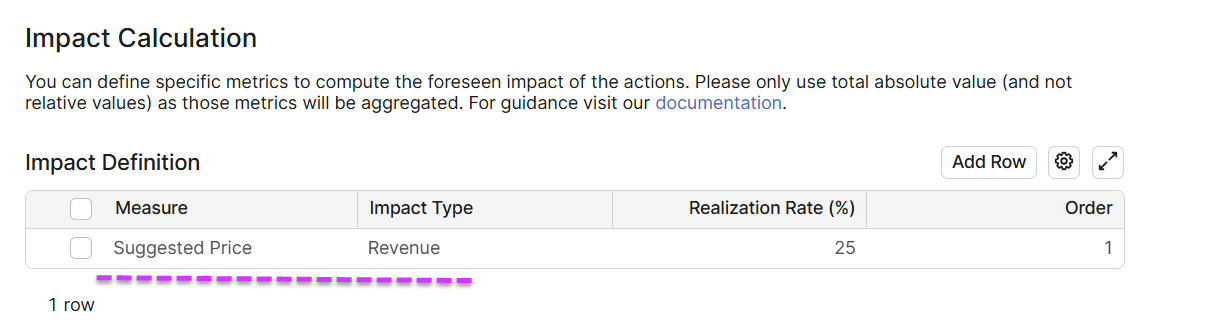
Impact Calculation – Click Add Row.
-
Measure >
Suggested Price. -
Impact Type >
Revenue. -
Realization Rate (%) > Enter an appropriate value, for example, 30.
-
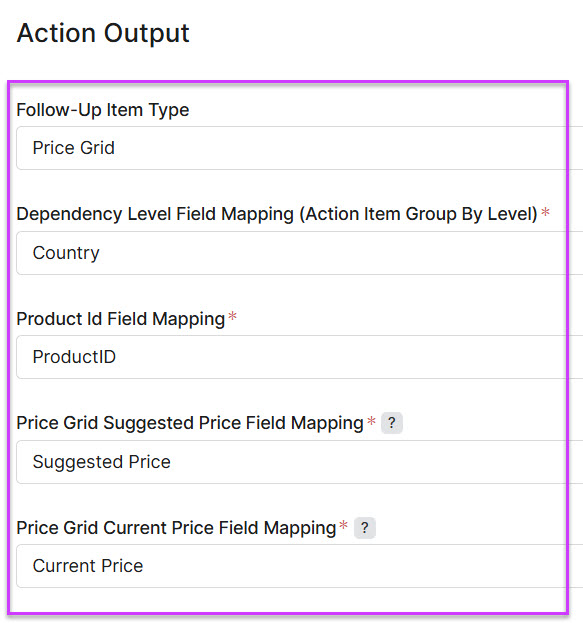
Action Output – Complete the fields accordingly, then click Continue.
-
Follow-Up Item Type >
Price Grid. -
Dependency Level Field Mapping (Action Item Group By Level) >
Country. -
Product Id Field Mapping >
ProductID. -
Price Grid Suggested Price Field Mapping >
Suggested Price. -
Price Grid Current Price Field Mapping >
Current Price.
-
4.1.4 Summary Step
-
Submit for Approval.
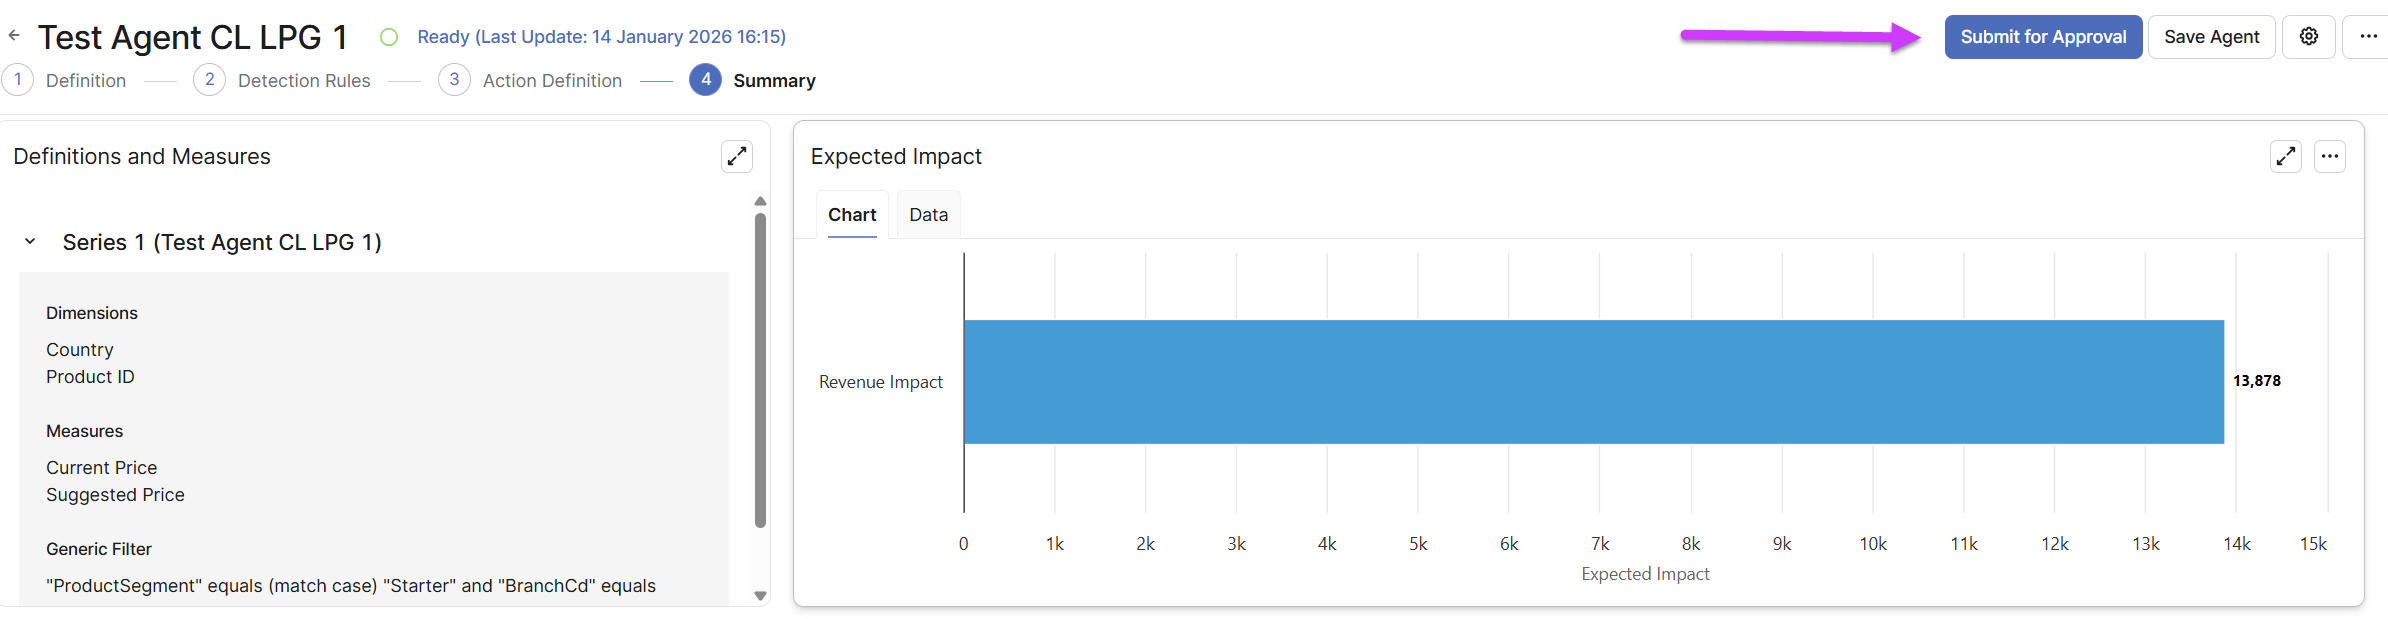
Wait until the Agent runs at the time configured in Step 2 – Detection Rules / Schedule.
5. Verify LPG and Data
5.1 Create LPG from Action Item
-
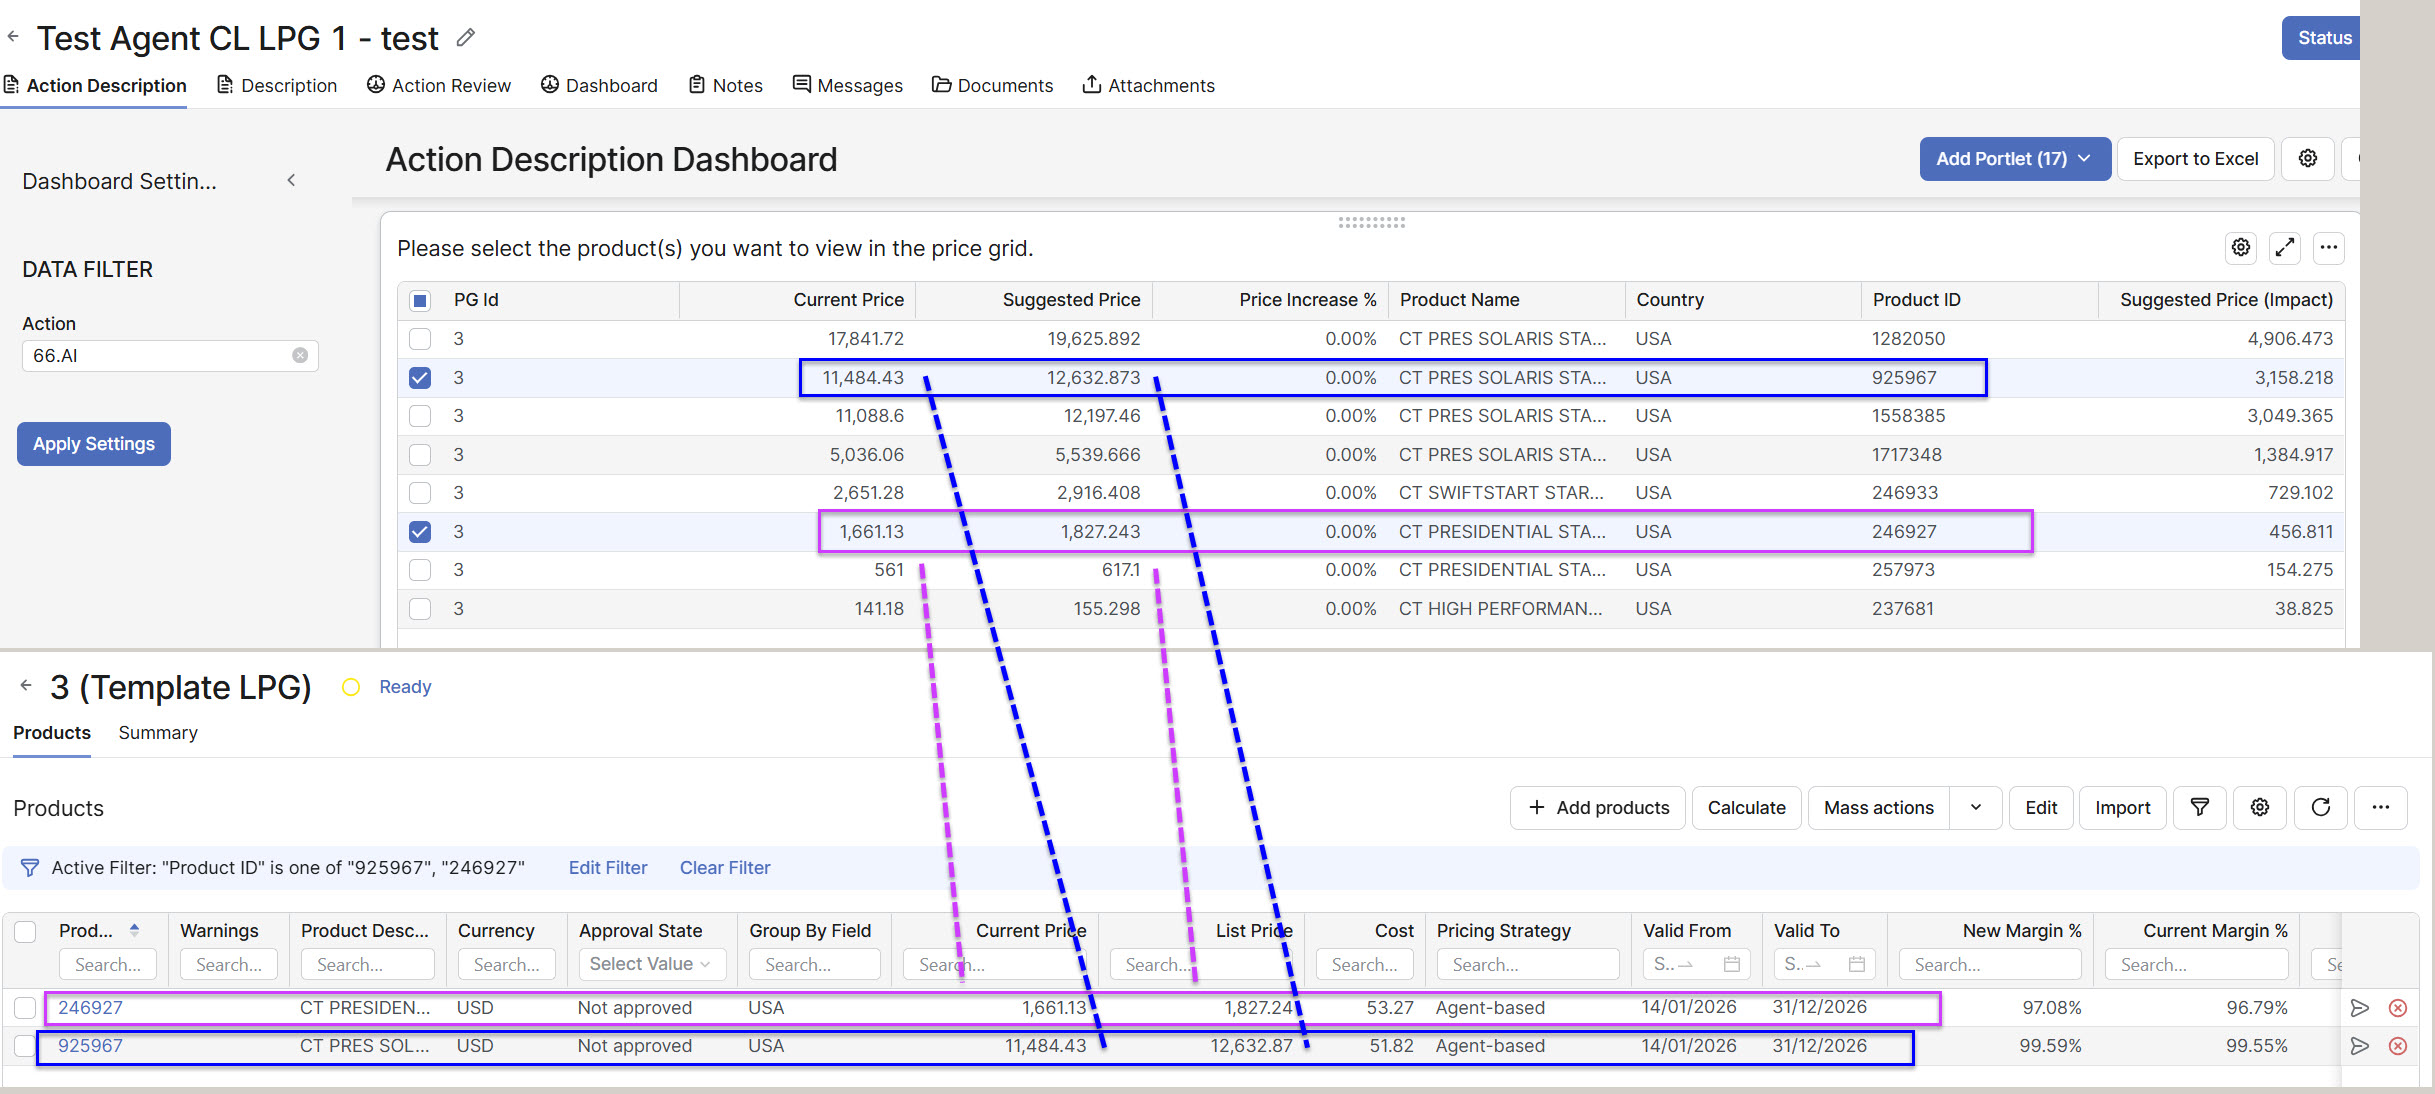
After the Agent runs and the Detection Rule is triggered, the Agent creates the corresponding Action Items.

-
Navigate to the Action by clicking the AI number, select the product(s) you want to view in the LPG, and then click View LPG.


-
Verify the values in LPG.
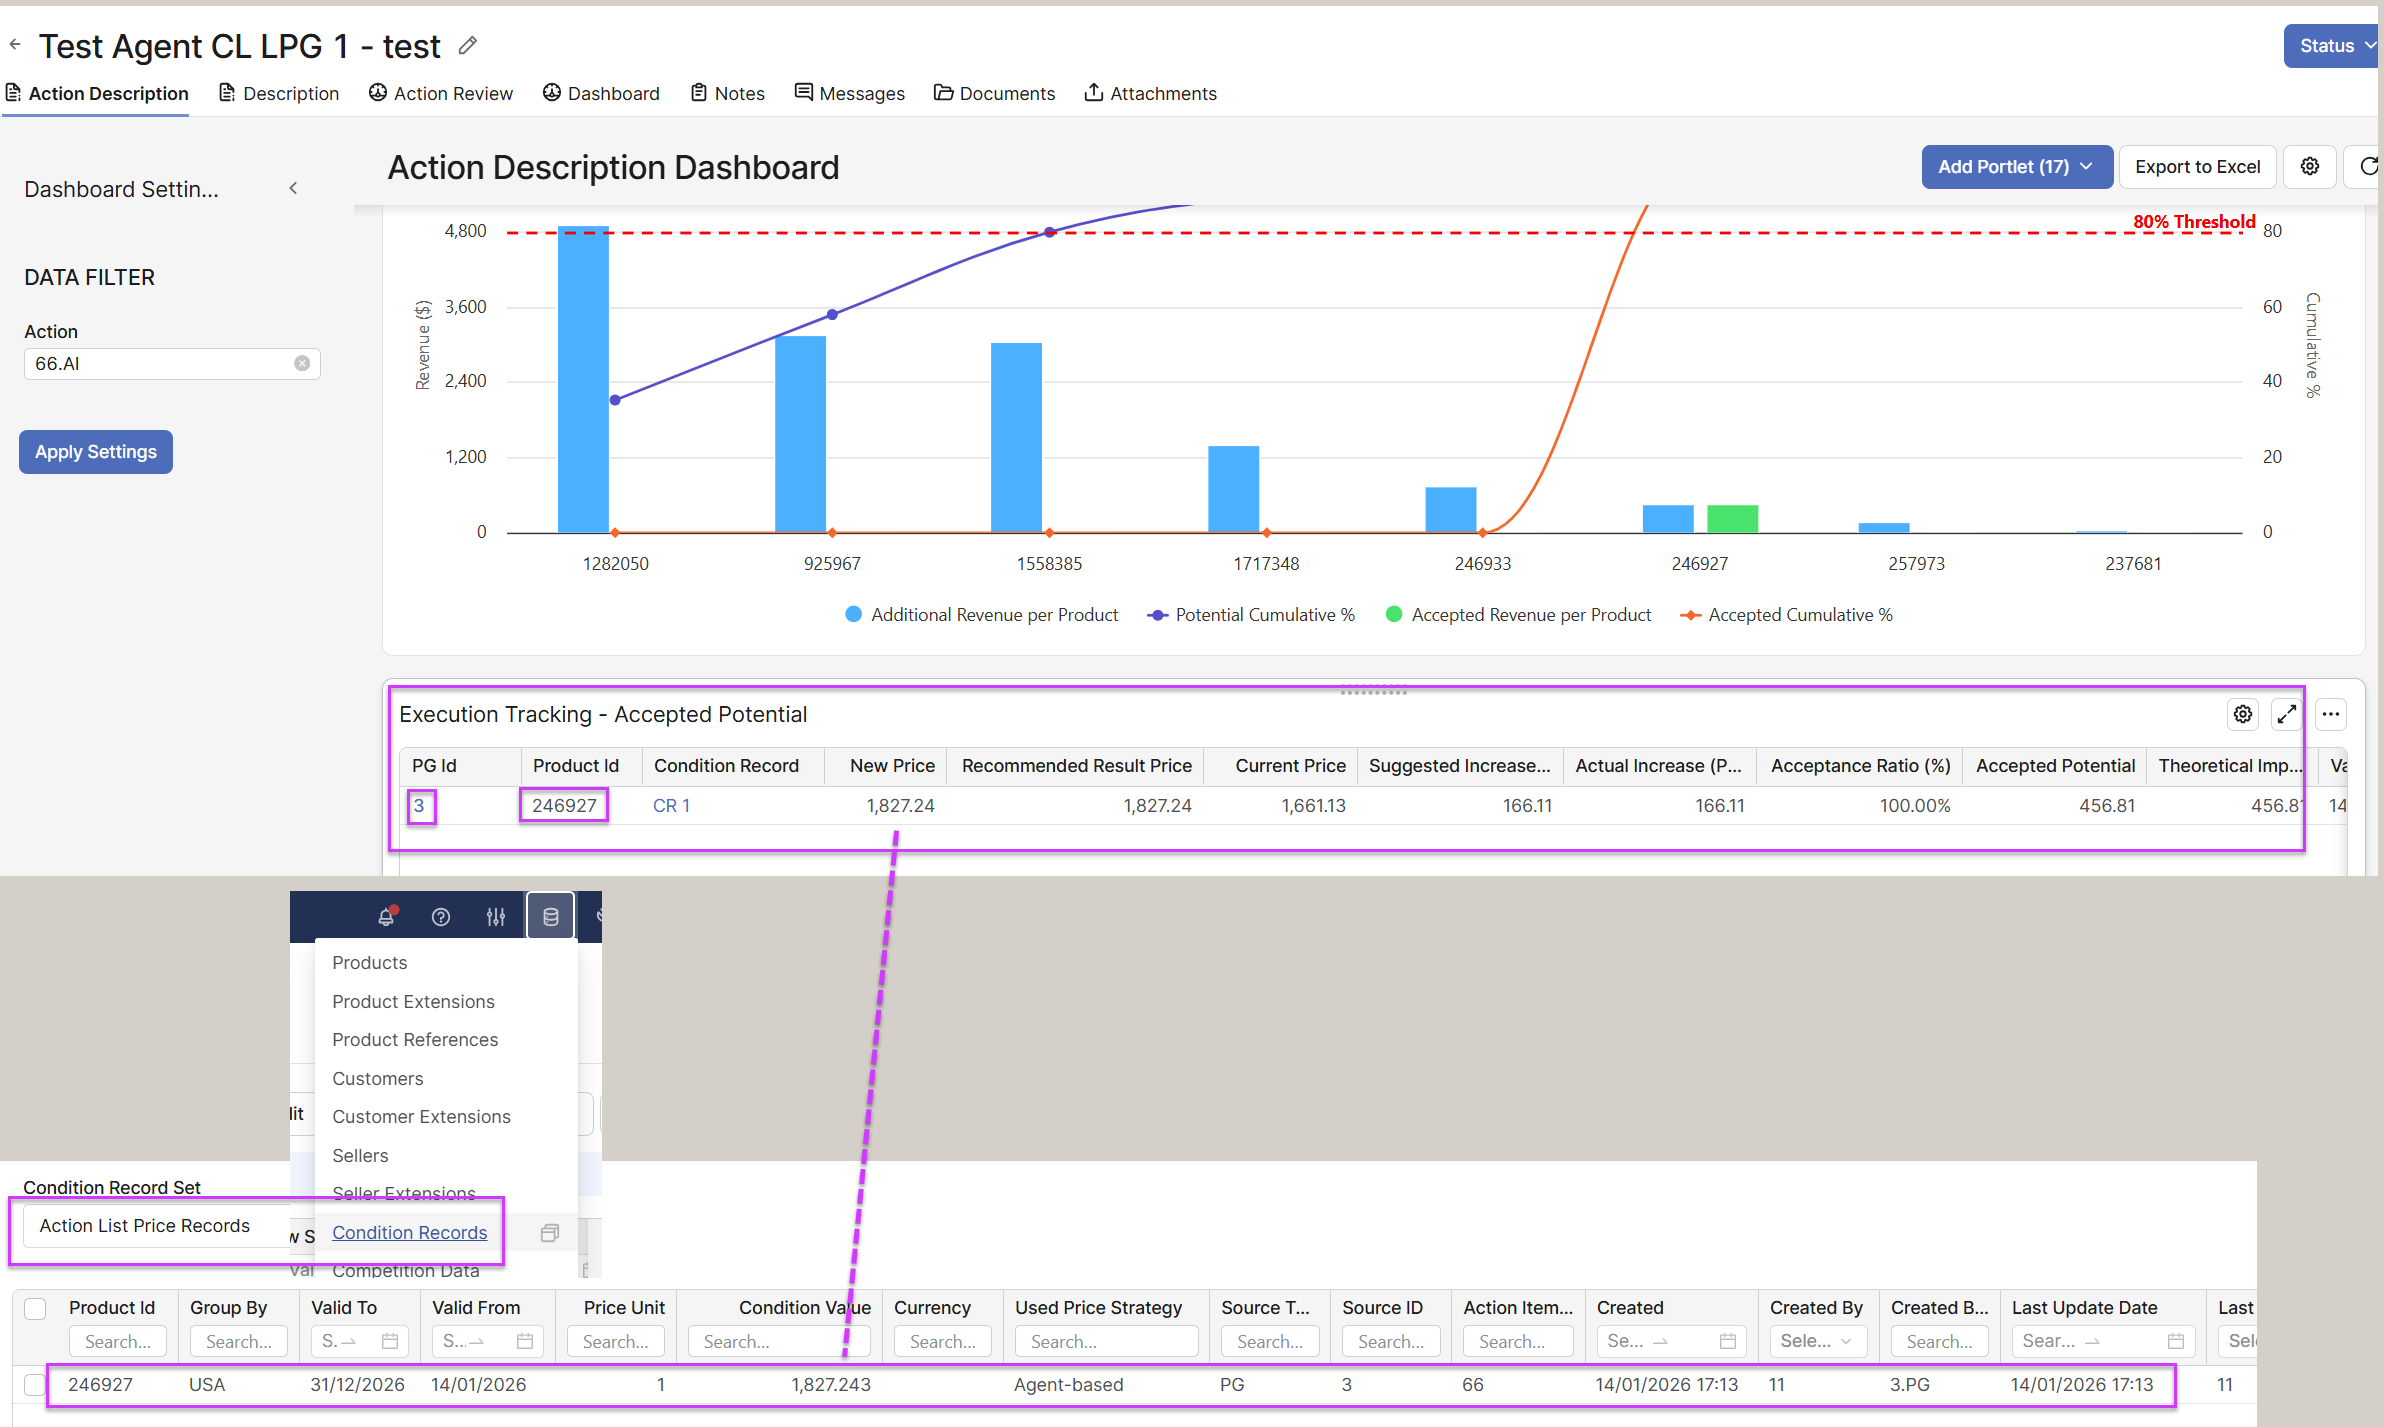
6. Submit the LPGI and verify in Action Item
-
Recalculate LPGI.
-
Submit LPGI.

-
After Submit (there is no approval workflow), wait a few seconds, the Condition record is created.
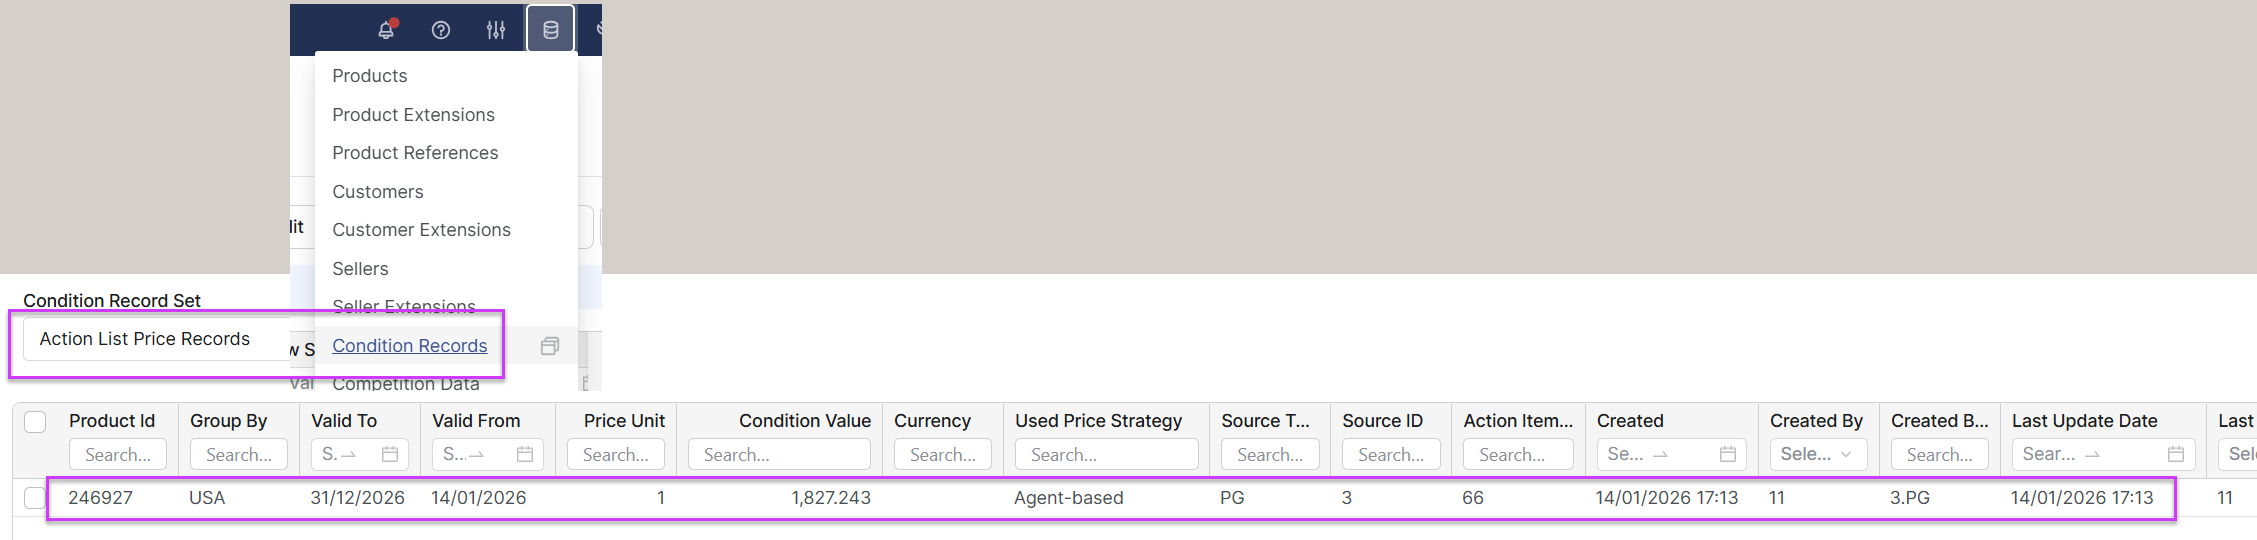
-
Go to Action Item and verify the Execution Tracking - Accepted Potential section. The record should be there and values match.