Role of Customer Extension Tables
The role of the Customer Extension (PX) table is to hold values of customer attributes, which generally meet one of these conditions; either did not fit within the maximum size of the Customer table, or contain values that also depend on some other dimension (ie. time, date, etc)
Configure the Customer Extension Table
Our goal is to use PlatformManager to upload our CSV data into the Customer Extension Table. First, you’ll need to create and then configure the columns in the extension table to match columns in the CSV file that will be uploaded.
-
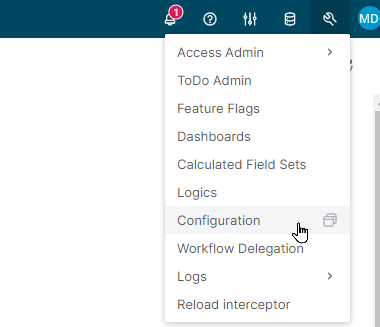
Click on the configuration icon (it looks like a wrench) and select the Configuration option:
NOTE: Product extension tables must be created explicitly within our partitions unlike master tables that already have a default configuration.
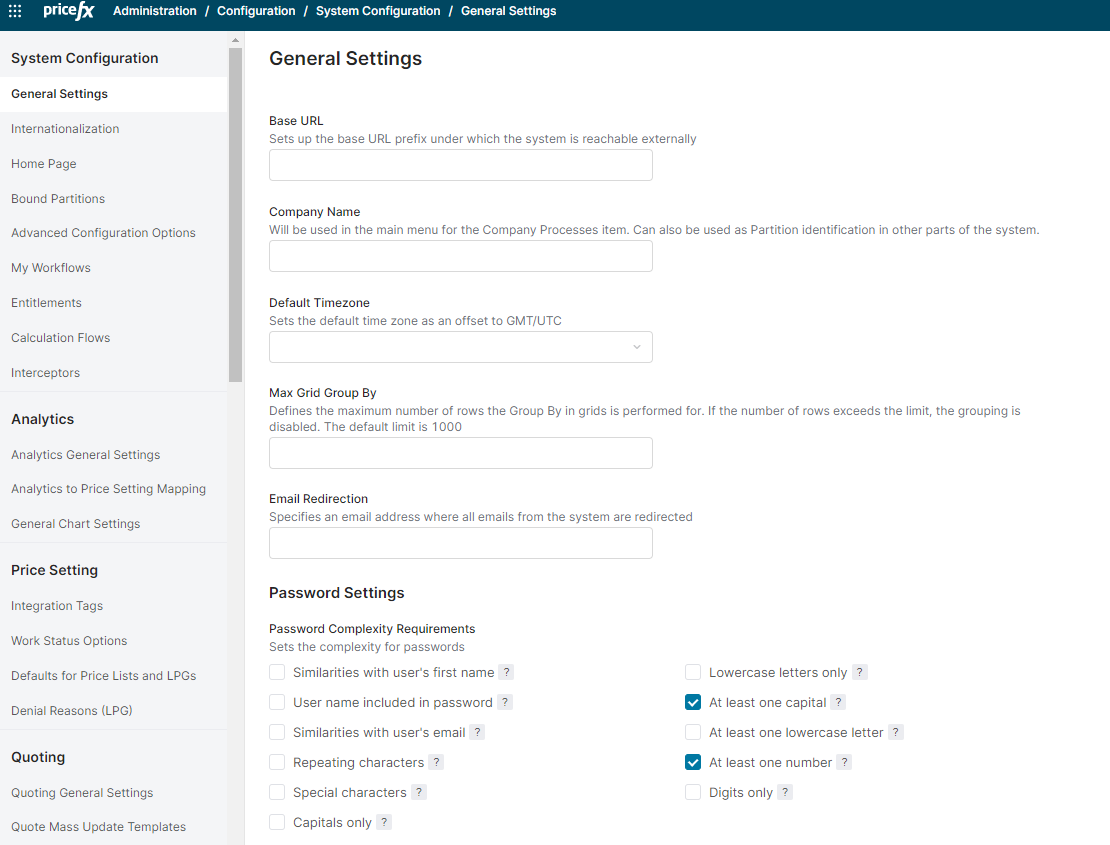
2. The Pricefx Configuration panel for our partition will appear:
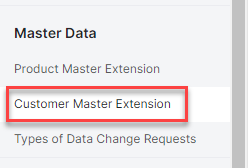
3. Scroll down to the Master Data area and choose the Customer Master Extension option:
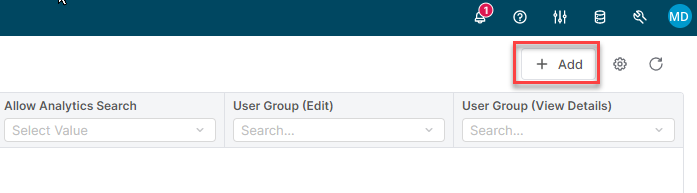
3. The Customer Master Extension panel will appear and it is probably blank since we started with an empty partition.
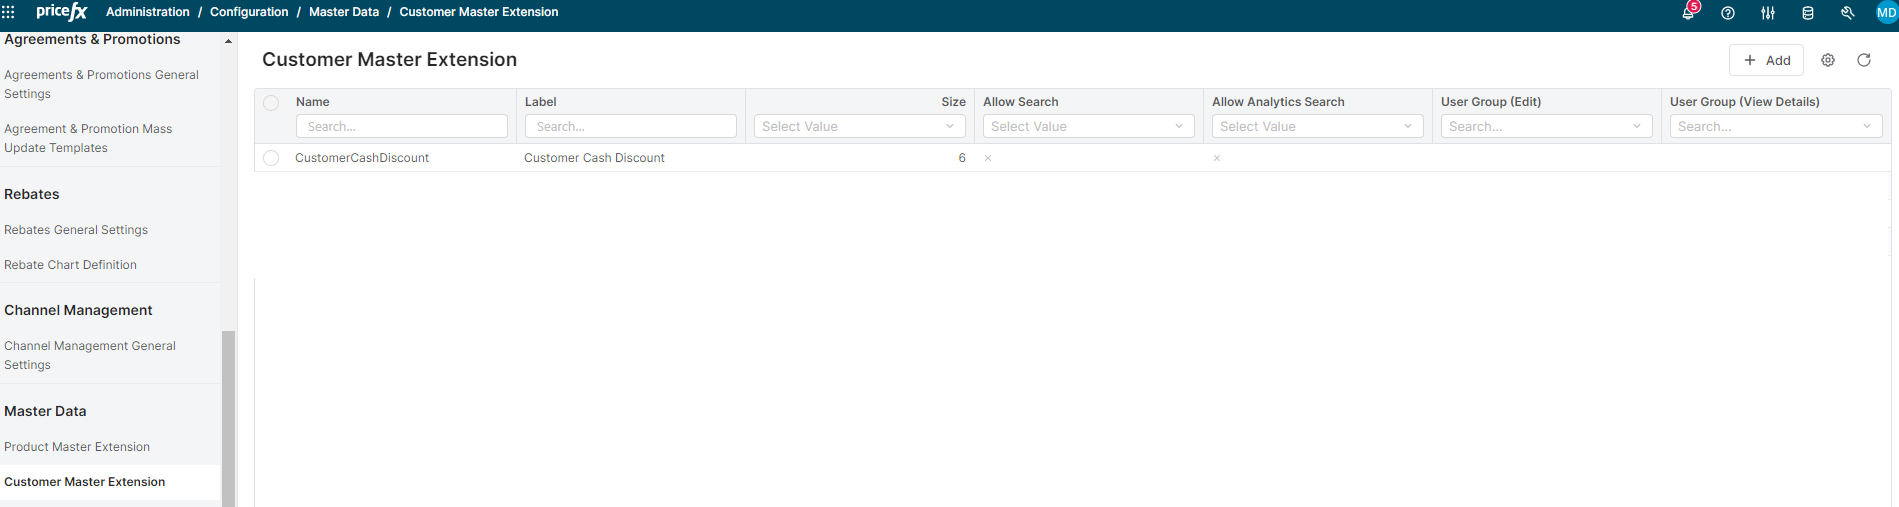
4. To create a new Customer Extension table, click on the Add button:
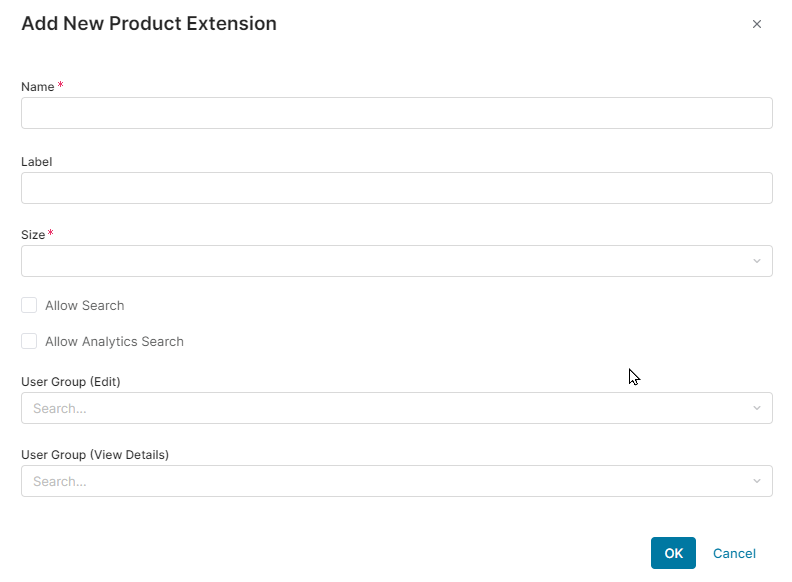
5. This will launch the Add New Product Extension dialog:
6. Update the attributes for our product extension table as shown below:
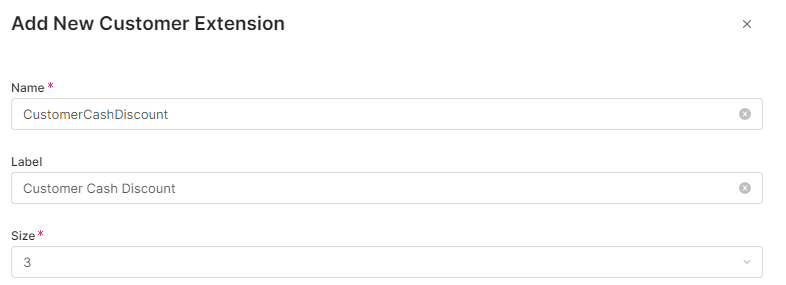
From this layout we can see that our table is called CustomerCashDiscount and a Size value of 3
3.
NOTE: The Size parameter will refer to the number of attribute columns that our extension table can have. The value is predetermined to be 3, 6, 8, 10, 20, 30 or 50. You should select the one that is closest to the number attributes you would expect to have.
7. Click OK button.
8. Next. to update the Attribute columns, simply select our Customer Cash Discount table:
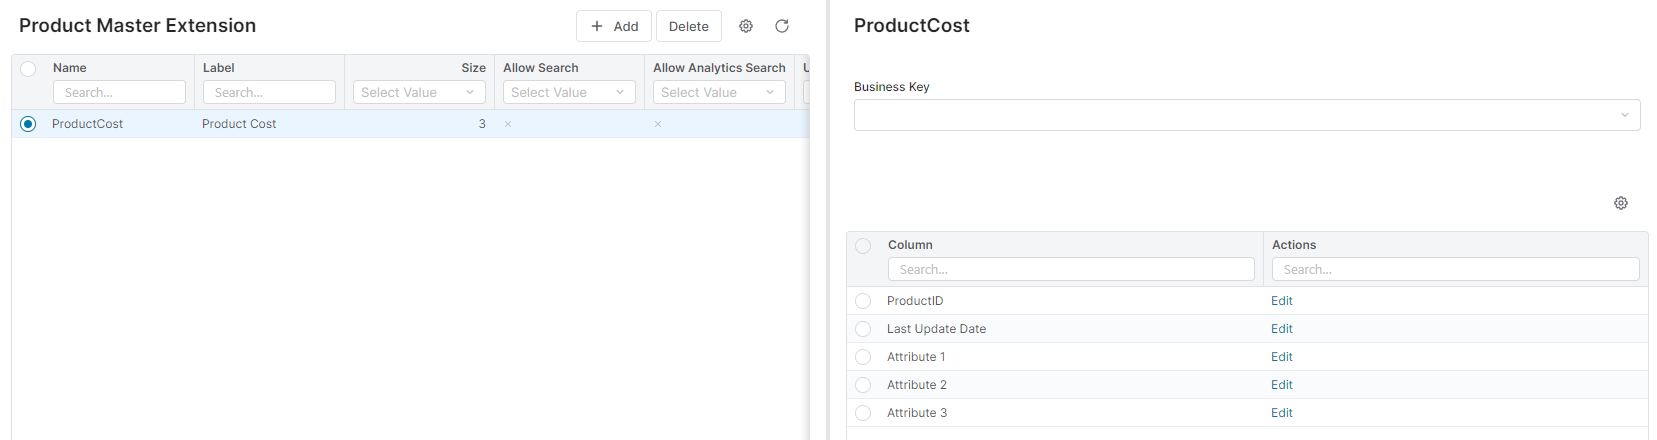
NOTE: Since we selected a Size option of 3, there are exactly three Attribute columns in our extension table. We don’t need to use all of them, only what is needed.
8. Click on the Edit option for Attribute1, set the Name and Label to Discocunt %:

10. Set the Data Type to Real and Format Type to Percent
11. Click OK button.
12. Click on Edit option for Attribute 2 and set Name and Label to the following:

13. Set the Data Type to Date and click OK button.