This illustration will highlight the sequence of steps needed to add a new user to Gitlab repository and manage their access.
-
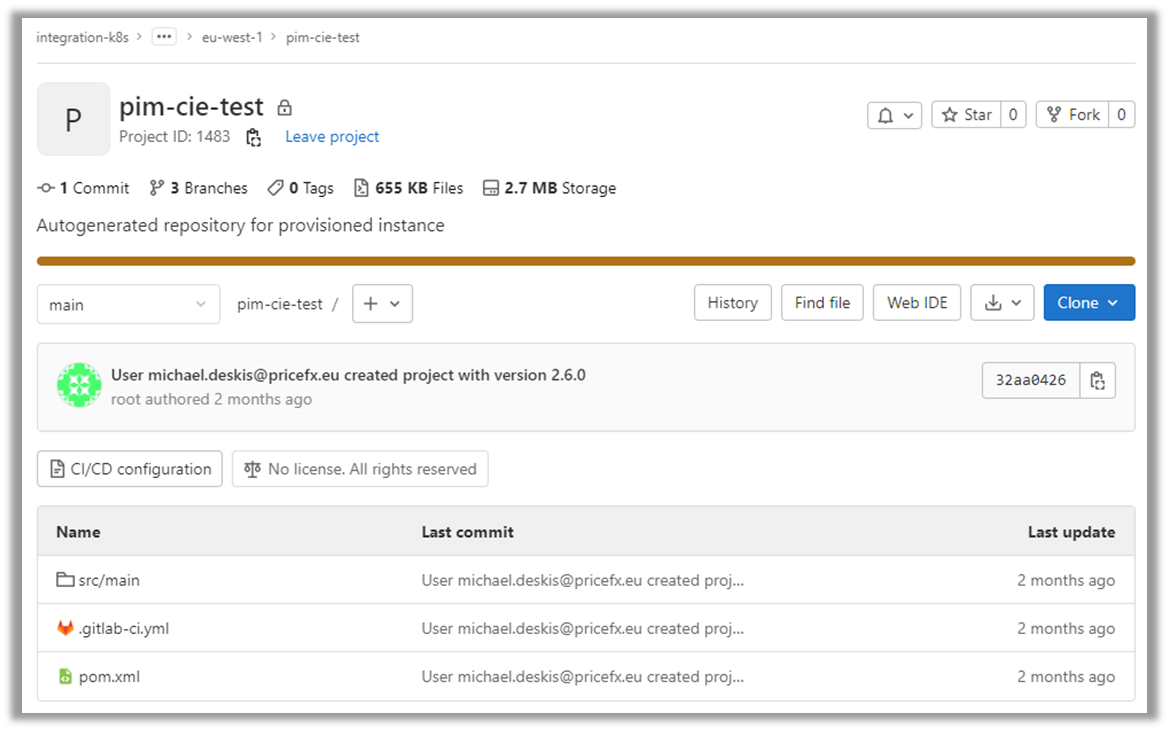
Go to the listing of IM Instances, find your instance:

2. Click on the three dots to show the context menu:

3. Next, click on Permissions option, the list of users are shown:
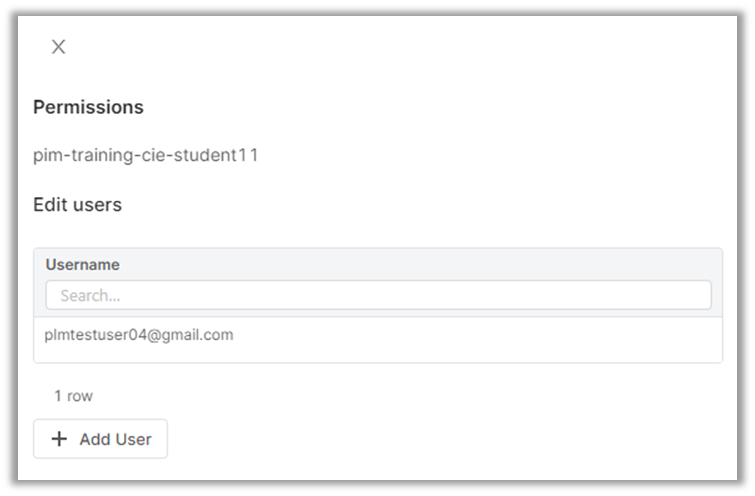
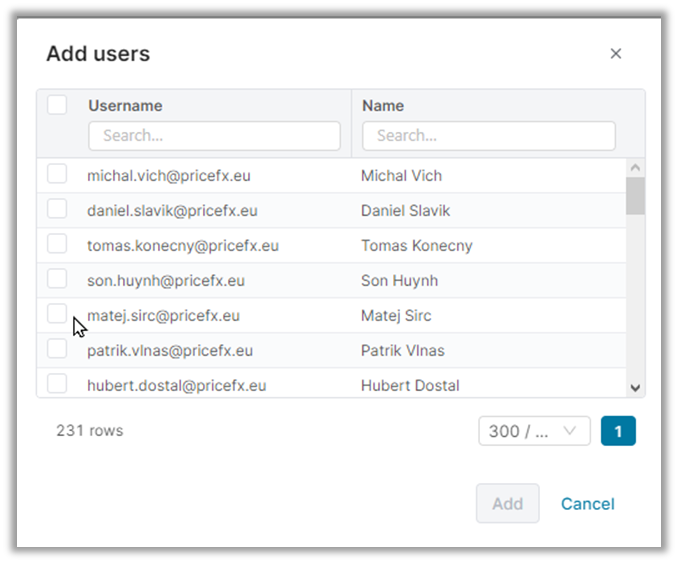
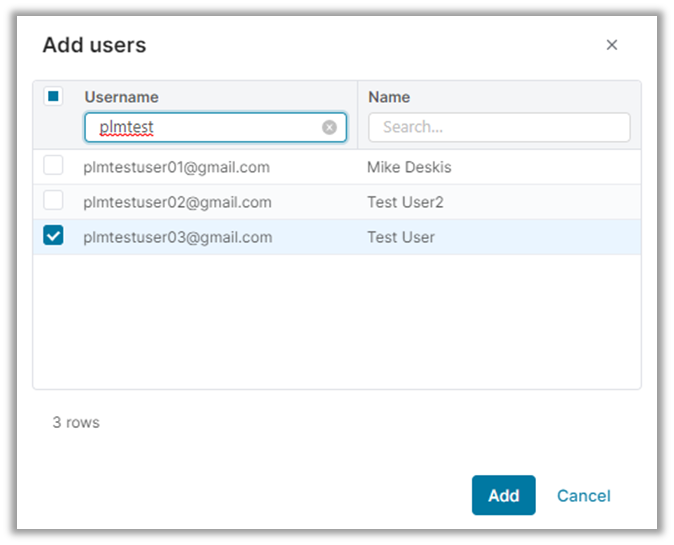
4. Next, to add a new user we click on the Add User button to display list of available users:
5. Then, in the Search box for Username, we can filter for the user name required:
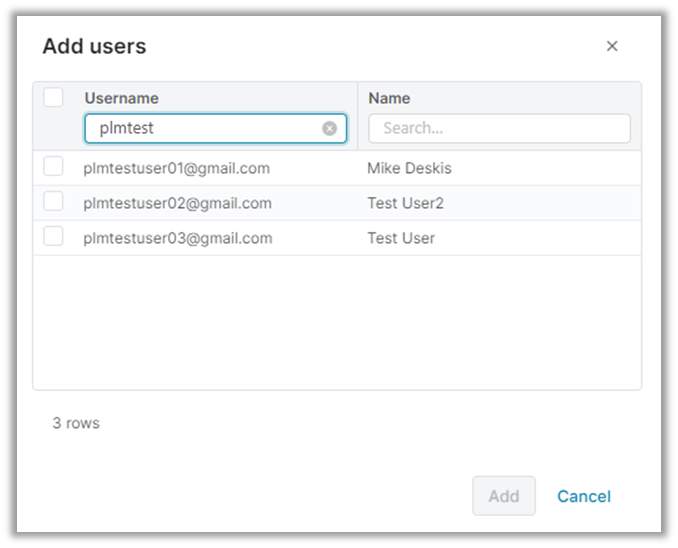
6. Select the username and click Add button:
7. The new username will be added to the set of users with access to this IM instance:

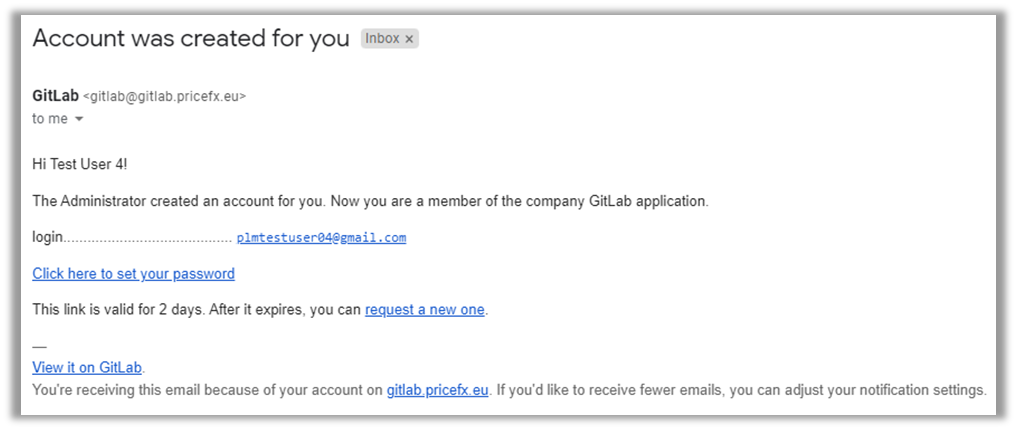
8. Finally, we click on Save Changes option to save our updates and this will generate an email invitation to the new user:
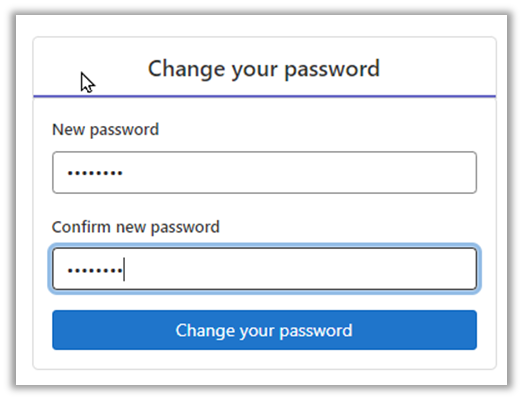
9. Next, we need to click on the option to set our password:
10. You should have also received another email that provides access to the Git project that is linked to your IM instance:
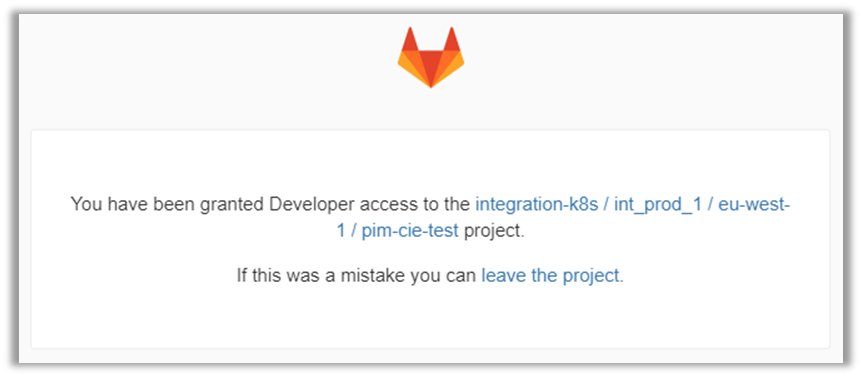
11. Click on the link to see your project in Git: